


It’s day four of our 12 Days of Holiday Giving event—our merriest of the year! Today we’re getting a special treat from Latisha Yoast as she reminds us that handmade cards deliver the spirit of the season to someone special, and we think that you’ll just love the beautiful trio of card designs that she is sharing! Don’t forget to check out today’s wonderful partner giveaways at the end of the post, too! One lucky winner will get two extra-special gifts under their tree this year!
…………………….
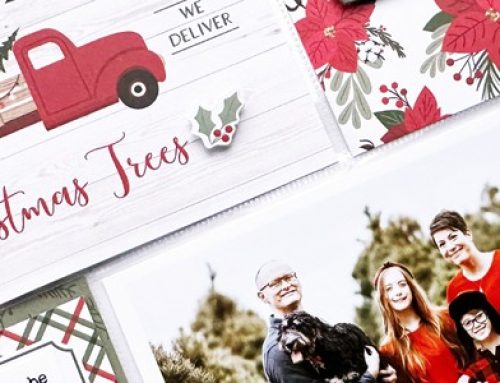
Happy Holidays to all of you, our readers! It’s Latisha Yoast here with you to share a few cards that I created using products from our friends over at Concord & 9th!
Supplies | Cardstock: Concord & 9th cranberry, white, evergreen, dove; Patterned Paper: Concord & 9th Be Merry; Stamps: Concord & 9th Plaid Turnabout, Mix & Match Holiday Sentiments; Dies: Concord & 9th Nordic Noel, Mix & Match Holiday Sentiments, Fresh Cut Florals #4; Ink: Concord & 9th cranberry & mushroom; Specialty Paper: Concord & 9th glitter cardstock; Stickers: Concord & 9th Nordic Noel Enamel Shapes; Adhesive: Concord & 9th glue, Scrapbook Adhesives by 3L 3D foam squares
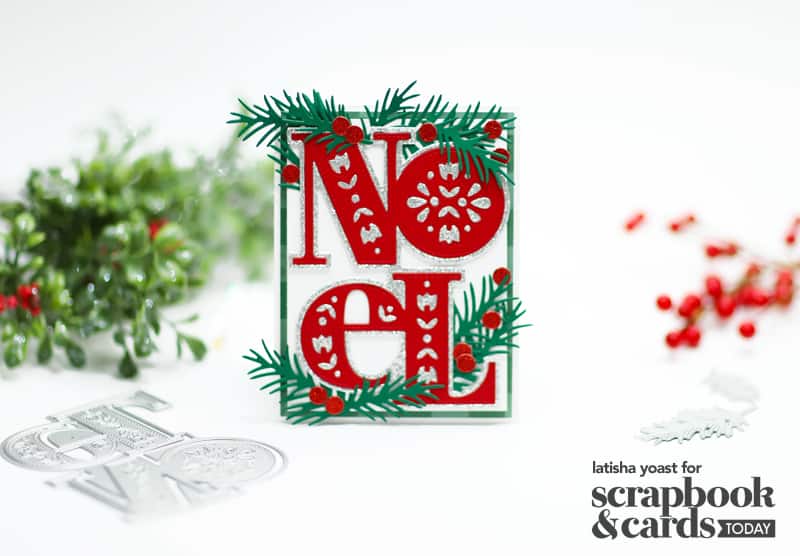
I created my first card using dies, a trimmer, and adhesive. Because there is no stamping or a heavy layer of patterned paper to create depth. I added depth by using different widths of foam adhesive and glue. The Nordic Noel die with the greenery from Fresh Cut Floral #4 are the perfect pair. The sparkle from the holly berries and the outline of the “Noel” die cut gives the card extra shimmer and shine that screams classic Christmas.
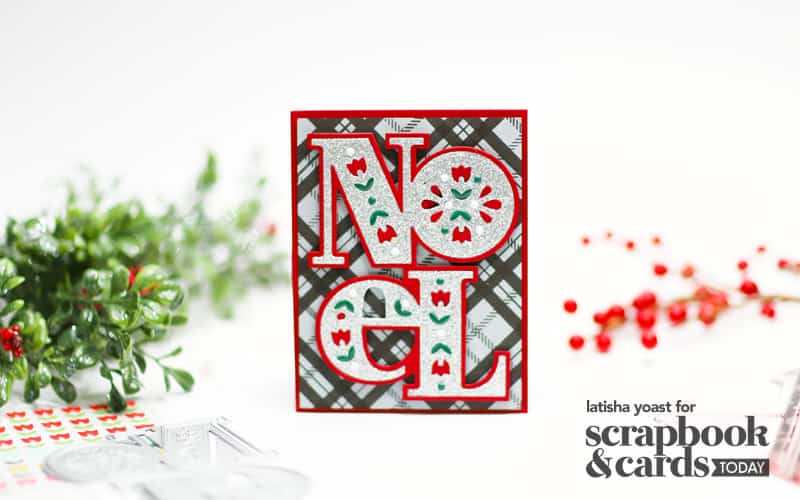
What is so fun about the Nordic Noel die is that it is a multi-use die. There are enamel stickers that coordinate, too. Instead of inserting paper or die cuts into the negative spaces, you can add the enamel stickers. I adhered the “Noel” die cut with foam adhesive to the stamped plaid panel, which I created by stamping the Plaid Turnabout stamp in mushroom ink on dove cardstock. This stamp creates custom plaid backgrounds with up to four different colors of ink. It’s so cool!

I love a large stamp and die combo that gives you a multitude of choices for sentiments. I stamped once with cranberry ink, then die cut using the coordinating die. I created sentiments to mix and match. What a perfect name for this stamp set: Mix & Match Holiday Sentiments.
Once the card base was trimmed and scored, I adhered patterned paper to the front of the card. I added Greenery to the right side of the card front, then I adhered the sentiments over the greenery using foam adhesive. To help center the sentiment, I added holly berries as well.
Thank you so much for joining me today! I hope you are inspired to head to your craft table and create a few special holiday cards!

Find more of Latisha’s work here: Instagram | Facebook
…………………….

How beautiful were Latisha’s cards? It’s hard to choose a favorite! Let’s take a look at today’s giveaways, and if you love the products that Latisha used, you’ll love the first one!
GIVEAWAY #01
Shop your wish list with a $50 gift card to Concord & 9th! We’re wishing you a very merry holiday season and can’t wait to experience more color and crafting with you in the new year!
GIVEAWAY #02
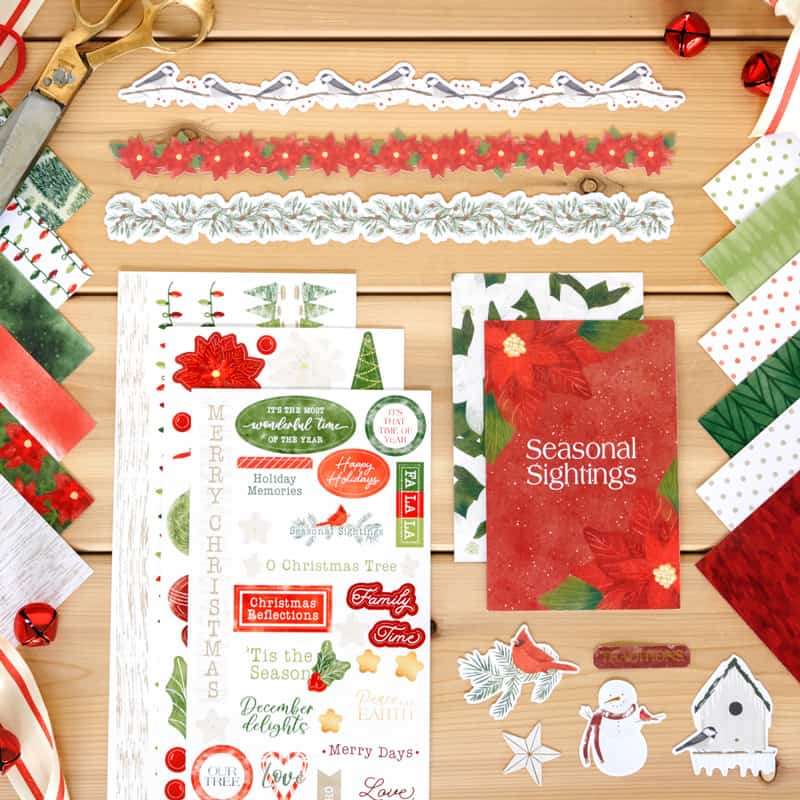
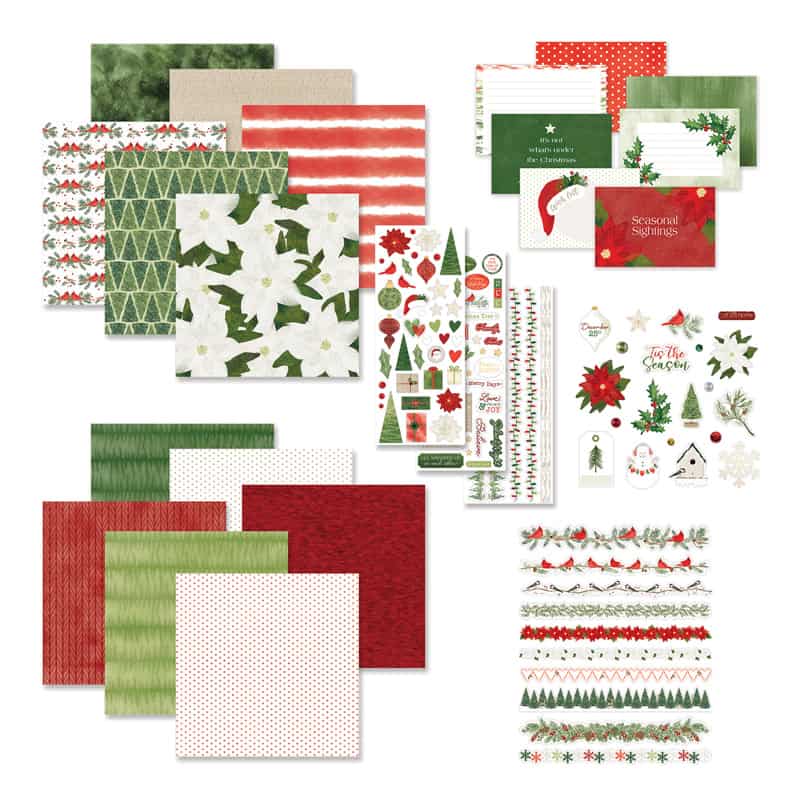
Share your very merry memories with all the decorative products in the Seasonal Sightings collection from Creative Memories! This Christmas scrapbooking kit includes a designer paper pack and complementing tone-on-tone paper pack, a variety mat pack, laser-cut borders, foiled embellishments, and stickers. You’ll fa-la-la-la-love these products for all your Christmastime memories!
…………………….
Another wonderful day of this event, and we have so much more to share with you! To enter to win today’s prizes, leave a comment on this post telling us your favourite Christmas destination—is it home, or somewhere else?—by midnight on Wednesday, December 21st! A randomly selected winner will be announced here on the blog on Friday, December 23rd
Join us tomorrow as we explore a holiday traveler’s notebook project with Nathalie DeSousa! We’ll see you then!


Home is where I want to be for the holidays! After that, anywhere warm!
Those Cards where beautiful!!
Great cards by Latisha. Thanks for the inspiration.
I do love to give homemade personal Christmas cards I’ve created but since having kids my time has dwindled so I give our family holiday photo cards.
My favorite Christmas destination is home or anywhere my brother is stationed!
Oh wow, Love that NOEL die!
I love being wherever family is for the holidays.
I love to be home for Christmas with my hubby and kids.
My favorite Christmas destination is at my uncle home. Lots of family gathering there over the years. Wonderful memories
Just stayin’ home for Christmas.
There is no place like home for the Holidays!
I love being home with family for Christmas. Thanks for the opportunity to win these awesome prizes.
Favorite Christmas destination is home. I have precious few years before my kids are out the door so I’m soaking it in while I can.
I love being at home next to the Christmas tree with all the Christmas lights on watching a movie with my family.
I love being with my son and husband for Christmas, no matter where we are. Another day of great inspiration and amazing prizes. Thanks SCT, makers and sponsors.
I love having family at home, no other destination is needed
Love that NOEL Die – your cards are beautiful. My favorite holiday destination is Home with my family but one of these days I really would like to spend Christmas in the Caribbean or somewhere warm and tropical!
My favourite Christmas destination is definitely visiting family. We live across the country from family, so going and visiting them over Christmas is wonderful. Although, one day, it’ll be nice when we choose not to travel over Christmas and get to make our own tradition at home.
On Day 4 of Holiday Giving, I oogled at MORE Christmas paper and dreamed of doing more shopping! It’s better than sugar plums!
Thanks for the chance to win these amazing prizes!! My favorite destination for Christmas is wherever my husband, kids, and grandkids are!! That makes for the most perfect day when we can all be together!!
My favorite destination is home! Beautiful card!
The cards are beautiful! I like the colors of the 2nd Noel card!
My favourite place to be is home, cooking for my family! I love having everyone over. ❤️
and those cards are beautiful!! Very festive
Gorgeous showcases and such fabulous gifts! Love everything!
Favourite Christmas destination: home, with my husband and mini schnauzer. Cozy!
~carol
Staying cozy at home.
I would love to spend Christmas someplace with snow!
My destination is wherever my family ends up together!
Fun cards with these goodies, my favourite destination is the beach or staying at home!
My favorite Christmas destination is my sofa with a fresh cup of coffee and cookies. Being the first up it is my calm place before the thrill of my grandkids running down the stairs to tear open their gifts. Happy Calm Place to all!
Home is the perfect place to be for the holidays!
My dream Christmas destination is London England. But until then home is best.
My favorite destination is home although I would love to spend one Christmas in Yellowstone National Park. Thanks again for giving us the opportunity to win such generous gifts.
Such gorgeous card inspiration! Where to be for the holidays is a tough one. Single adult son here or across the country with the grandkids. I am sure you can guess where we will be – with the grandkids. But, as a parent it makes me sad. He has work and cannot join us. THank you for another day of opportunies.
Wow! Fabulous prizes! Every year our family does something different- we’ve been on cruises, gone to Disneyworld, we even spent our Christmas at an AirBnb in Australia before. This year we’re staying home. As long as my family is together, it doesn’t matter where we are!
I think it would have to be Hawaii
Oh the Seasonal sightings collection is beautiful! Such fun cards!
I’ve never been anywhere but home for Christmas. I would love to be on a warm beach somewhere with my family though
Pretty cards. Favorite Christmas destination is home and church.
At Christmas I like to be with family – wherever they may be.
Beautiful cards!! My favorite destination for Christmas is home! I love being home with my family!
I’ve never spend the holidays any where but home but we are talking about a family trip to a cabin in Tennessee next year. Would love to see snow.
Love Concord & 9th. Your cards are really festive and bright. I love them all :)
Thanks for the chance to win these great prizes!
Simple yet beautiful cards. I love love love the plaid turnabout stamp. Me thinks I need to get one!
Lovely cards! I recently bought the Noel dies and can’t wait to try them out, thanks for the inspiration! Christmas at home????
I love the Concord and 9th Noel die. Such great ideas for cards.
Christmas is always where my family is. In this year’s case, it’s in Calgary with my sister and her family!
I am always home. Christmas is home with my family.
First I must say that I love your card using the Nordic Noel Die beautiful. The kit from Creative memories is awesome. Home is where the heart is and that is my favorite place. Thank you for these wonderful opportunities and amazing giveaways.
My favourite Christmas destination is home, surrounded by loved ones.
My husband and I like to escape the cold for a bit and go somewhere warm and relaxing like Jamaica.
Love this festive card:)
I love being at home for the Holidays
Wow, what a beautiful card, my favorite place to be at Christmas is home with my family.
Nice collection, it will help in documenting the memories of the season. My favourite destination to gather and celebrate the holidays is home, of course. However, I am interested in how the sunny beach side of the world celebrates. I want to try a beach Christmas