
Hello! It’s time once again for another edition of OLD NEW BORROWED COOL! I’m so excited it’s FEBRUARY and the season of LOVE. I have to tell you, I’m a huge romantic. I am a sappy movie freak. I cry at anything remotely sentimental and to say this is one of my favorite holidays would just not even begin to do it justice! I just LOVE “love.”
Once the Christmas holidays are over, I’m always eagerly awaiting the next decorating theme and it makes me infinitely happy that it’s VALENTINE’S DAY! To be truthful, I have décor galore for this holiday, but the one thing that has always eluded me is the “perfect” wreath for my front door. Everything premade I’ve ever found hasn’t been substantial enough or the right color or some something wasn’t quite right. So I set on a hunt of my beloved Pinterest (no, folks, she still hasn’t tired of Pinterest yet!) to find one I liked that I could possibly replicate. There were plenty of beautiful ones, but the one I fell in love with was THIS ONE. It made me swoon and judging by the number of people that have pinned it, it isn’t just me! The bonus was, it looked (fairly) easy to do myself! And that’s just what I did. Follow along with me and I’ll show you just how to make one for your own, too!
But as always before I get into the heart of this post (Hee. “Heart” – get it?!), I want to briefly recap the premise for this blog series. Each month I’ll bring you a new post that incorporates something OLD from my stash, something NEW that I might have just picked up and something BORROWED from wherever I can get it to create something COOL to share with you! It’s just that easy.
First I started gathering what supplies I had on hand and then made a list of what I needed. So from my stash I pulled:
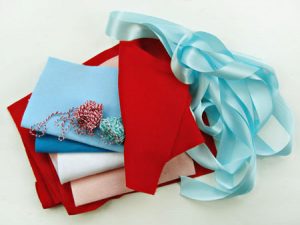
OLD: A mixture of crazy felt in lovely (hee, I did it again!) Valentine colors. Those aquas are my faves! Some pretty satin ribbon, also in aqua, and a bit of baker’s twine from My Mind’s Eye.
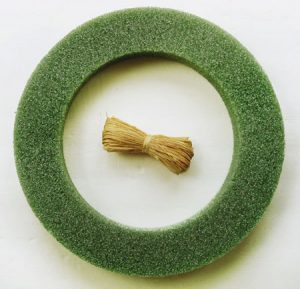
NEW: A styrofoam wreath form and a bit of raffia. Do you remember when we used raffia in scrapbooking ALL the time? It’s been so long, I had to get more!
BORROWED: The idea of the “perfect” wreath as well as my friend Jen’s pinking shears. She sews. I don’t! Oh! And I snagged a little trick from our friends in the stamping community, too – stay tuned for that!
And now we’re going to create something COOL!
COOL: This absolutely gorgeous, beautifully colored, full of love and happy VALENTINE’S DAY WREATH!!
Now I know that some of this wreath is pretty simple or self-explanatory but I want to show you a few things that might make it easier for you as you create your own.
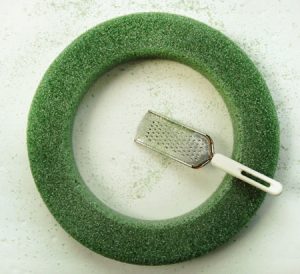
The first thing I ran into was that the foam wreath form that I found wasn’t round. Well, that was okay with me as I really did prefer for it to have a flat back to hang better. But I did want a bit of a curve on the front to make it more “wreath-like.” Here’s where that stamping technique comes in – sorta! Stampers love to take Styrofoam and make it into gorgeous accents for their flower stamps and the like. And they can create that by “shaving” the Styrofoam. I did that with my wreath, but I just didn’t use the shavings – but you could if you wanted! I simply took this hand-held cheese grater and ran it along the outside and inside edges of my wreath to remove the sharp edge. You can do this as much or as little as you like.
Once I had that done, I wrapped my wreath in satin ribbon. You can use any ribbon of a decent width, really, but I am sappy and like satin! Just a word of warning, it takes close to TWELVE yards of ribbon to do a 16” wreath form! Simply secure the ends with your trusty glue gun and you’re good to go!
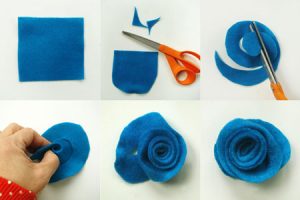
Then it was time to make my roses. Roses might look complicated, but truly they are quite easy, pretty quick and here’s your warning: They can be ADDICTIVE! Just follow along with this diagram and you’ll be making your own roses in no time!
- Cut a rough felt square.
- Remove the corners to create a sort of circle (perfection is not necessary here – the more irregular, the better the flowers look usually!)
- Cut circle into a spiral.
- Wrap spiral onto itself starting with the thin outside edge.
- Roll until you get to the center.
- Secure the center tab under the rose with hot glue to secure.
Now you’re ready to make oodles of these and glue them onto your wreath any way you desire!
Add a bit of raffia through the roses and tie a pretty ribbon at the top. You’re almost there!
All we need to do now is to make those sweet hearts.
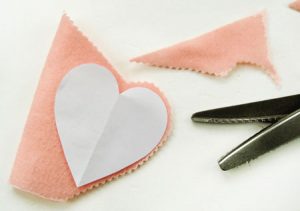
I simply cut a heart template from paper – the old school way by folding it in half and cutting until I got one I liked! Place it onto two layers of felt and cut out. I wanted a decorative edge so I used pinking shears. Stitch around the perimeter of the heart and then stuff with cotton balls before you close it up. It’s that easy! Finish buy stringing them with twine and across the middle of your wreath and you’re done!
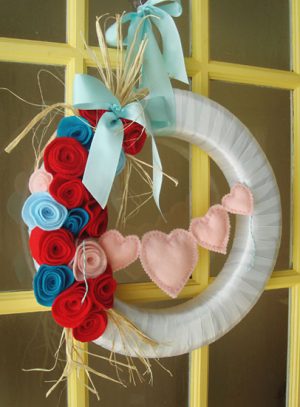
It already graces my front door and I’m so ready for Valentine’s Day now!
May your Valentine’s Day be full of love and lots of fun crafty projects! I’d love to see whatever you make! Link me up here and have a wonderful FEBRUARY!


