
We are so excited to welcome our friend Daniel Diaz to the blog today as our first guest designer of the month! If you’re scrolling through Instagram, you cannot help but stop when you see one of Daniel’s card creations—they’re always bright and full of amazing details. The card he created to share with us today is no exception! Let’s take a look at what Daniel is inspiring us with today, and be sure to find more of his designs at his social media links at the end of this post!
…………………………….
Hello, my crafty friends! I’m Daniel Diaz and I’m so happy to be guest designer for the SCT Magazine Blog this month! If you know me, then you know how much I love flowers, bright colours, and some good chocolate. This time we will talk more about the beautiful flowers from Pinkfresh Studio and less about the chocolate, but maybe next time.
I have to admit that I’m totally in love with the products from Pinkfresh Studio. They make it so easy to create some amazing cards in just a short time. And you know what’s even better? You don’t need to colour the images with pencils or markers, you can just ink blend them using the amazing layering stencils. So enough said, let’s jump into how I created this card.
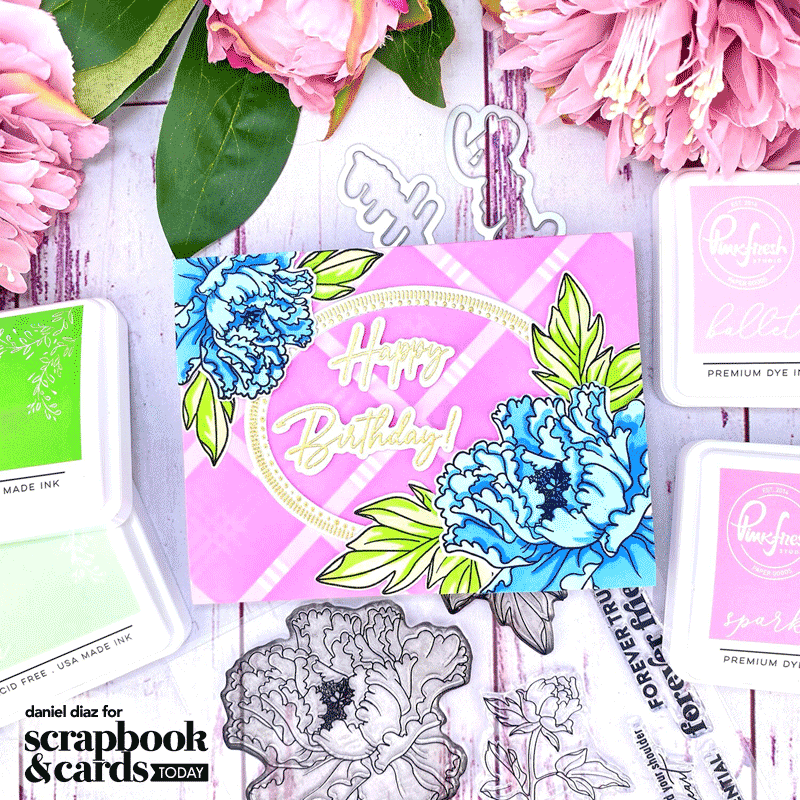
Supplies | Pinkfresh Studio: Friendship Blooms Stamp Set, Friendship Blooms Die Set, Friendship Blooms Stencil Set, Diamond Plaid Stencil, Happy Birthday Sentiments Stamp Set, Happy Birthday Sentiments Die Set, Merry & Bright Frame Stamp Set, Merry & Bright Frame Die Set, Detail Black Hybrid Ink, Fresh Pear Premium Dye Ink, Grassy Knoll Premium Dye Ink, Ballet Slipper Premium Dye Ink, Sparkling Rose Premium Dye Ink, Bubble Gum Premium Dye Ink, Sky Blue Premium Dye Ink, Summer Shower Premium Dye Ink, Blue Jay Premium Dye Ink.
Other: Scrapbook.com Ink Blending Tool, Scrapbook.com Premium Foam Adhesive, Bearly Art Precision Craft Glue, Neenah Classic Crest Solar White Cardstock, WOW! Embossing Powder Metallic Gold Rich, WOW!Embossing Ink, WOW!Embossing Heat Gun, Tim Holtz Non-Stick-Blades Scissors
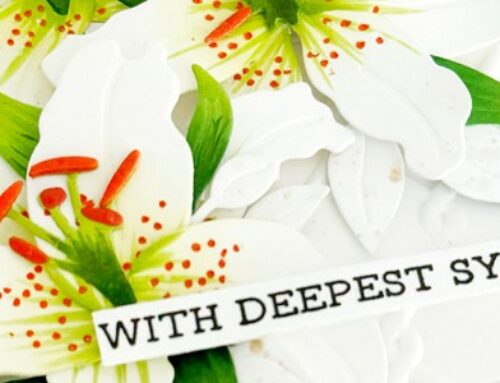
I started by creating my background and I really love to use some bright colours to make everything pop. For this card, I used the Diamond Plaid Stencil from Pinkfresh Studio, and I started by ink blending with the lightest pink, Ballet Slipper and Sparkling Rose and finished it with the second darkest pink Bubble Gum. As you can see, the inks from Pinkfresh Studio are super bright and beautiful and also easy to blend with. If you get the full Pinkfresh ink bundle, you get four different shades of inks for each color. To ink blend, I used the Ink Blending Tool from Scrapbook.com with the Domed Foam. I’m obsessed with this ink tool, even though I still love my blending brushes.
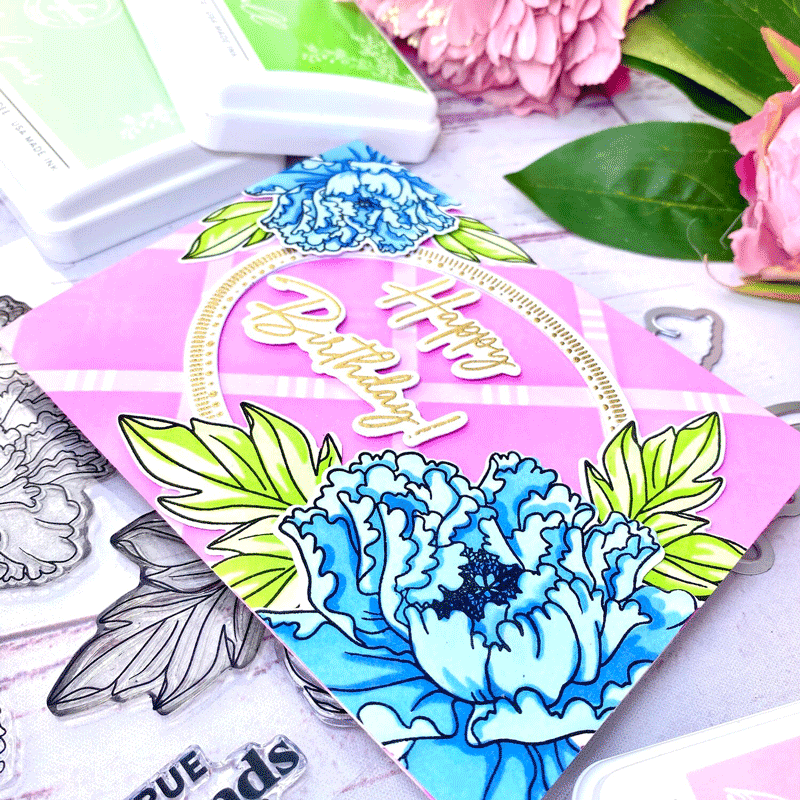
Now it‘s time to create these beautiful blooms from the Friendship Blooms Set, designed by the amazing Alex Syberia. Like I told you before, the good thing about this set is that you don’t have to colour anything with pencils or markers. First, I stamped all the blooms and leaves with Pinkfresh Detail Black Hybrid Ink. If you are looking for a Black Ink that you can use with alcohol markers and watercolours, this is the perfect one. Now, let‘s get some colours onto our images. You get a set of 5 stencils in the Friendship Blooms Set—three for the blooms and two for the leaves. I used three different shades of blues for my blooms and two shades of green for my leaves. You start with the lightest ink color and add the next layer with the next darkest one. It would not work the other way around, because you can’t add a lighter layer on a darker one.
Another thing I also like is to mix older sets with newer ones. I used the oval frame die from the Merry&Bright Frame Die Set, which is a Christmas set, but depending on how you use it, it can be used for any season. I did die cut the oval frame three times and layered these up, to give it some dimension. Of course, you could also use foam tape, but that way you can use your scraps and you get the same result.
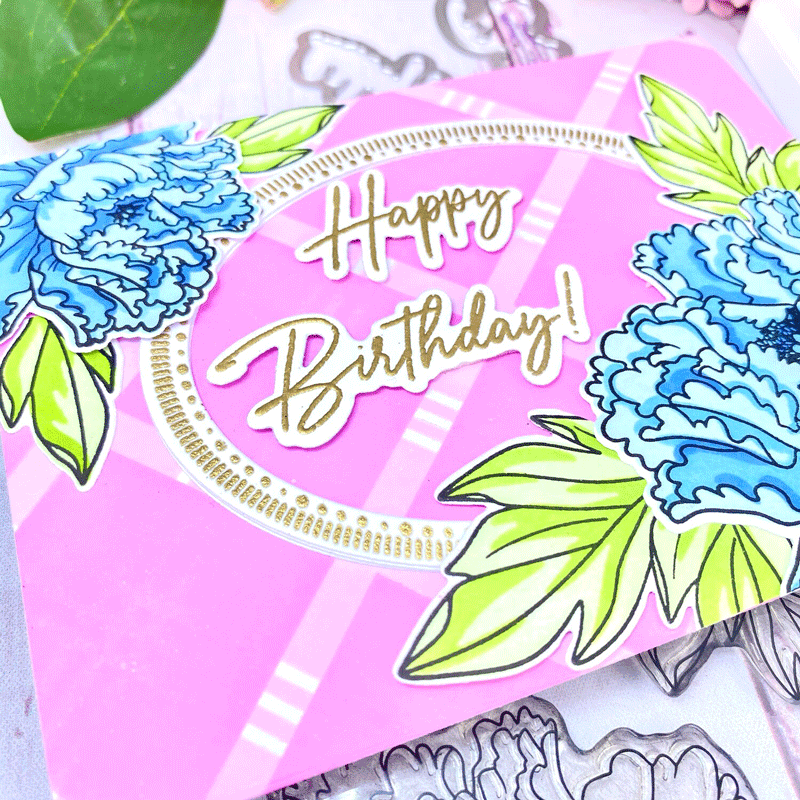
As I didn’t want to leave the frame just white I used the oval frame stamp from the Merry&Bright Stamp Set and stamped it with WOW! Embossing Ink and heat embossed it in gold. Another secret about me is… I love gold embossing powder, it‘s one of my favourite ones. I think cards look more elegant and bright with some gold embossing on it. That‘s why I also decided to heat emboss the sentiment in gold. The nice thing about the Pinkfresh Happy Birthday Sentiments Set is that they got the coordinating dies. I really like when you get that perfect cut on a sentiment, it just makes me happy.
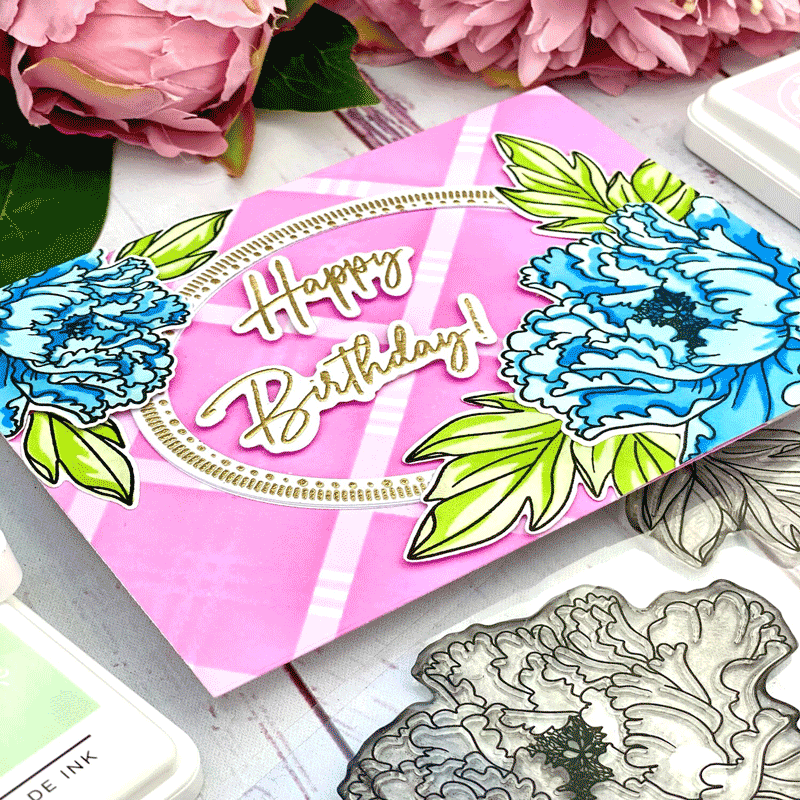
To finish the card, I adhered all the pieces onto my pink background. For the oval frame and some of the leaves, I used liquid glue from Bearly Arts and for the blooms, I used Scrapbook.com Premium Foam Adhesive to give it some dimension. I also trimmed off the excess with my Tim Holtz scissors, but you could also use your guillotine.
And that‘s it, crafty friends! I really hope you like my Happy Birthday card and I would love to see what you create using the amazing Pinkfresh Studio layering stencils and dies. I wish all of you a wonderful day and thank you so much for stopping by. Take care!

Hi, my name is Daniel, I am 32 years old and I am from Cologne, Germany. I was born in Germany, but my family is from Spain (a small village close to Madrid). For a year now I have been passionate about scrapbooking and card design. I found my love for crafting two years ago during a job interview. During my interview, the lady talked about scrapbooking and card making, which caught my attention. The rest is history. Now, I can’t stop doing crafty things. I also love traveling and meeting new people. My other passion is my small hotel here in Germany. I love having people around and treating them well.


Beautiful card Daniel and I love your Bio! Amazing where we catch our passion!
Sooo pretty!! Daniel is amazing!!! ????
Love this card! Can’t wait ‘til my Friendship Blooms set comes in the mail. Thanks for the inspiration!
This is lovely, and I like your easy to follow directions.
Thanks for sharing such a beautiful card!! I have been through Cologne. My father was in the Army and we lived in Wurzburg for 3 years (well before you were born ????). Germany is a beautiful country.
Absolutely beautiful!!!
You certainly do some beautiful work Daniel! I love the bright ‘pop’ to your card!