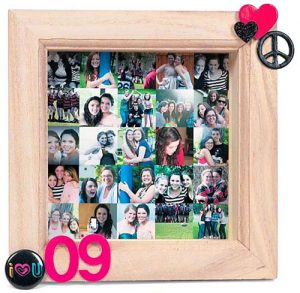
just “shoot” me! by Kathy Thompson
turning precious photos into great gifts!
Here are the complete instructions for creating Kathy’s quick and simple photo collage (found on page 34 in the winter 2009 issue) using Adobe Photoshop Elements. Photo collages are great for using as-is (as in the framed collage on page 34) or simply to get a lot of small photos onto one page for quick printing. (Although these instructions are for PSE, most photo editing software has the same capabilities).
- Create a new document. In my example, I am going to create an 8”x8” collage, a size that is easy to print at home or to send out to a photo lab for printing. Make sure your resolution is set to 300 pixels/inch and your colour mode is set to RGB colour.
- Open the photos you want to use in your collage.
- Select the first photo you want to work with.
- Select your crop tool and enter the dimensions that you want your photo to be for your collage (with a 2”x2” photo, you could fit 16 photos into your collage!), so let’s set our width to 2” and our height to 2”, and set your resolution to 300 pixels/inch.
- Using your crop tool, drag out the area that you want to crop on your photo, and click the green check mark or double click to commit.
- Using your move tool, drag your newly cropped 2”x2” image down onto your blank collage canvas.
- Close the photo you were working on WITHOUT saving the changes!
- Continue doing this until you have all sixteen 2”x2” photos on your canvas.
- Go up to View>Grid (to set your grid lines go to Edit>Preferences>Grid).
- A grid will now appear on your screen and help guide you to making sure your photos are even.
- If you’re not sure, use the Align function. Click on the photo in the top left corner. Holding down the shift key click on the subsequent photos across the top row (all four of them – you’ll notice in the layers palette that all four top photos should be selected.
- Go up to Align>Top Edges.
- This will “snap” your photos to the same top height.
- Repeat this with each row, and then do it vertically as well (Align>left edges).
- You should now have a square photo collage that measures 8 inches across and 8 inches down, housing sixteen 2×2” photos.
- Save the collage as a PSD (layered document) in case you want to go in and change any of the photos at any time.
- Here’s something neat: now, flatten your layers (Layer>flatten image). Now save it as a JPG.
- You can now resize your JPG to any square size you want!
- For instance, the frame I used was 6”x6”, so I would simply go up to Image>resize>image size, and in the Document Size section I would input a width of 6” and Photoshop will automatically input a height of 6”. Double check that your resolution is set to 300 pixels/inch and click ok.
- You now have a perfectly sized collage to fit into a 6×6” frame! Save the image without saving the changes, and you will always have your original 8X8 to go back to should you need to resize it for something else.

