
Hello SCT Peeps! My name is Stesha Bloodhart and I am a member of the Stampin’ Up! 2019 Artisan Design Team!
The Bird Ballad Suite is my favorite product suite from the Stampin’ Up! 2019-2020 Annual Catalog and perfect for a trio of wedding creations. The images from the Free As A Bird Cling Stamp Set are so cute and color friendly!
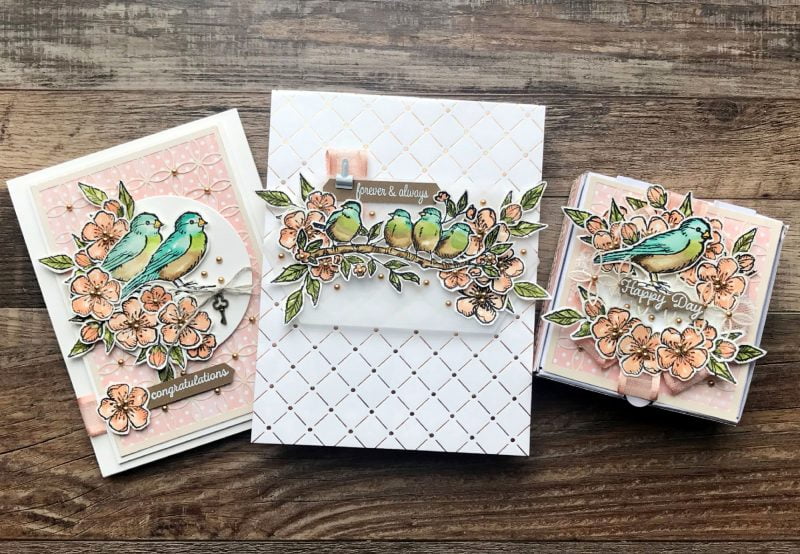
All three projects use the same watercolor technique for each image. I like to use the Stamparatus to stamp multiple images at once and to ensure I get full coverage when stamping on Fluid 100 Watercolor Paper.
Each image was stamped in Jet Black Staz On Ink onto Fluid 100 Watercolor Paper and colored with a medium brush tip Aqua Painter and the following Stampin’ Up! Classic Ink Pads: Petal Pink, Pear Pizzazz, Mossy Meadow, Soft Suede, Pool Party, Granny Apple Green, Bermuda Bay.
After allowing the images to dry, they were then snipped with Paper Snips
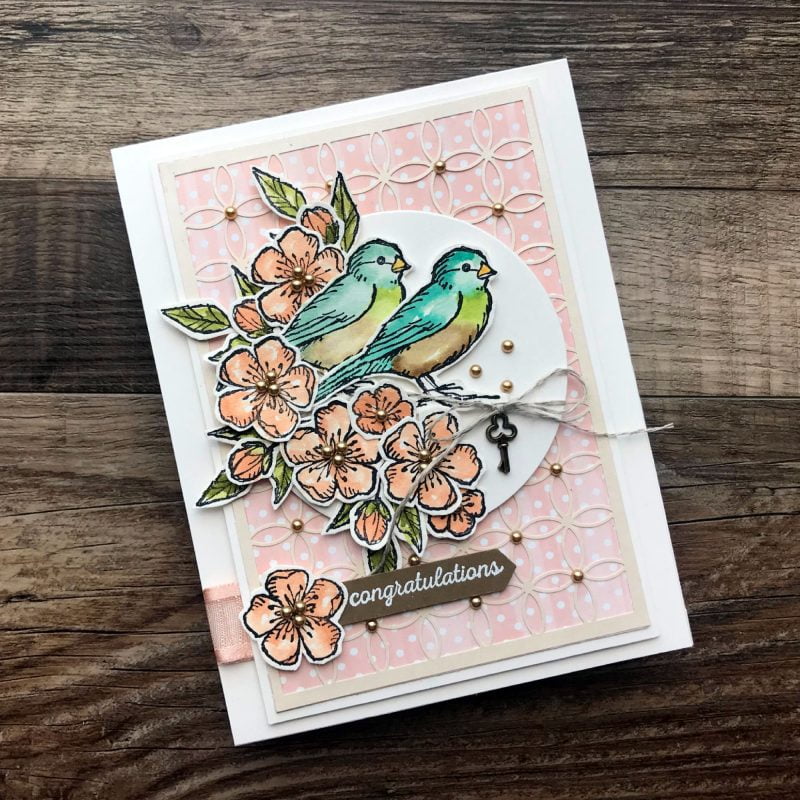
The congratulations card was created using the following steps:
- Start with a 4 ¼ x 5 ½ card base of Shimmery White Cardstock
- Adhere a loop of Petal Pink 5/8” Organdy Striped Ribbon as shown with Mini Glue Dots
- Adhere a 3 5/8 x 5 1/8 piece of Shimmery White Cardstock to the center with Stampin’ Dimensionals
- Cut the card front from the Shimmer Detailed Laser-Cut Specialty Paper and adhere to a 3 3/8 x 5 piece of the petal pink polka dot from Bird Ballad Designer Series Paper
- Crop a 3 inch circle of Shimmery White Cardstock using the largest Layering Circle Die and wrap with a piece of Linen Thread, securing it in place with a bow. Adhere to the card base with Stampin’ Dimensionals.
- Adhere a key trinket under the bow with a Mini Glue Dot.
- Assemble and adhere all stamped images as shown using Stampin’ Dimensionals and Mini Glue Dots.
- Rub a piece of Soft Suede Cardstock with an Embossing Buddy then stamp the sentiment in Versamark Ink. Cover with White Stampin’ Emboss Powder, flick the cardstock to remove the excess and set with a Heat Tool. Crop with the Classic Label Punch and adhere with Mini Stampin’ Dimensionals
- Add gold Metallic Pearls as shown.
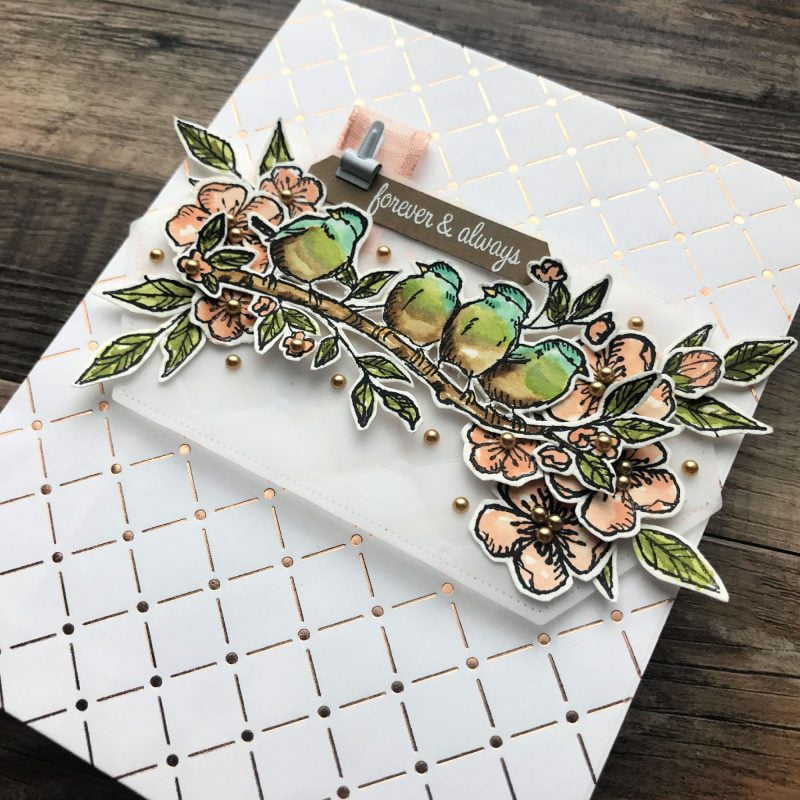
The forever & always gift back was created as follows:
- Start with a Copper Dotted Treat Bag as your canvas.
- Adhere a loop of Petal Pink 5/8” Organdy Striped Ribbon as shown with Mini Glue Dots
- Crop a piece of Vellum Cardstock using a die-cutting machine and the largest Stitched Nested Label Die. Adhere with strategically placed Stampin’ Dimensionals so they stay hidden behind the images.
- Assemble and adhere all stamped images as shown using Stampin’ Dimensionals and Mini Glue Dots.
- Rub a piece of Soft Suede Cardstock with an Embossing Buddy then stamp the sentiment in Versamark Ink. Cover with White Stampin’ Emboss Powder, flick the cardstock to remove the excess and set with a Heat Tool. Crop with the Classic Label Punch and secure with a Mini Library Clip.
- Add gold Metallic Pearls as shown.

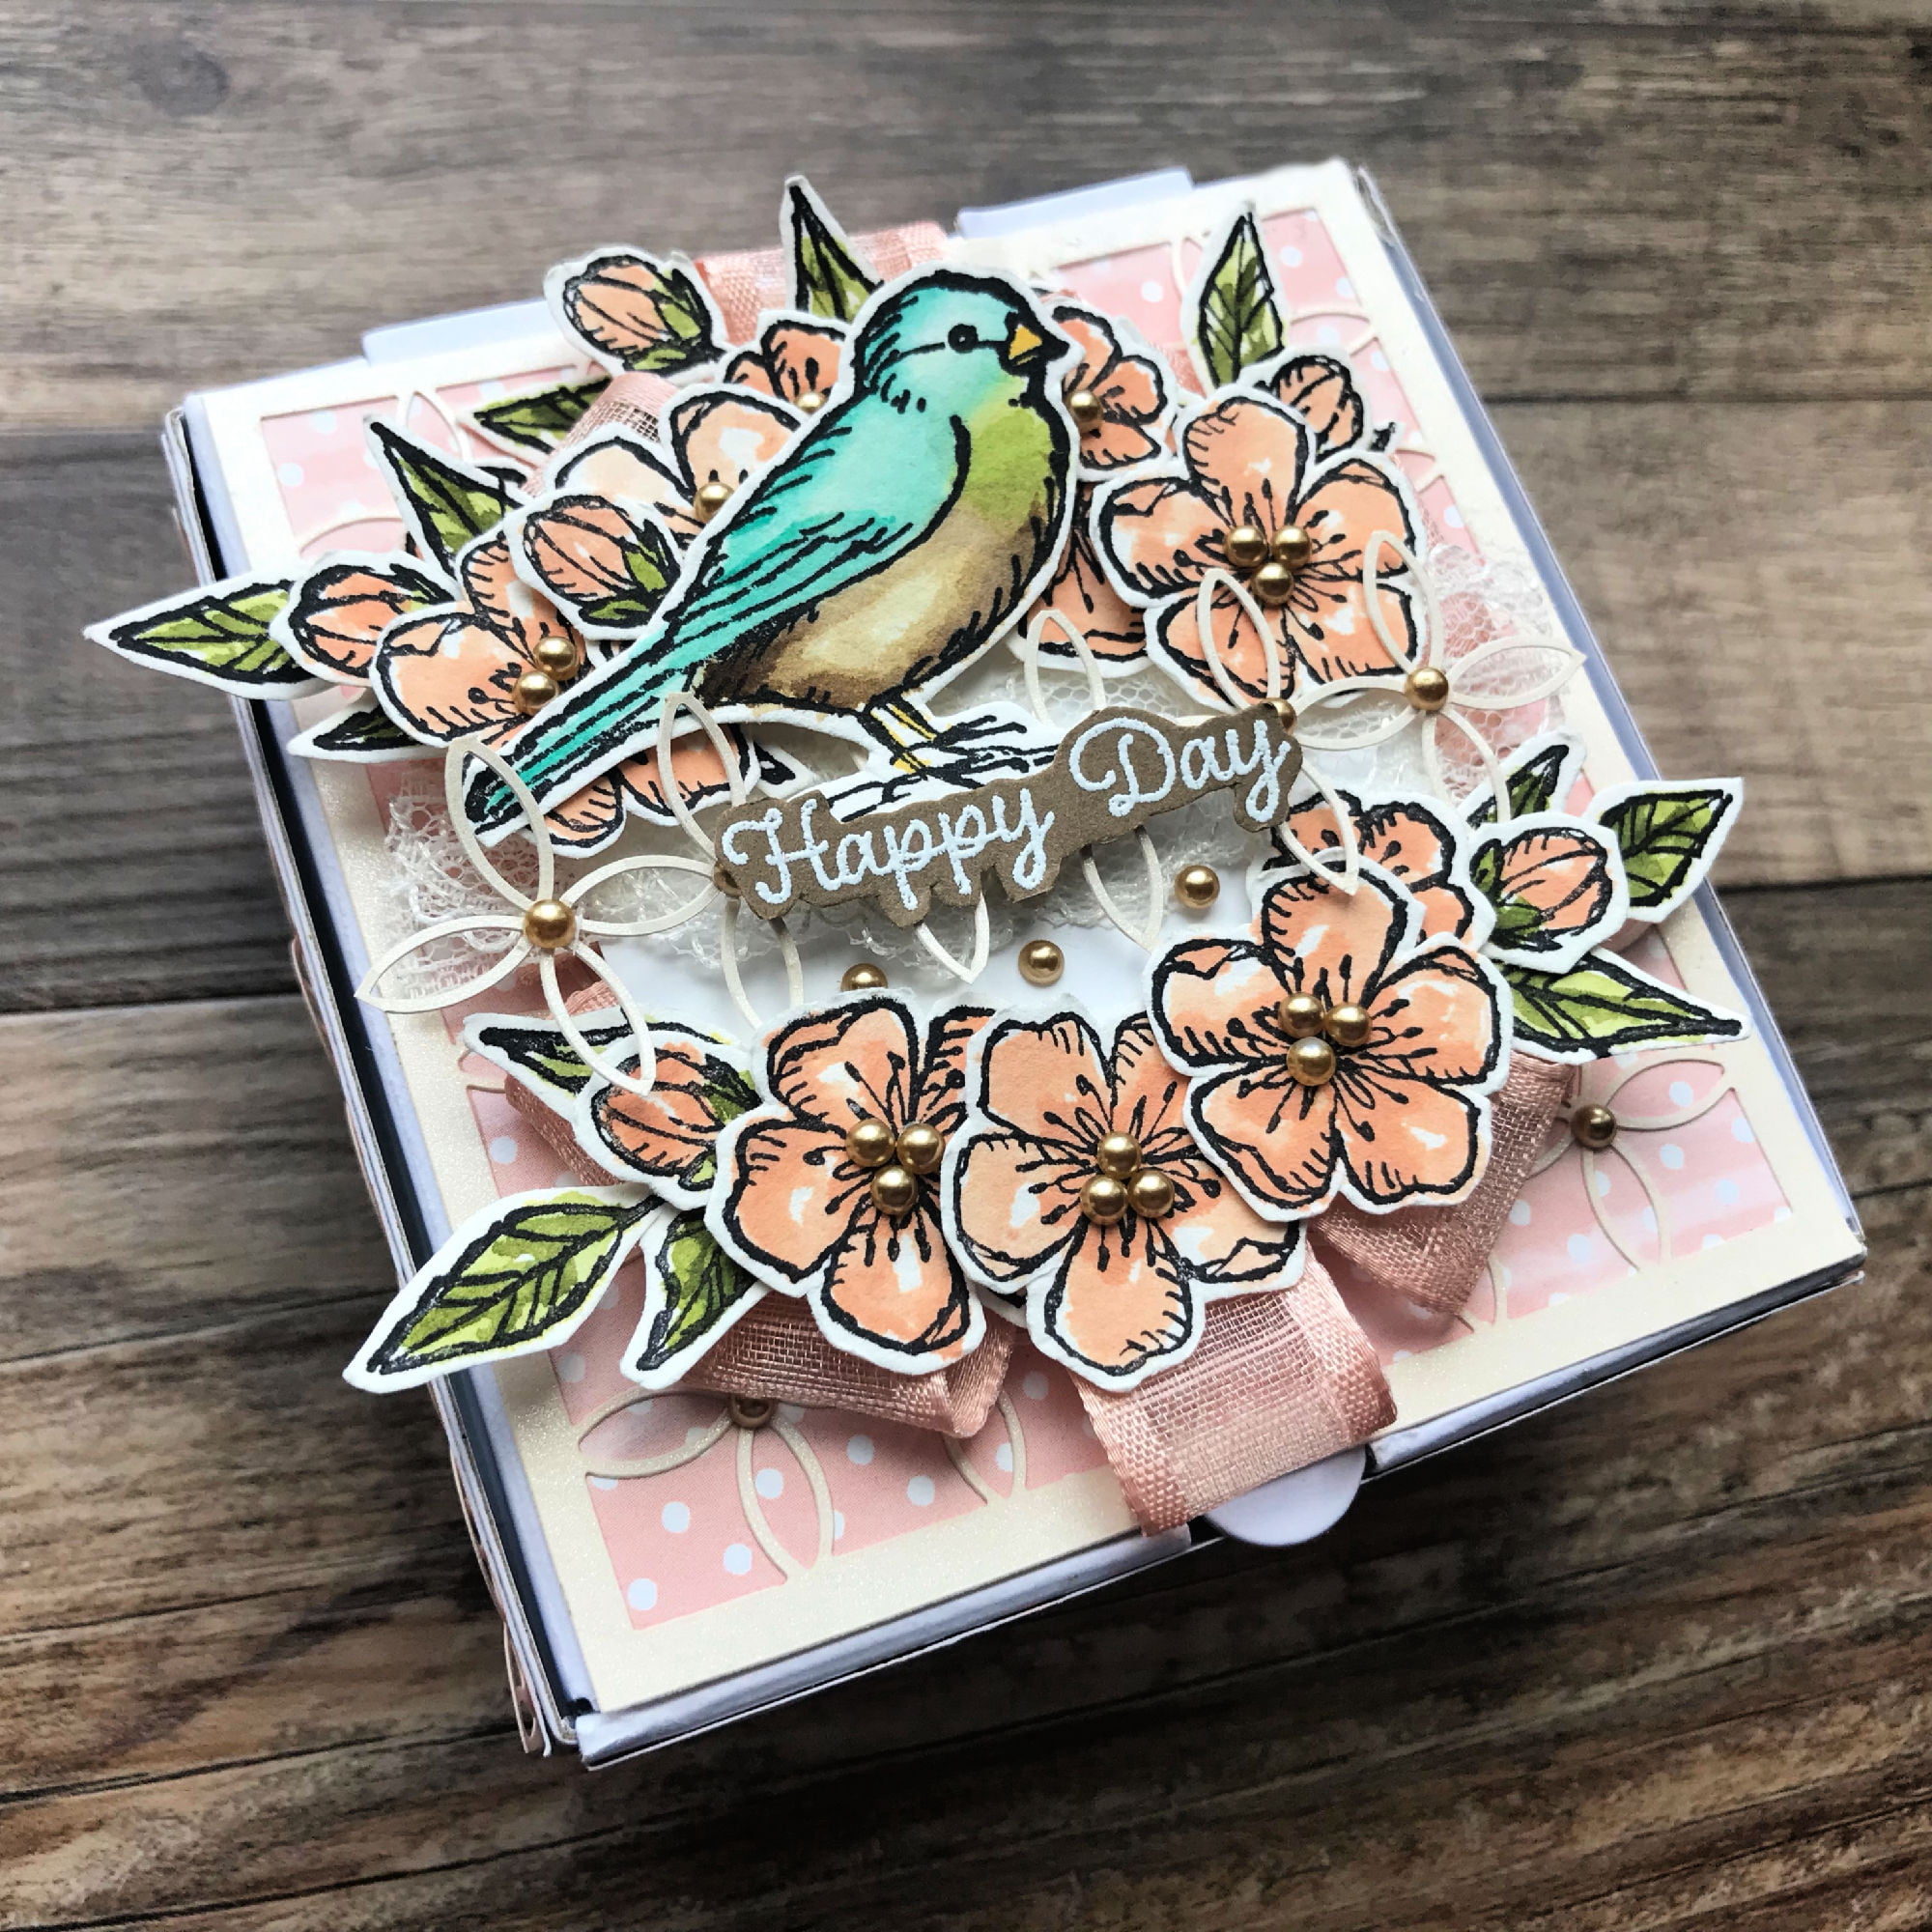
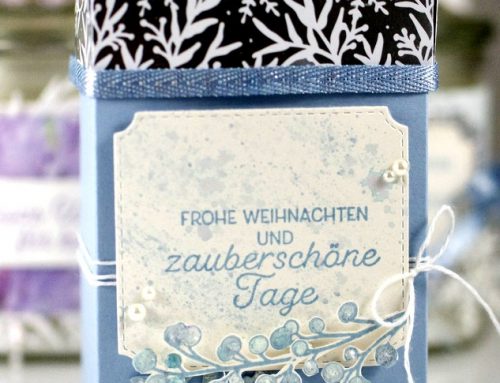
The Happy Day Mini Pizza Gift Box was created as follows:
- Assemble a Mini Pizza Box to use as your canvas.
- Cut a piece of the petal pink polka dot from Bird Ballad Designer Series Paper to the following sizes: Qty: One 3 3/8 Square, Qty: Four 7/8 x 3 3/8 Strips. Adhere to the top and sides of the Mini Pizza Box with Tear & Tape Adhesive.
- Cut the card front and strips from the Shimmer Detailed Laser-Cut Specialty Paper and adhere to the Mini Pizza Box. Note: You will need to trim the pieces to size and adhere with a dab of Multipurpose Liquid Glue
- Use the 2 1/4” Circle Punch to crop a circle of Shimmery White Cardstock. Adhere loops of Petal Pink 5/8” Organdy Striped Ribbon around the back of the circle with Mini Glue Dots
- Add two strips of Very Vanilla 3/8” Scalloped Lace Trim to the center of the 2 ¼” circle with Mini Glue Dots.
- Rub a piece of Soft Suede Cardstock with an Embossing Buddy then stamp the sentiment in Versamark Ink. Cover with White Stampin’ Emboss Powder, flick the cardstock to remove the excess and set with a Heat Tool. Snip with Paper Snips and adhere with Mini Glue Dots.
- Assemble and adhere all stamped images as shown using Stampin’ Dimensionals and Mini Glue Dots.
- Add gold Metallic Pearls as shown.
Thank you for taking a peek at my trio of wedding projects.
~ Stesha
……………………………….
GIVEAWAY!
Thank you so much for joining us today, Stesha and sharing these beautiful wedding themed projects! Very inspiring!
We also want to thank our friends from Stampin’ Up! who have joined in today to share a fun prize package…
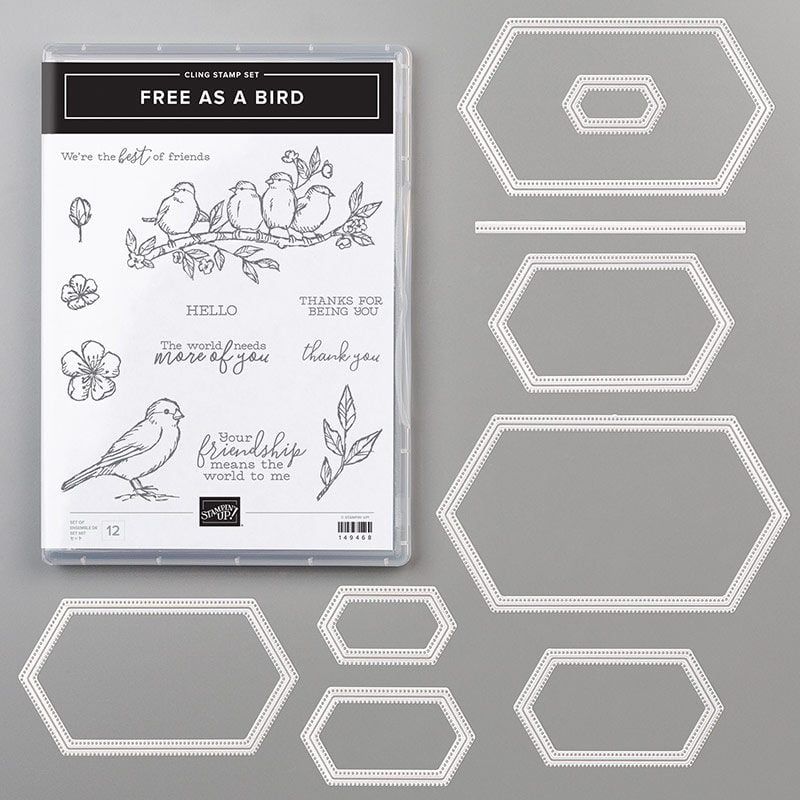
Our friends at Stampin’ Up! would love to offer one lucky reader the opportunity to win the Free As A Bird Bundle which includes 12 cling stamps and 9 dies! For an opportunity to win this amazing prize package, be sure to leave a comment below by July 18th! Good luck!
Happy Saturday!

Oh this prize is gorgeous, would be fabulous to win!
What gorgeous wedding projects you have put together–simply gorgeous! Also an amazing prize package, so useful for weddings and other card making projects.
I love your card ideas. This would be a nice prize to win. Good luck everyone,
Love all three projects! I especially like the dies in this set.
So many adorable cards! :) I love this new bird set.
What a wonderful giveaway! You had me at birds.
Creations are amazing..beautiful and thanks for the chance to win an awesome prize!
I really love this set!!
Beautiful cards and the stamp and die set is great. Love Stampin Up!!
Lovely group of projects! The birds in this stamp set are delightful! Thanks for a wonderful giveaway!
This is without a doubt, one of the prettiest suites you have created. A lot of beautiful arrangements with this set. The homebound people I send cards to would be all smiles to get a card like this! Thank you for your creativity and your generous giveaways.
Blessings,
Debbie Mann
This is a gorgeous trio of projects! I especially love the gift bag with the pretty copper accents. Thanks for sharing your inspiration projects with this beautiful set.
Love your cards and box. Can’t wait to use my DSP.
These cards are just gorgeous! Thank you for the inspiration and fresh ideas. Just love the shading you did with the birds and flowers. Hope I get a chance to try this one!
Gorgeous projects! The bird are so pretty. Thanks for a super giveaway.
Beautiful card an SU goodies ????
Love those sweet birdies!
I just love those little birdies. What beautiful cards. Thank you for the chance to win!
Ooo! I was just eyeing this great set in a Stampin’ Up catalog yesterday! I would love to win! Thanks for the opportunity!
This bundle is perfect! My son is getting married in October and this would be so fun to use on decorative items I’m making for the rehearsal dinner. Thanks for a chance to win.
Those cards are absolutely gorgeous ❤️ Great giveawa!
Ohhhh, beautiful!
These cards are breathtaking and so beautiful. Thank you for sharing your talent with all of us!
Thanks for sharing your incredible talent with us, and for the wonderful opportunity to win this great bundle.
Absolutely gorgeous! My favourite is the birds on the branch. Thanks for sharing and for the opportunity to win!
Great prizes and such beautiful handiwork. Love the pearls in the flowers!
These cards are exquisite.
Thank you for the opportunity to win this wonderful set.
Very beautiful cards..makes you want the stamp set & dies even more . Thanks for that opportunity to win them.
Love love love! This set is on my must have list and I’d love to win it!
Beautiful projects! Love the birds and flowers. Gorgeous stamp set.
Thanks for a chance to win…
Your projects are beautiful! Any wedding couple would be happy to receive them.
Beautiful cards lovely stamp and die set
What fabulous projects for weddings made with this set! It is for sure on my wish list! Beautiful set!
The Free As A Bird Set is so pretty! I love what Stesha Bloodhart created with the set.
Thank you, Debra
So beautiful, love the bird paper and stamps
What a gorgeous set! And such pretty inspiration! So elegant! Thank you for the wonderful opportunity!
Love this stamp set!
These birds and florals are gorgeous paired with the pretty palettes on these cards.
Wonderful creations. These birds really do look easy to color and I’m not a very good at coloring.
I’ll be honest. When I first saw this stamp set I thought nope not for me. But now from these beautiful examples it on my wish list! Thank you so much for sharing!
Pick me, pick me! I have so many ideas for this bundle!
I love the cards!
Wow, those cards are gorgeous and you really showcase that stamp set so well. I really love the copper dotted background but I love them all and now I am taking another look at that set thinking of all the things I could make with it. Thanks for the inspiration and the chance to win it, it is just stunning.
These cards are absolutely stunning! I ❤ this stamp set. Thank you for the opportunity to win.
Stunning cards. This set is versatile, for many occasions.
Love this set and the trio of wedding creations!
Would be fabulous to win this. Love the quality of stampin up products
Oh, what lovely cards! This is one of the sweetest bird sets I’ve seen.
Wow! I just love the wedding projects you created! Your watercoloring is beautiful. :) Thanks for the chance to win this wonderful prize!
Beautiful cards! Thanks for the inspiration. That set was already on my wish list and now it is moving to the top of the list.
This is beautiful!