
Today we are so excited to welcome our first guest of 2023, Justin Adkins! Justin’s cards are bright, colourful, and full of beautiful details, and we just had to share his talent with you! Today, Justin is sharing a great idea on how you can stretch your holiday stamps into the next season! Let’s take a look!
![]()
Hello friends! My name is Justin Adkins from Just A Note by Justin (you can find me on Instagram and my blog) and I am beyond excited to be sharing a special project that I created for you all here on the Scrapbook & Cards Today blog!
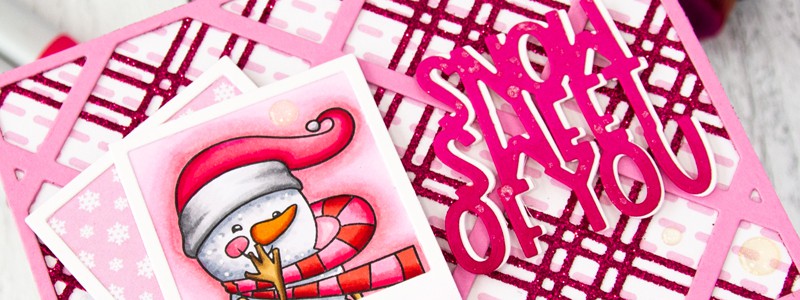
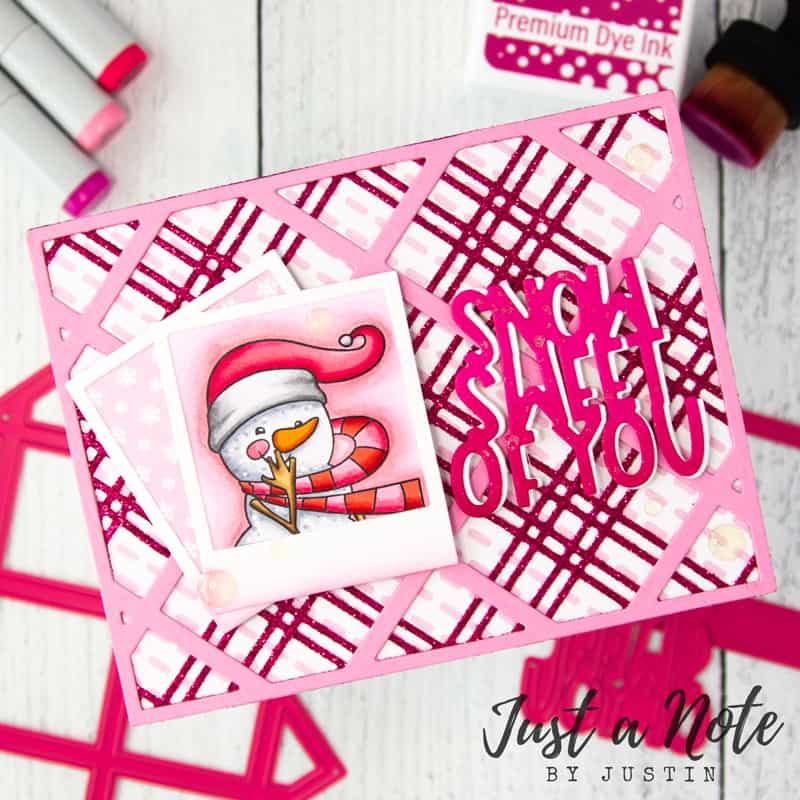
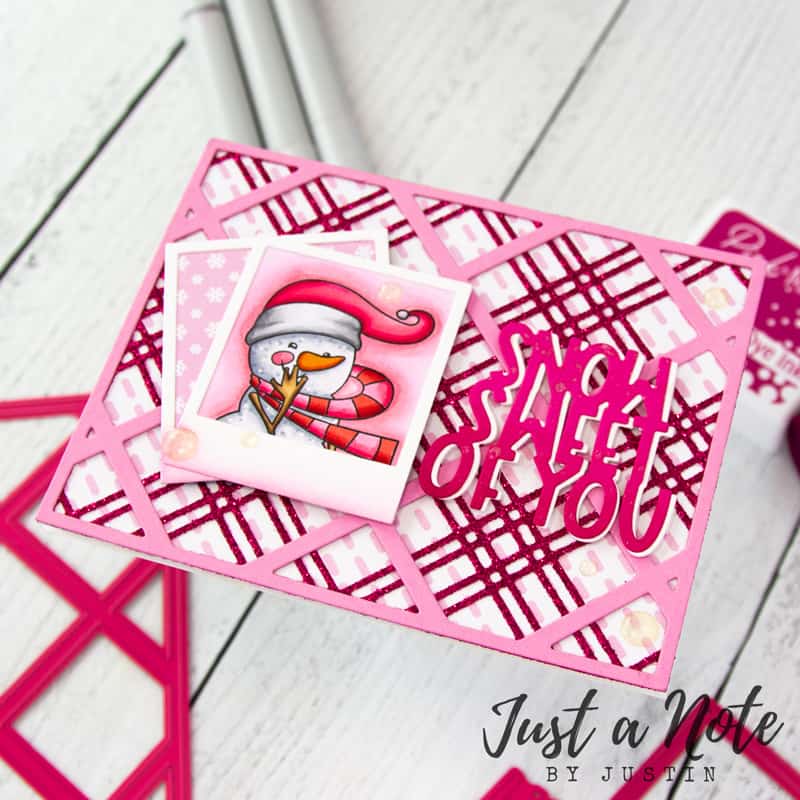
Today, I am giving some encouragement for how you can extend the life of your Christmas stamp sets and turn them into projects for other holidays! Pink & Main has so many adorable holiday stamp sets, I just cannot allow myself to use them during a short set of months throughout the year! Today I will be using the Christmas Squares stamp set, turning it into a pink and snowy Valentine’s Day card!
Supplies | Pink & Main: Christmas Squares stamp set, Square Frame dies, Plaid cover dies bundle, Empty Snow Globe dies, Stitched Rectangles set 1 dies, Ice Rink cardstock, Salon cardstock, Dress Shop cardstock, Dress Shop premium dye ink, Snow Day 6 x 6-inch paper pad, Summer Glitter paper pack, Clear Glitter enamel dots, Mini Ergonomic blending brush; Therm O Web: iCraft UltraBond permanent adhesive, iCraft 3D foam tape (White, 1/16”); Spellbinders: Sparkle Silk; Other: Blackout Ink by Ink on 3, Copic markers, X-Press It blending paper by Copic, MISTI
I have some fun details to share with you!
Whenever I create any form of a project, I like to start with selecting a color palette. In this instance, I wanted to choose a lot of pinks and a couple of reds, as I knew this would help take my Snowman image from the Christmas Squares stamp set and help transform it into a Valentine’s Day image. Once my color palette is selected, I like to then move into the coloring portion of my project. Generally, my image coloring takes up a good portion of the time to create my project, and I like to work on that first.
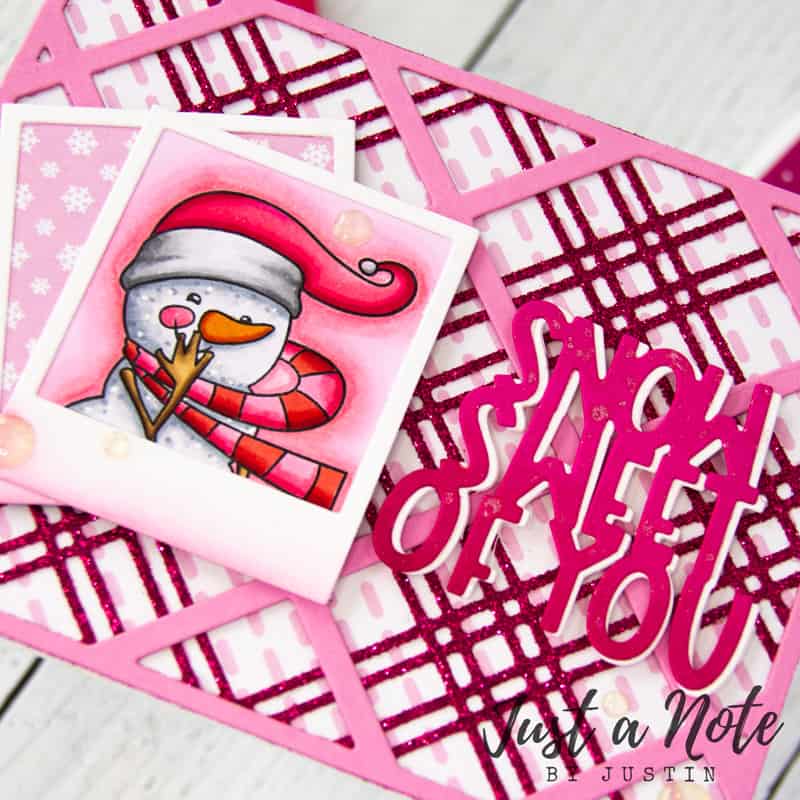
I often think that changing up the traditional color palette for an image is the best starting point to stretch your stash! For example, my snowman has a Santa-style hat on, which immediately can make someone think of Christmas. However, when you change the color of that hat to a lighter pink, it breaks away from the assumed theme! It could also be really fun to use other colors for different holidays or themes as well!
When I color snow, I like to keep the colors very light and not overly saturate the ink, as this helps keep the snow portion of the image lighter in appearance. I like to also add some small dots of Copic Ink, and then add some dots of white gel pen as well! This helps give that frosty appearance.
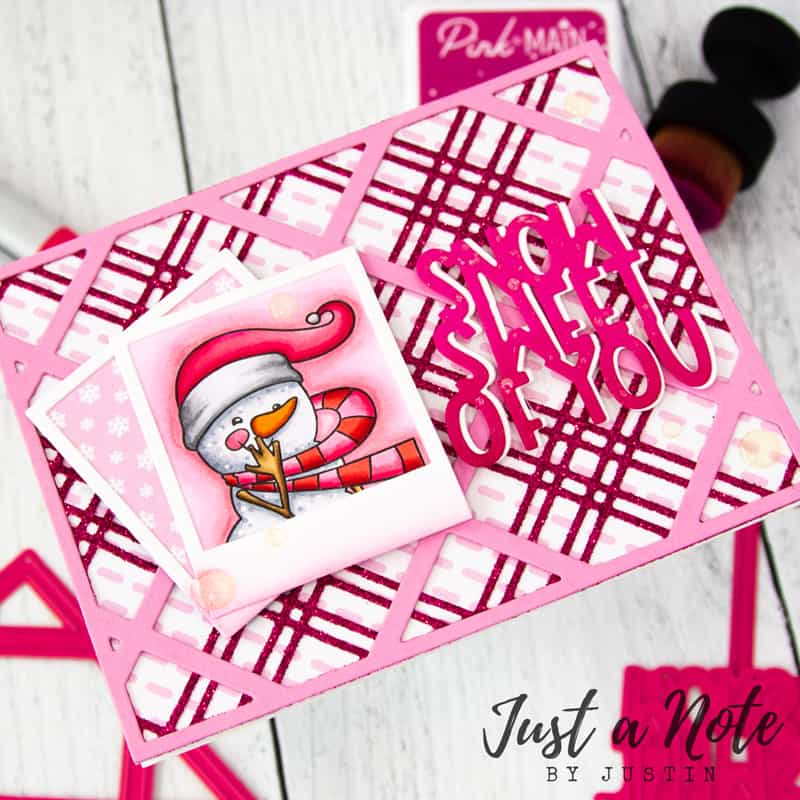
I thought it would be fun to use a selfie element to the card, and I remembered I had the Square Frame Dies by Pink & Main, which includes a Polariod-style frame. I cut out two dies from Ice Rink cardstock, ink blended the bottom in Dress Shop premium dye ink, and adhered one on top of my snowman image. The second frame I adhered on top of a light pink and white snowflake patterned paper from the Snow Day 6 x 6-inch paper pack. It was also very easy to trim off any excess paper to make the frames look flush with the background. I used liquid adhesive to adhere these two on top of each other, offsetting them so they looked like a messier stack of photos.
Now, I also love to play with cover dies, and Pink & Main offers a fantastic collection of them. I thought that the Plaid cover die bundle would be a great way to add fun colors and texture to my card. I cut one layer from Salon cardstock, and the second finer layer from the Magenta glitter paper, part of the Summer Glitter paper pack.
Tip: The finer layer may require the use of an additional shim, as I have found that certain cardstocks can be difficult to get a clear impression. It’s a good idea to test out any of your new die cuts, particularly those cutting fine details, before using them for a project so you make sure that they will cut your paper as you intend them to!
For the background of my layered plaid die cuts, I selected a light pink dashed line pattern on white paper, also from the Snow Day 6 x 6-inch paper pad. I die cut this paper with the largest die from the Stitched Rectangle 1 dies by Pink & Main, because this die was also the same size as the Plaid dies I previously used!
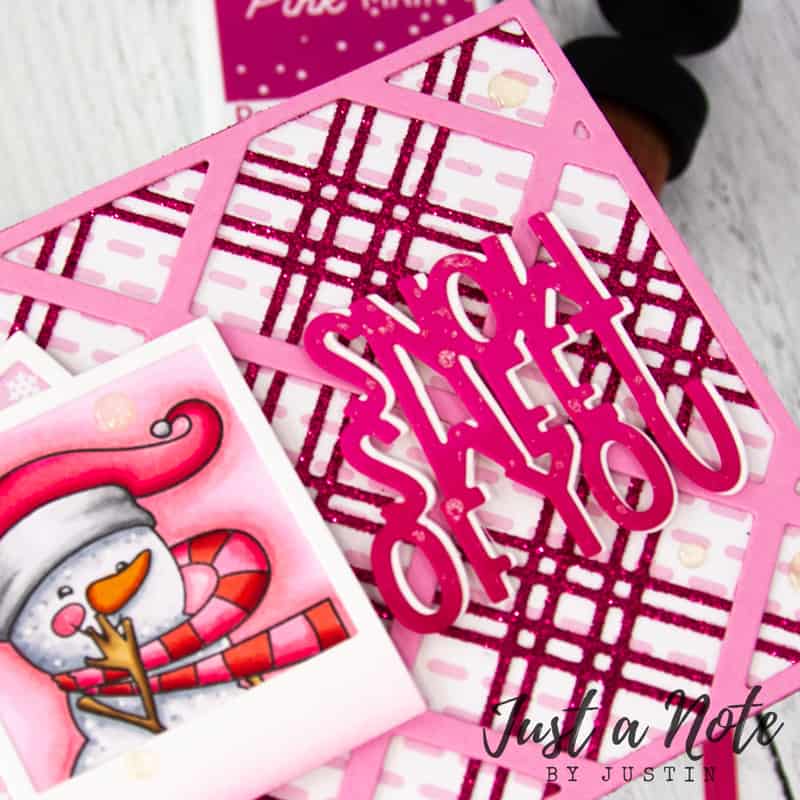
Another thing that I love about Pink & Main is that they will often sneak word dies into die sets that can help add to any of your projects. I consider these almost like 2-for-1 uses. For example, in my card, my sentiment comes from the Empty Snow Globes die set, which is a coordinating die for another stamp set. However, I thought the “Snow Sweet of You” would be a perfect choice for my card’s sentiment. I die cut two of the sentiments, one from Dress Shop cardstock and the other from Ice Rink cardstock. For the Dress Shop die cut, I also distressed the bottom edge with Dress Shop premium dye ink to help darken it up and give a monochromatic ombré effect. For some extra glitz, I splattered Sparkle Silk from Spellbinders on my die cut as well. I used UltraBond liquid adhesive to adhere the Dress Shop die cut on top of the Ice Rink die cut, offsetting it to give a little bit of a shadow effect.
Tip: Distressing the edges of your dies is an amazing way to add extra depth to your projects, and make your dies pop! I recommend using either a darker color in the same color family of your die cut, brown ink, or black ink!
When it came to finishing my card, I used a combination of iCraft UltraBond adhesive and iCraft 3D foam tape to adhere all of my layered dies and images. I added a few Clear Glitter enamel dots from Pink & Main to my project to jazz it up a little as well!
Don’t miss out on watching me create this card in my process video:
So, as you can see, it’s not that hard to take your holiday-themed stamp sets and utilize them for alternative themes and holidays! It’s an amazing way to stretch your crafty collection and use some of your favorite sets year-round! Or, maybe I’ve inspired you to finally click “purchase” on that Christmas stamp set that has been sitting in your cart for weeks now, as this post has sparked some inspiration for how you can use it for another theme! I hope this card brings you so much crafty inspiration for your next project! Thank you all so much for stopping by! Happy crafting!

Justin Adkins is a paper crafter residing in Woodridge, IL, just a short drive away from Downtown Chicago! He launched his paper crafting journey after a quick visit to a local crafting store where he bought 2 stamps, an ink pad, paper, and some envelopes to create a birthday card. He would save money by just making cards instead of buying them. While the saving money portion never happened, Justin soon began to find the same joy you do in creating with paper, and that joy continues to this day!
Justin Adkins is currently designing for Pink & Main, Therm O Web, and Kindred Stamps. Justin often facilitates Facebook Lives where he will create a project from start to finish, and answer questions along the way!


Great card – such a good idea to try and stretch stamp sets to other seasons. Thanks for sharing Justin.
Justin, I love this card and I especially love, love the idea of getting more mileage out of the seasonal stamps or stamps that seem like they are good for one theme! Keep em’ comin’.
This is such a cute card! Love the dies and everything you’ve used!
He’s a sweetie, love the colours.