
Hey friends! It’s Mindy Eggen here with you to share a really fun technique using inks, stencils, and a gel plate!

Supplies | Cardstock: Scrapbook.com; Inks: Concord & 9th; Dies: Concord & 9th; Embellishments: Gina K Designs; Adhesive: Gina K Designs, Scrapbook Adhesives; Other: Rubber brayer, gel plate, Misti
I’ve been playing with my gel plate more and more lately and love the results I get. It really stretches the use of my ink pads beyond just stamping with them. When combining that with stencils, you can create the most unique backgrounds!
You will need a rubber brayer to smooth out the colors. I like to use this technique instead of ink blending to create beautiful blends with minimal effort. Once you start, it’s hard to stop! Pretty soon, you’ll have piles of backgrounds to use.
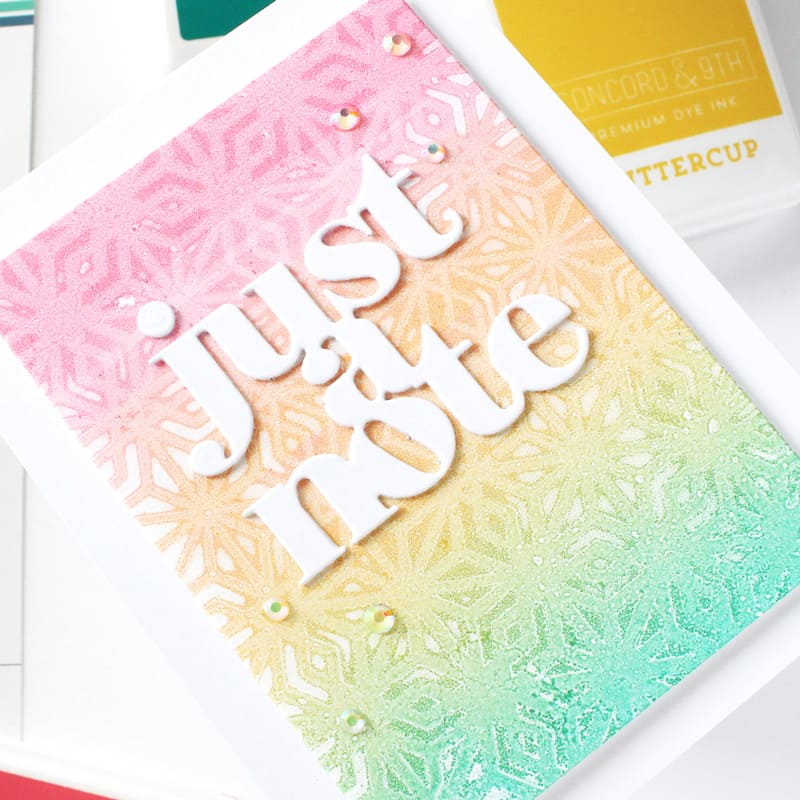
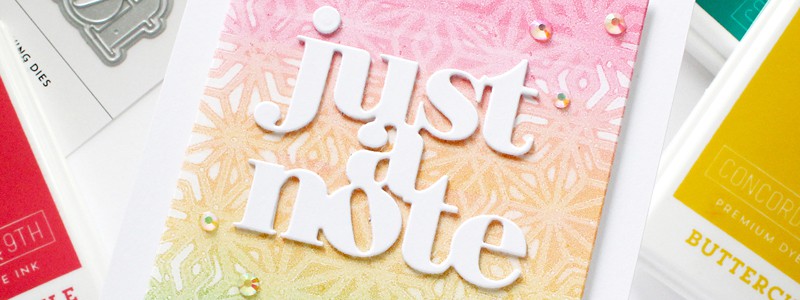
I’m using Concord & 9th ink pads today in Honeysuckle, Buttercup and Oceanside. Once these are blended with the brayer, they create a beautiful rainbow, but you can use whatever inks you may have on hand.
To make my print, I’m using the Crystal Kaleidoscope stencil from Honey Bee Stamps, but this can be used with any stencil. Do you have floral stencils in your stash? Try it!

This is a technique I reach for when I’m in a slump. I can either brayer on different colors to experiment with blends or dig through my stencils that haven’t gotten any love lately. Since I use 80 lb cardstock for most of my card fronts, that is what I’ll use to make my print.
To finish off your cards, all you need is a sentiment. Your sentiment can be a die cut like what I’m using from the Concord & 9th Just Sayings Dies or stamp a sentiment with black ink. Top off the card with a few Angel Aura Rhinestones from Gina K Designs and you have a completed card ready to send off to a friend!
Watch this video that will walk you step-by-step through how I created my card today:
I hope you enjoyed today’s technique. It’s a go-to for me! Thanks for stopping by!


Great way to use the gel plate! I must try this! Thanks for sharing :)
Absolutely love your card!
Beautiful card! I love this technique and another way to use my gel plate.
Loved this technique! Have never seen! Beautiful card!
What a beautiful card. I’ll have to give this a try!
Beautiful! I would love future classes on how to use a brayer (and gel press). I still can’t get a handle on them. I love your cards!
Your card is so very pretty, I love it!
Okay, now I want a gel plate even though I’m still not 100% sure what they are. ????
Absolutely gorgeous