


 60 / 84

1
Apply an even layer of low
tack adhesive spray to one side
of your stencil.
2
Place stencil firmly onto the
cardstock. Load ink onto the
blender brush and apply in a
circular motion, using more
pressure in the center, and less as
you blend the ink out.
3
Gently peel back your stencil
to reveal your pattern. Repeat on
opposing corner of your cardstock.
S TEP - BY- S TEP
Stencil onto your layout
See more of Cathy’s pages, cards, and stories at cathyzielske.comA SPECIFIC STORY
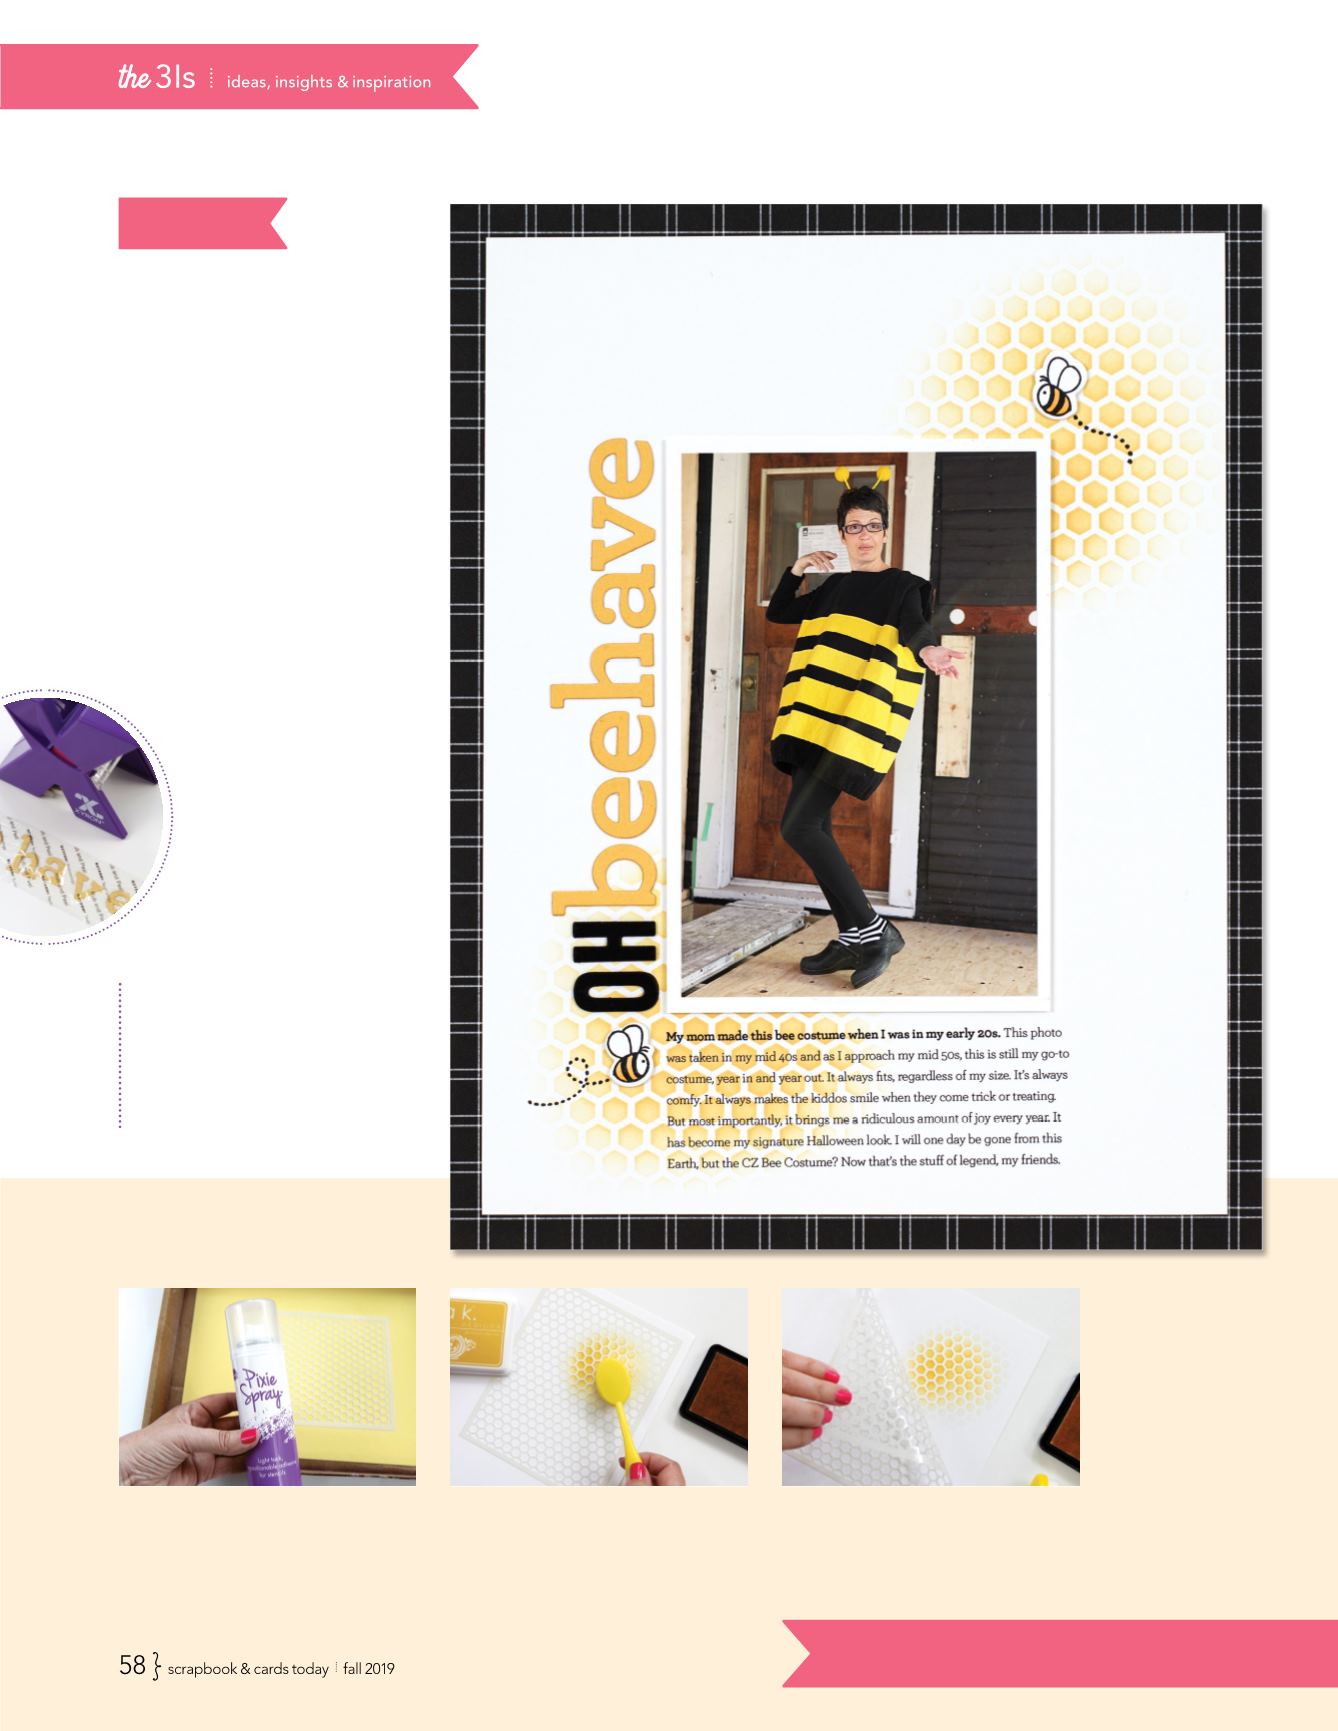
On this page, I’m telling a very
specific story about Halloween.
Specific stories act like a zoom
lens, zeroing in on the details
from a particular event or topic.
The story of my bee costume,
which has been my go-to outfit
since my early 20s, is truly a
legend in the Zielske family.
The photo is from 2010, but
the story is as current as ever.
It’s a Halloween classic!
layout 2
oh beehave
supplies
CARDSTOCK: Gina K. Designs, Hero
Arts; PATTERNED PAPER: Close To My Heart;
STAMPS: Honey Bee Stamps; INK: Gina K.
Designs, DIES: CZ Design for Simon Says Stamp,
Honey Bee Stamps, Lawn Fawn; FONT: Archer;
BLENDER BRUSHES: Taylored Expressions;
ADHESIVE: Gina K. Designs, Scrapbook
Adhesives by 3L
PRODUCT TIP:
Make quick
work of adhering die
cut letters
with a Xyron
Sticker Maker. Just feed
them through the top,
pull out through the
bottom, and just like
that—instant stickers ready
for your project!
DESIGN TIP:
Repeat elements.
Two stenciled
hexagon patterns and two bees create a visual
link on this layout. Plus, reflecting the theme of
the story with products? Bonus!