
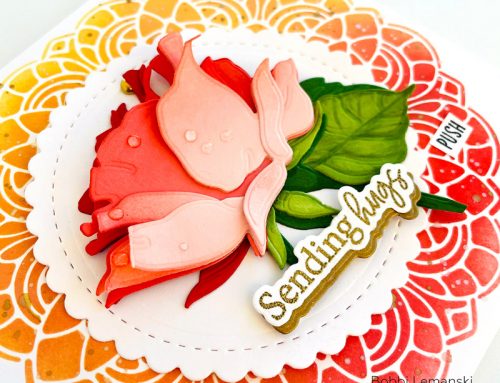
Hi all my fellow card makers out there today! Thanks for joining me here at Scrapbook & Cards Today for this Card Café Thursday! Today I’m sharing a fun technique using stencils! Yes… stencils! Stencils aren’t just for layouts you know! You can use them in all kinds of fun ways on cards.
Join me at my scrappy desk today while I play with some cool stencils and a newer medium to the card making industry called Brusho Crystal Colour.
I wanted to keep the video rather short so I didn’t share how I created my little shaker so I thought I would do that here…
- Stencil your back ground piece of water color paper and trim to a A2 card front base size of 4 ¼” x 5 ½”.
- Temporarily adhere the front stenciled panel to a side folding card base. Place the stitched rectangle die on the front card panel, leaving the card open and flat, pass it through your die cutting machine to cut the window through both pieces of paper. You may want to pass it through a few times to insure the die has cut through both the stenciled paper and the card base. Remove the inner rectangular pieces (you can save them for another a card!) and remove the stenciled panel from the card base.
- Trim 2 pieces of clear acetate slightly larger than the rectangular holes. Using strong adhesive tape, adhere the pieces of acetate to the BACK SIDE of the stenciled panel and the FRONT SIDE of the card base. This will eventually create a clear window.
- Wrap the stenciled panel with some gold thread and secure it on the back.
- On the card front, add dimensional foam adhesive all around the outside of the rectangular window, leaving NO spaces in the foam tape. You need a completely foamed in window so the contents of your shaker cannot escape! Add foam adhesive around the outside edges of the card base too – to allow your entire stenciled panel to be popped up.
- Remove the adhesive backing on your foam adhesive strips and carefully add all of your shaker elements to the inside of your tight rectangular window cavity; right over top of the acetate. You want to trap these items inside the 2 pieces of acetate. Try adding items like sequins, seed beads, glitter, mica flakes or even small die cuts like little hearts or stars to match your card’s theme.
- Very carefully place your stenciled panel over top of the exposed adhesive and line the two windows up again to trap those fun shaker pieces inside.
- Adhere both the front and back of your critter to your window acetate.
- Decorate the inside if desired.
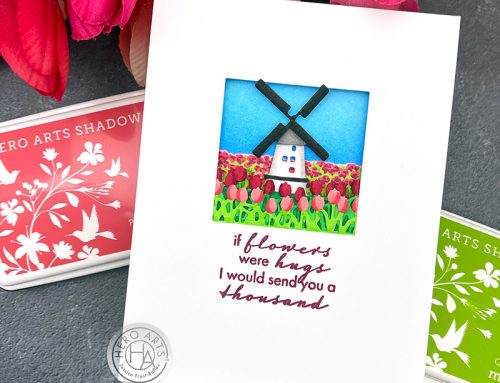
Here’s another fun look at the front of our card today…
Here’s another look at the inside of our card with a cute little sentiment that reads, “I’m only in this for your CUTE BUTT obviously.” done in gold embossing.
And of course, here’s his little pink panther butt… aww…
I certainly hope that you enjoyed learning more about using stencils in your card making and also about the cool medium, Brusho Crystal Colour. I hope you give stencils, water colour and a window shaker card a go!
Thanks for joining me today! Happy creating!
Supplies:
Stamps: My Next Stamp (Rose for You, Cute Butt)
Inks: Memento (Tuxedo Black), Copic Markers, Brusho Colour Crystals (Brilliant Red, Gamboge), Versamark
Paper: Canson (90# Cold Press Water Color), Neenah (Solar white), Stampin’ Up! (Strawberry Slush), Recollections (White)
Dies: Simon Says Stamp! (Stitched Rectangles), Cheery Lynn Designs (Expandable Tiny Borders)
Sequins: Pretty Pink Posh (All Stars), CraftMedley (All Pink)
Embossing Powder: Power Keg (Gold)
Stencil: Tim Holtz (Zigzag)


Oh, darling card and sentiment. Love those Brusho’s. Need to look around for some. Thanks for sharing the video.
What a sweet card!! Love the colors! This is such a fun card! TFS!
Cute card! Love the stamp. The Brusho’s need investigating for sure. Thanks!
Awe, that’s one cute card! Love it :)
Love using stencils different ways. Thank you for showing us the video using Brusho Crystal Colour.
Totally awesome and fun and an idea I need to do for next year. :-)
CUTE CUTE CUTE! Love your sweet card!
These watercolor crystals look fantastic!
Love the Pink Panther (and his butt!)
They look like a lot of fun to use – oh, the possibilities!! Love the card too.
very cute card.
Super cute! Love it!
oh my that is just too fun