
Hello again everybody!
I am SO excited to be back here on the Scrapbook & Cards Today Blog sharing my planner again and how my February has shaped up thus far! (see original post here)
To be honest, I cannot believe we are already almost at the END of February…it just seems like I was posting for you all sharing my January pages and now….February is up! So…let’s do this!
This month I would like to talk PHOTOS.
After reading all of the wonderful comments that were posted last month, it was quite clear to me that for many of you…you all not only love photos…but you had questions. So my goal here is to show you some of the methods and means I use to print my photos so that you can include more of your own precious memories into your own planner. Photos are wonderful…but they are even MORE amazing when printed.
I print photos for my planner in 3 ways.
Primarily, I love to use my Canon Selphy Printer
and My Instax Share SP-1 Printer when printing photos to include in my planner.
I love these 2 devices because they are super convenient. I love that they both print images wirelessly so I can print photos directly off of my phone. (The Canon Selphy also can print images directly off of a SD camera card, when inserted).
I also have a large Canon Pixma printer that I use. This printer is hooked up to my desktop computer and I will use this printer and it’s printing software to also print my photos. Most of the photos I print from my large printer are photos taken with my actual camera versus my iPhone.
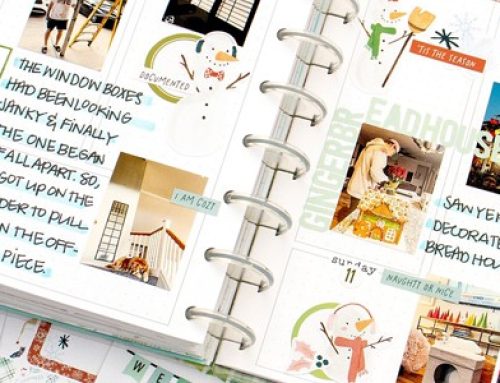
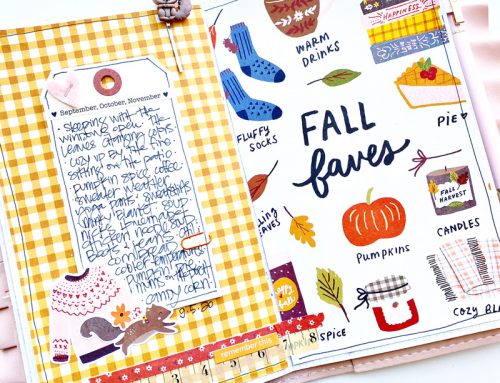
Ok, so since it is the month of “love”, I wanted to focus on documenting a lot of “that love” into my planner. Below you can see I added a ton of small photos to the back side of the February divider page. These are some of the moments I captured this month that looking back, I loved the most.
Most of the photos you will find in my planner are ones taken with my iPhone. I think this is because a lot of the photos in my planner are more of the candid, random everyday moments that fill my life…and well…my phone is always with me so it makes it easier than ever now to capture these moments. My planner is intended to be that glimpse into my everyday life, so adding these photos in are such a perfect accompaniment to that.
I achieved these smaller photos by using my Canon Selphy printer and the PicFrame App. (This is the app I use all the time when wanting to print my photos into smaller sizes. It can be purchased in the App store for a few dollars. It is well worth the investment and works great to achieve those little cute photos we all adore). This is probably my number one way to print and add in my planner photos, so I wanted to break down that photo printing process for you so you can see exactly what I do.
In this step out tutorial I will show how to obtain 6 square photos onto 1 4×6 sheet. I have broken down the process into 2 parts. Part A is essentially “prepping” our photos for print…while Part B is the actual printing process.
So here we go!
PART A “Prepping Photos"
Step 1: Open the Pic Frame App. You will see this screen. In the top right hand corner of your phone screen you will see a dimension. (ex. 1:1…note: however in my example below it is showing 2:3)
You can see that there are so many different compositions available. (NOTE: Have fun playing with these! Exploring and experimenting is part of the fun! Different compositions will yield different photo sizes).
Press it to reveal a drop down list of dimensions.
Step 3: Highlight the photo composition below (2 photos across, 3 going down)
Step 4: Tap one of the blank squares and choose camera roll
Step 5: Select the 6 images from your camera roll feed you would like to print and hit done. The app will automatically place your photos in your squares. (NOTE: you can adjust and resize your photo within the square if necessary by using your finger)
Step 6: If desired, touch the style button to adjust the width between your photos. You can make your photos closer together or further apart. This is a way to achieve that white edge around your photo as well. (more width = more white edge)
Step7: once you are complete hit share (above photo bottom right hand corner) and choose the option to save to your camera roll. You are now ready to print your tiny photos!
PART B: “Printing Photos”
PRINTING A PHOTO COLLAGE USING THE CANON SELPHY PRINTER:
Step 1: Open Canon Print App. (download for free on the app store) Choose photo print.
Step 2: Select camera roll and hit next.
Step 3: Locate photo collage that was created in PicFrame. Press Next.
Step 4: Press Select.
Step 5: Press Next
Step 6: Press Print.
And Voila! Now we have our photos ready to be trimmed and added into our planner!
I know it takes a few steps, but once you do it a few times it is really easy and so rewarding. Not only do you have your photos printed…but they are in such a fun “planner friendly” size! Just trim out using a paper trimmer, or use a square punch and adhere!
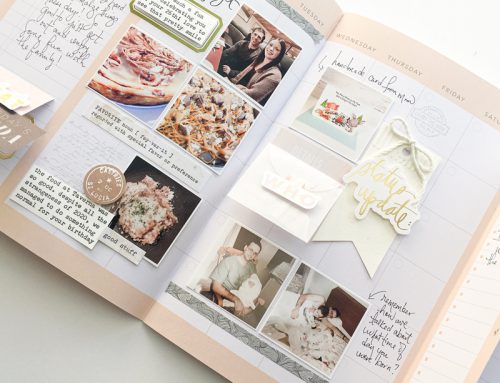
When it comes to adhering and incorporating photos into my planner…there are so many fun ways to do so. Here are just some (of the many) awesome ways I love to display photos in my planner:
- regular adhesive (roller, double sided tape, sticky dots)
- washi tape
- paper clips
- bull dog clips
- stapler
- photo sleeves
- using punches to “crop” photos into fun shapes (circles, squares etc.)
- add a full photo into your planner as a “page” by simply punching holes directly into the photo and adding it into your planner, like it’s own “page”.
I incorporated many of these techniques with my photos this month!
Other fun extras I included in my planner this month was a “love list”. Here I noted something I loved each day in the month of February. Nothing long or complicated. Just a stand out moment of the day and a moment, now memory that I loved.
And I also worked really hard this month at including more “story”. More words, more journaling. More memories. This is probably my biggest personal goal. I want to write more. Each month more and more. So looking back I am pretty pleased at myself that I kept committed. It is important to do so…because it is so easy to forget.
The rest of my pages…
So, in summary when it comes to photos and your planner here are some key things to keep in mind:
-have FUN with different photos sizes and styles
-utilize different printing methods (ex. instax prints)
-experiment with various apps and filters on your mobile device.
-mix up your photos using both color and black and white photos into your pages
-create collages
-PRINT YOUR PHOTOS!!! (you will NOT be sorry!) ;)
Before I wrap up this months posting…I just have to express how flattered and humbled I was by the huge outpouring of love from all of you who took the time to both comment and enter yourselves in the planner giveaway. I read each and every comment and felt so much love and encouragement from all of you. So thank you from the bottom of my heart. I am very excited to continue sharing my passion and planner journey with you all.
Speaking of sharing…I am SO excited to announce that the winner of our planner giveaway is…..
Lindsay, I just love what you do with paper products! I, too, am a visual person. Your design skills are such fun and inspiring to view! You "charge" my papercrafting/planner addiction! Posted by: Donna Karlan | January 31, 2016 at 11:19 AM
CONGRATULATIONS! I am SO thrilled for you Donna! Enjoy your happy mail! Please send an email to catherine@scrapbookandcards.com with your address and telephone number and she will send a note off to Heidi's team to get the prize on it's way to you!
XOXO
……………………………………………………………………..
About Lindsay Bateman
My name is Lindsay Bateman and I have an obsession for all things paper. Photographs are my love language. Combining the two is my idea of heaven…and the perfect day all rolled into one. I am a wife of 7 years to an amazing man named Matthew, and in 2014 we welcomed our miracle baby boy, Madix into our world. Navigating this brand new journey of motherhood and documenting our life through photos and words is now what makes up my daily life, and i LOVE it. Scrapbooking is my solitude, my happy place and I truly would be lost without it. I am obsessed with instagram, all things black and white and anything with sparkles! Scrapbooking is not just my hobby, it is my way of life!

Congratulations to Donna for winning the planner giveaway!!
LOVE your planner and these are all great tips! Now I just need to sell a kidney so I can get a printer!! I have been without one for over 3 years and am going nuts not being able ot print anything out!! Maybe one day I will be able to get one but it will have to wait till I meet my dang insurance deductible of $10,000.
TFS!
Thanks for the detailed tutorial on using PicFrame app to print photos! And for sharing your planner! wonderful memories
Cheers~
Thank you for sharing your tips on adding photos! I love all the different ways you added them to your planner. This is what I need to start doing, too :)
OH LOVE LOVE LOVE THIS!!!!!!
Great tutorial! Your planner is very inspiring! The pictures add so much. :)
Thank you so much for this post! I have the Selphy printer and i love love the small pictures you can do with the app! I would have never realized if I had not seen your post! Going to definitely use!!
What setting do you use when printing? If i use the “rimless(?)” setting it cuts of the sides and with it makes a 1cm border. Or do i need to adjust the frame in picframe before printing?
OMG THANK YOU THANK YOU THANK YOU. Ever since my computer got upgraded… I haven’t been able to print photos from my computer which is where all my pro photos are :(
NOW I don’t take photos much anymore because my selphy is crazy when it comes to trying to print the size photos I want.
I have a collage app on my phone. I really need to start taking way more photos! I WANT TO SCRAP :)
Thanks for the idea! I have the collage app on my phone, I can create the collage and upload it to my computer. I’ve actually already sent one to Walgreens to print out, they always have coupons for photos.. now all I have to do is go the extra step and cut the photo squares for my journal!
As much as I would love to print at home, this is a cheaper option for me.
Thanks Again!