
Hello everyone! I’m so excited to share on May’s edition of Stampin’ Up! Saturday. This week I have some birthday projects to share with you. Birthday cards and gift packaging are always handy to have on hand, right?
My projects today feature a bundle of products including the Party Pop-Up Thinlits Dies and the Party with Cake Stamp Set (available in Clear Mount and Wood Mount).
I made four different birthday cards as well as a gift bag and gift box to share today.
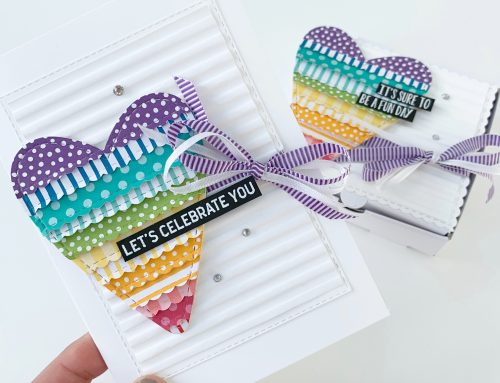
For the first card, I die cut the pop-up from Watercolor Paper and trimmed it away from the pop-up portion. I then used Aqua Painters and some ink refills to give it a touch of watercolor. It makes a beautiful focal point for the front of a card, don’t you think?
I also decorated the inside of each of my cards. I love the fun sayings in this stamp set. I used the cute patterned papers from the It's My Party Designer Series Paper Stack to accent my cards with. I used the Cherry On Top Cotton Paper Assortment with the Fringe Scissors and some Crushed Curry Baker's Twine to complete the card front.
For my second card, I heat embossed the greeting in white on three different colors of cardstock (Melon Mambo, Crushed Curry and Mint Macaron), and then cut them into strips. I used some more patterned paper and twine, along with the It's My Party Enamel Dots in matching colors to complete the card front.
On the inside, I used the pop-up die as intended, and added some more white heat embossing to highlight it. I also backed the entire Melon Mambo die cut with some yellow patterned paper.
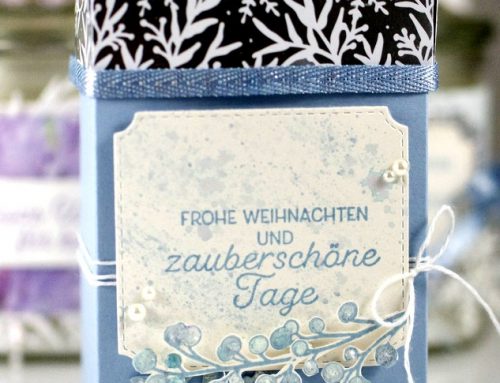
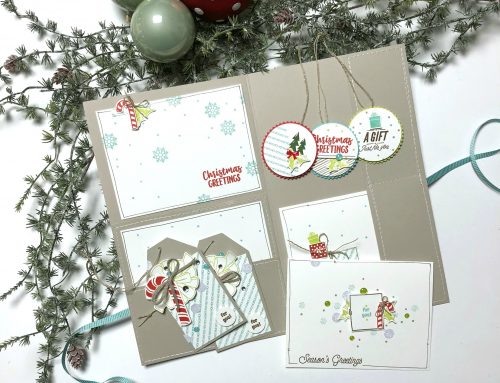
The third project is made with the Gift Box Punch Board and some Sahara Sand Cardstock. I used more of the yellow cotton paper fringed, patterned paper and the wonderful Baker's Twine Combo Pack. The greeting is stamped in Versamark Ink onto Watercolor Paper then heat embossed in white; I then water-colored over each word of the greeting in a different color. This is a great way to make your greeting stand out. I also used the Ornate Tag Topper Punch for the top of the tag. That punch makes it so easy to make a cute tag with any 2” strip of paper!
Next I used the leftover pink letters from the second card above to start the decorations for this gift bag. I selected seven different patterns from the paper pack, one for the main panel, and then six others in 1” strips that are fringed. I started at the bottom and adhered them one at a time, about ¾” above the previous strip. Then I just adhered it to the front of the gift bag. It’s a simple project, but it has a big impact!
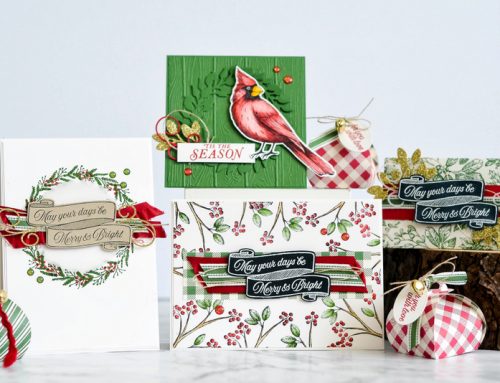
For my fourth project, I wanted to make a card that would work for a masculine birthday, so I left off the bright pink and stuck with more neutral colors. I water-colored over my greeting again, but this time it was heat embossed in black. I added a little fringe, this time using the 2015-2017 In Color Envelope Paper. In addition to making personalized envelopes, it’s thinner than normal patterned paper so it works well with the Fringe Scissors too.
Here is the inside of the same card. See those fun sentiments at work again? There is a cute little punch (part of a pack) that makes cutting out the candles a breeze.
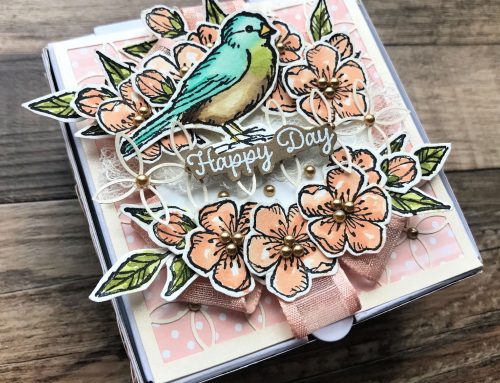
Ok, I have one more card I just had to share! I made it 4” x 4”. It may be small, but don’t let the size fool you—it packs a big punch! I added a layer of Vellum Cardstock over the patterned paper so the balloons and greeting would stand out more, and used a sewing machine for some stitching around the edge before adhering it to the card base. The balloons were punched out using the Balloon Bouquet Punch, and under the greeting I used some of the It's My Party Designer Washi Tape. The balloons and greeting were adhered with Stampin’ Dimensionals for more depth.
The inside is fancy, but it was easy to create with the second pop-up die. I just added some stamped confetti, and let the die stand out against the Melon Mambo Cardstock.
It has been so fun to share these projects with you on the Scrapbook and Cards Today blog. I hope you keep the Party with Cake bundles in mind the next time you need to make some extra special birthday cards or gift packaging. Thanks for having me!
– Marisa Gunn
Thank you so much Marisa! We love how you've used these products and shared the versatility of them. We also love that our friends from Stampin' Up! would love to share the Party with Cake clear mount bundle with a lucky SCT reader! For an opportunity to win, be sure to leave a comment below by May 31st! We will announce the winner on Stampin' Up!'s next inspiration Saturday on June 4th! Good luck!!!
Last month Stampin' Up! offered one lucky reader the Cutie Pie Thinlit Dies!
And the winner is….
Misty congratulations! Please be sure to send your mailing address and telephone number to catherine@scrapbookandcards.com and we'll send that off to Stampin' Up!
Please join us again on June 4th for Stampin' Up!'s next inspiration Saturday! Be sure to leave a comment below for this month's prize too!
~ Catherine

Nice to see the versatility of this die set. It is one I've passed over and now I'll have to give it a second look. Or perhaps I will just won one :) Posted by: Misty Murphy | April 09, 2016 at 08:48 PM