
Hello SCT friends! It's Emily on board today with some ideas on layering. A few of you posted on our Facebook page a while back that you'd like to learn how to layer without having it look stupid. Now, this is a subjective thing, but I've been experimenting with layers since then and hope that I have come up with a few ideas that might encourage you to try layering on your next project. These ideas work equally well for scrapbook pages as well as for cards.
Here are some tips I learned:
- Use smaller prints, there's not as much competition.
- Papers don't have to be from the same manufacturer. This is a great time to mix and match.
- Papers don't have to match, in fact it's better that they don't.
- A few solid (or nearly solid) papers should be part of your design.
- Vellum is your friend.
- Don't stop with paper, die cuts and embellishments add a lot of dimension.
- Circles help to balance out all the angles.
- Layers should be a variety of sizes and both square and rectangular.
- Foam adhesive is also your friend.
- Stitching on the machine adds some nice texture.
- Play with the placement.
- Don't glue anything down until you are happy.
- Take a picture, then start at the bottom and build up.
- Tilting should be embraced.
- Overlapping is a good thing.
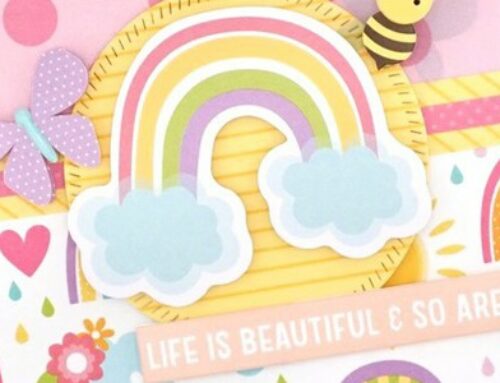
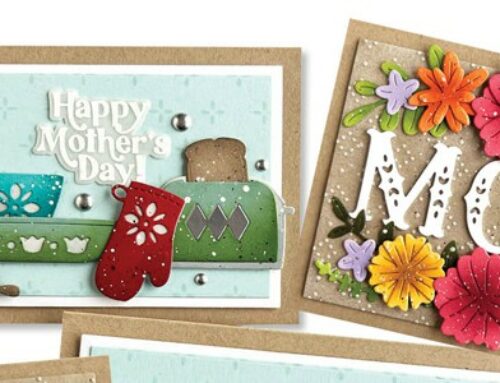
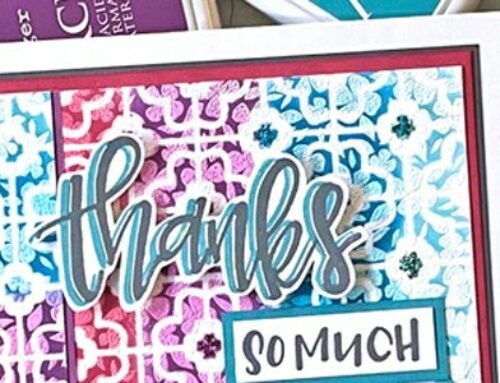
I've included a few examples of projects I've done over the last few months. How many of the above elements do you see in them?
And now I'm going to walk you through how I put together a layout with layers. I just started cutting paper and moving it around a lot, seeing how it looked here versus there, on this layer or that. Keep in mind where you'll be including your title and journaling, that's really important to have it planned before you start gluing things down. Once I got my design to where I liked it, I took a quick picture with my phone so I could refer to it, then I pulled everything off the background and started building.
I first stitched the transparency onto my background.
Then I added layer by layer. Some I stitched, some I added a foam dot on one corner and and glued the rest of it down, others I only used adhesive. For me, the key is to alternate how you attach layers so you get some dimension.
You'll noticed you can see the foam adhesive through the vellum. I'm OK with that because it will get covered up!
Notice I've got a variety of sizes and styles of rectangles. The dark blue strip is going to act as a shelf for the rest of my design.
Here's where the tilting starts. Don't go TOO crazy with tilting, just a couple of papers will be fine.
You don't have to go from big to small in the size of your papers, by offsetting them, you can put larger pieces over smaller ones, it adds interest I think.
Notice none of these papers match. I have a number of manufacturers represented here all ready. Now I'm going to start getting ready to house the photo. I like to use a bold color as the base, in this case, I went with a black and white Project Life card from Cocoa Daisy's Day in the Life: August kit.
At this point, you see that I've got two papers that have a similar color, the dark turquoise. I found that the black and white houndstooth was a little TOO bold, so I made sure the next layer covered two sides of it so it just peeks out instead of being a frame.
I decided I needed just a pop of red, so this piece works as a way to draw your eye to the part of the photo I wanted emphasized, me and my husband.
I added the photo with dimensional foam.
The last step was adding die cuts and embellishments. If you look at all my examples, these little extras are what give the design movement and textures.
And that's how I add layers to my designs! I hope you'll try some of my tips and create your own layered project.
GIVEAWAY – DAY 10!!!
Today we are celebrating our friends from BoBunny! Jan, the owner of BoBunny and her son Matt, have been great supporters of SCT since the beginning and Carley, well, she is a dream to work with! We are also excited to have Jeri joining us a Crop & Create Moncton next spring. Everyone loves Jeri! BoBunny was one of the earliest companies in our industry and have always been a favourite to many. We have loved seeing them evolve from paper and stickers to a company with a vast range of innovative products enjoyed by papercrafters all around the world. We could not be more pleased to be celebrating their years of support and in turn they could not be more pleased to celebrate you with this awesome giveaway…
Rich golds, warm greens and brilliant reds make this line perfect for the upcoming fall season. And what a prize package it is! To be entered to win it, please leave a comment below by Wednesday, September 2nd. All winners will be announced on September 4th!
After leaving a comment below, please take a moment to give Jan and her team a BIG "SCT thank you!" on their Facebook page HERE. No doubt she will read every comment!
Here are all the places you can be inspired by BoBunny and their incredibly talented team:
Facebook: BoBunny
Instagram: @mybobunny
Blog: BoBunny
Website: BoBunny
Pinterest: BoBunny
YouTube: BoBunny
Be sure to join us tomorrow for the big reveal of our latest special issue and of course, another giveaway! And if you are brand new to our blog, welcome! To learn more about our celebration this month, be sure to read this post.
~ Catherine, Publisher, Scrapbook & Cards Today
Thanks for joining us today!


Beautiful prize! I like the tutorial on the layers. I am not sure I will be able to do it but this gives enough ideas I should be able to give it a try.
Love love love the butterflies and the colors in the BoBunny prize! Thanks for the great tips on layering, it’s one thing I hesitate to do, unless I am CASE-ing someone else’s layout since I know how it will turn out. As always thank SCT for the great insipration
Bo Bunny has beautiful
and fun products. This
collection looks lovely!
Carla from Utah
Great examples of layering. Thanks for sharing your process. It’s something I enjoy but struggle a little with. Thanks very much for a chance to win. Michelle t
Love this kit from Bo Bunny – as usual just wonderful colours and designs.
I struggle with layering and appreciate your tips. I love BoBunny and purchased their collections from the beginning. I love them!!!
BoBunny always has the most gorgeous paper lines. This one is wonderful again and I can only hope I win it.
Thank you Emily for sharing how you layer.
Interesting to see the photo collage of the layering layout. I need to layer more :) Alway love BoBunny style.
Beautiful layouts – I definitely have trouble layering because it seems so “unstructured.” Thanks for the tips!
I love Bo Bunny! Thanks for sharing!
Thank you for your tips in layering. I don’t do it much at all, but having those tips might make me more likely to do it.
Wow to layers, not sure I could do this and not have it look like a hot mess, but will try using your tips.
Awesome collection with fabulous color!!! So many delightful goodies!!! Thanks for sharing with us!!!
What an awesome page! I absolutely love the design and am not so great at layering myself…maybe it takes practice. Anyway, this prize pack looks awesome, I love the concept! Love Fall and love fairies! Thanks for sharing.
Katie B.
Bo Bunny is the best. I love the graphics and the colors and the paper quality is ALWAYS superb!
Great layering tips and tricks. Thanks for the step by step pictures. Even though I don’t do scrapbooking, I do struggle with layering.
That BoBunny collection looks delighful. Those warm colours are so pretty. Thanks for the chance to win.
I love the beautiful fall colours. Bo Bunny has always been one of my favourite designers. Almost every Christmas album is done with their beautiful designs. Love their chipboard and the lovely detail to their elements.
Thanks so much for the wonderful tips for layouts and for the fabulous Bo Bunny give away. Love it!
Enchanting this BB collection is. I will embrace some of these great tips shortly… being in dire need of a planner, I decided to go for a DIY using my stash of supplies. Got quite frustrated with the method of matching collections and manufacturers. Now, I feel free to start with one favorite PP and then build different layers with PP and embellishments, even if it means going outside the boundaries of a collection. Cheers!
What a gorgeous colour combo! Perfect for my upcoming fall pages ;) Lots of love from Thunder Bay, ON!!!
Love seeing how you did all the lovely layering! Love Bo Bunny collections and this one is no exception! Perfect colors and designs! And love all the alphas, embellies, etc.!
Thanks for the awesome tips on how to layer and use different papers together on a layout! How fun and freeing! Absolutely love BoBunny and would love to win this generous prize giveaway! Am envious of those of you who will be able to see Jeri in Moncton next spring! :)
BoBunny’s ‘Enchanted Harvest’ collection has a wonderful vintage and romantic feel. I love the traditional color palette of golden yellow, green and deep red! BoBunny definitely stands out as a trend setting company in the industry. Thanks BoBunny for this very generous giveaway!
I don’t layer much usually, but I love the effect when I do!
Love the vintage look of the Bo Bunny enchanted harvest collection!
First of all, I am a HUGE FAN of ALL THINGS BO-BUNNY…from the moment I first laid eyes on them. ( I am totally not kidding!)Still use the double dot cardstock and covet the stash I have.
Secondly, EMILY PITTS!!! Where did you come form or Where have I been not to have noticed you until today? I so adore layering and your layouts are PURE BLISS! Thanks for sharing your tidbits of wonderful information!
One of the best posts yet!
I LOVE Layering!!!!!!!!!!!
Great Bo Bunny Kit!
Great layout and beautiful BoBunny prize!
I love fall. We will have our 15th Annual Bonfire Chili Dinner the first Saturday of November. This would be awesome for scrapping that event.
Thank you so much for the great tutorial on layering. I don’t scrapbook very often, and when I do I am kind of at a loss at how to combine patterns. This was really helpful and I’ve bookmarked it for later. These tips are great for layouts and cards both! Thanks for the chance to win some beautiful Bo Bunny goodies!
Thanks for the tips and the chance to win! I really love this collection those elements and colors are some I’ve caught myself using frequently.
Fabulous prize! I love Bo Bunny-thanks for the chance to win!
Bo Bunny products are always among my favorites and Enchanted Forest is gorgeous! The vintage designs and warm colors make this a go-to all year around! I also really appreciated the tips on how to combine and layer papers on a scrapbook layout. I don’t scrap nearly as often as I would like to but I feel inspired now!
BEAUTIFUL!
Gorgeous line by Bo Bunny!
All of these items used are so beautiful.
love that scrapbook page you have put together with all of those fabby papers and designs! :)
I am just getting acquainted with Bo Bunny and really enjoy the fun colors and designs in their paper collections. what a fun giveaway to get us all ready for fall! :)
Wonderful layering ideas. The
Bo bunny collection looks great too.
I {heart} Bo Bunny. Thanks for the prize chance.
Thanks for the examples on layering – you make it look so easy, and thanks for the chance to win this gorgeous prize
Thanks for the layering tips! I love BoBunny and I really love this Enchanted Harvest collection. Fall is my favorite season and this collection will be great for it.
I simply love BoBunny. These colors on Enchanted Harvest paperline are my absolute favorite. I sure hope I win them!!! Thx for the generosity BB!
Thank you so much! To layer different patterns and embellishments can be so intimidating!!! It is nice to know that I’m not the only crafter who might struggle with this!
Love the Enchanted Harvest colors and the butterflies, the fairies are just too cute!!!. Thank you for the layering tips. Very helpful. Will be trying these tips on next project. I did not think using all the different papers like that would work or look good..BUT THEY DO!!! Great job!..Love your layouts! AND THANKS FOR THE CHANCE TO WIN THE FANTABULOUS PRIZE!!!!!
Thanks for the layering tips and for the chance to win this gorgeous kit!
wow—awesome!! thank for the tips! Awesome giveaway!
I love Bo Bunny paper quality, colours etc. it would be a treat to win this wonderful gift.
love your products and all the great colours. just love the all the matching pieces of your kits thanks for another great give away SCT
What an incredibly beautiful collection, Bo Bunny’s Enchanted Harvest is. Absolutely love it! WOW! The colours are awesome and just so fall! Thank you Bo Bunny and also thanks to Emily Pitts for all the great layouts and tips on how we could make ours look better. Thanks SCT for bringing all this together for us.
Awesome projects…love the stitching and the layering! And Bo Bunny enchanted harvest…Oh my goodness…it looks so lovely! Fall is my favourite time of the year!!!