
Welcome to the blog today! Don’t check your calendar—we have a special New & Noteworthy post today from our friends at Ranger, who are not only sharing their newest products, but a fun tutorial as well! Let’s check it out!
![]()
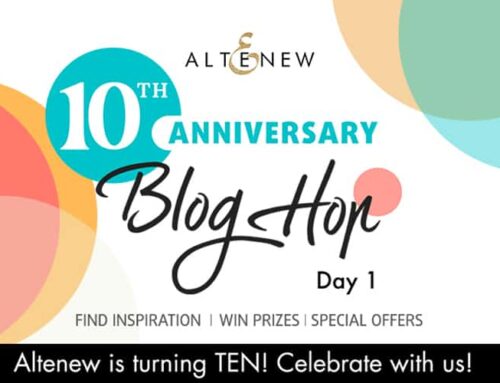
Today we are celebrating the arrival of SIX gorgeous new Ranger Archival Inks and coordinating shades of Stickles Glitter Glue! Take a look at these gorgeous new hues:

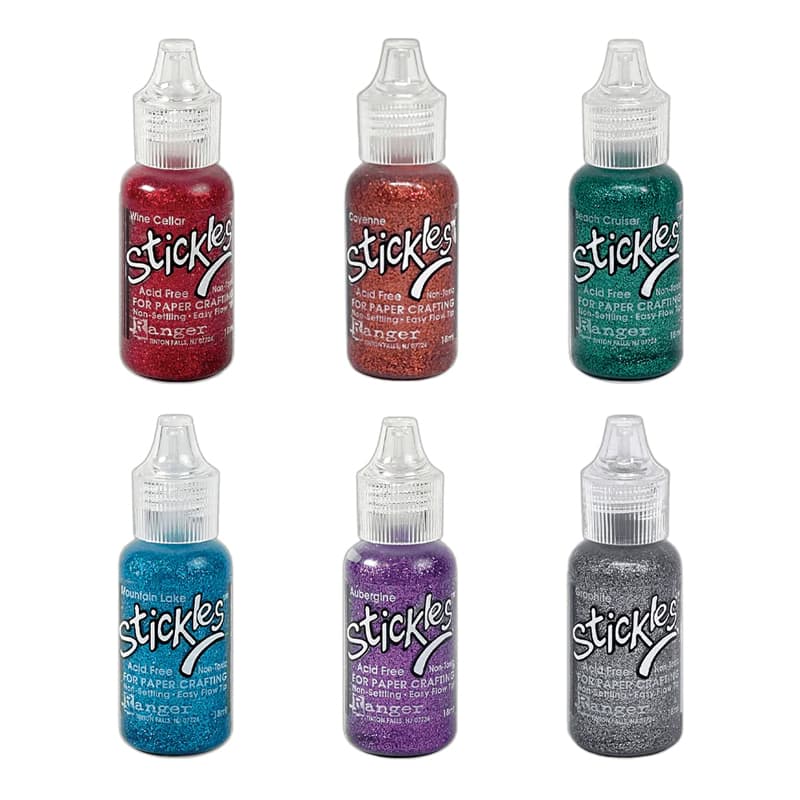
Let’s follow along as Lauren Bergold uses these beautiful new products to create a colorful ‘thank you’ card!
The emboss/resist technique is one of my favorites, but this is the first time I’ve tried stenciling ON TOP. It won’t be the last, however, because I’m hooked on the combination of bright color with soft texture!
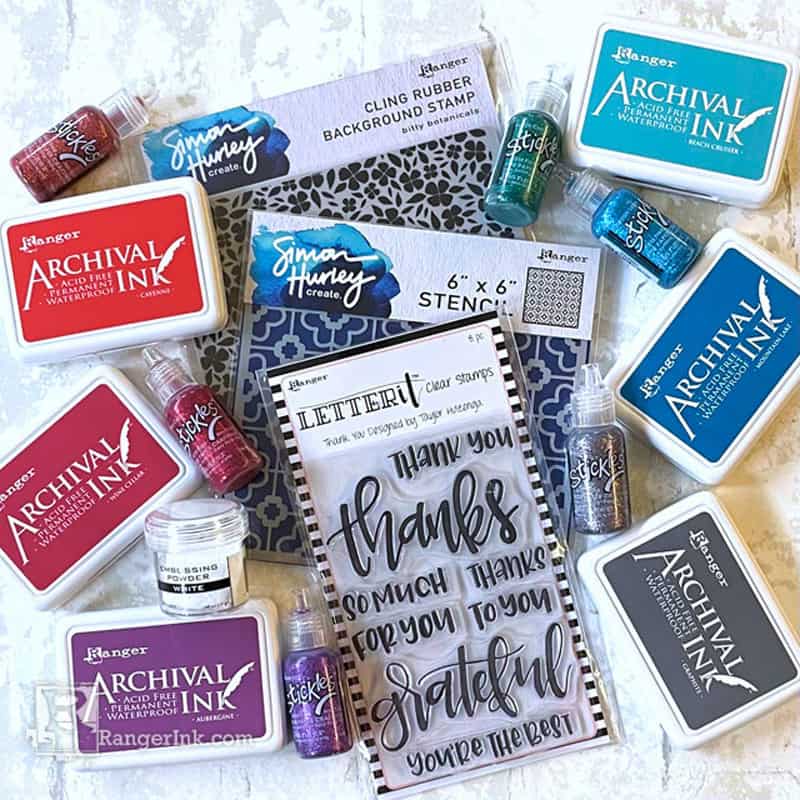
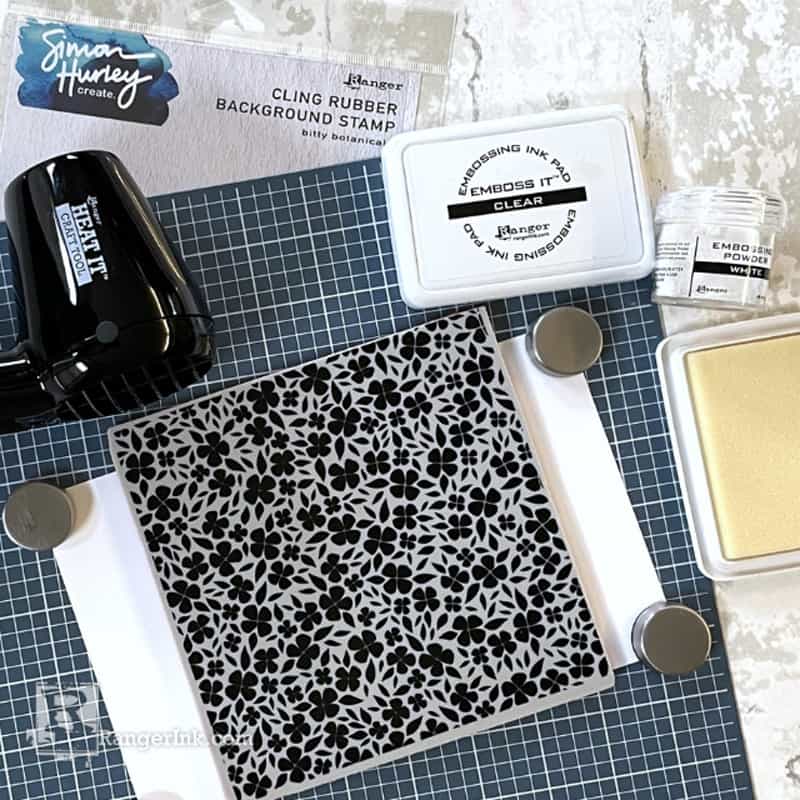
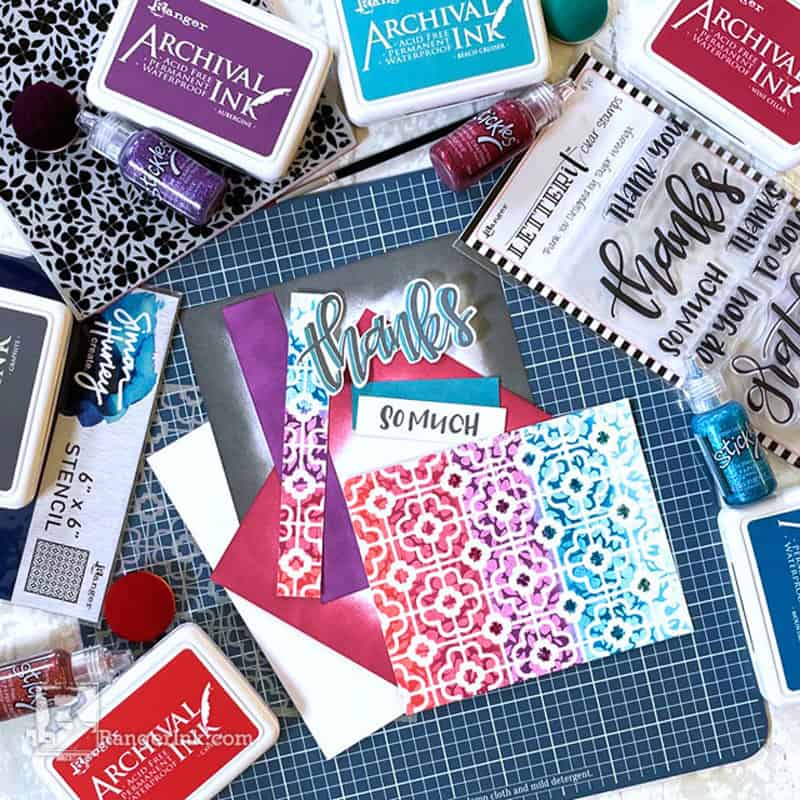
Step 1: Gather Supplies: Ranger Archival Inks in Cayenne, Wine Cellar, Aubergine, Mountain Lake, Beach Cruiser, and Graphite; coordinating Stickles Glitter Glues; Simon Hurley create. Bitty Botanicals Background Cling Stamp, The Loo! Stencil and Stark White Cardstock; Letter It Thank You Clear Stamp Set; Emboss It Clear Embossing Ink Pad; Ranger White Embossing Powder.

Step 2: Stamp the Bitty Botanicals Background in Emboss It clear embossing ink on Simon Hurley create. Bright White cardstock. Sprinkle with Ranger White Embossing Powder, tap off excess, and melt powder with the Heat It Craft Tool. Set aside and allow to cool completely.
Step 3: Use the magnets from Wendy Vecchi’s MAKE ART Stay-tion to secure Simon Hurley’s The Loo! stencil firmly on top of the embossed panel. Use a Mini Ink Blending Tool and Domed Foam to apply one Archival Ink color to each vertical row of tiles, in the following order: Cayenne, Wine Cellar, Aubergine, Mountain Lake, and Beach Cruiser. DO NOT wipe the excess ink from the embossed pattern.
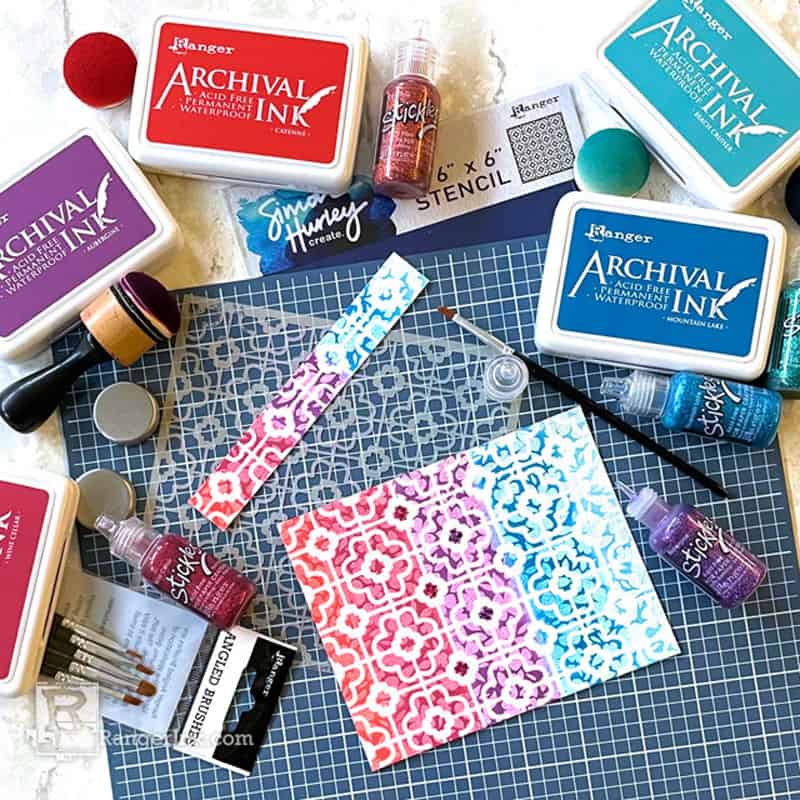
Step 4: Trim the embossed panel to 4.5 x 5.5″ saving the offcut for later. Apply coordinating colors of Stickles Glitter Glue to the small flowers between each set of embossed tiles on the large panel. Set aside on a flat surface and allow to dry completely.
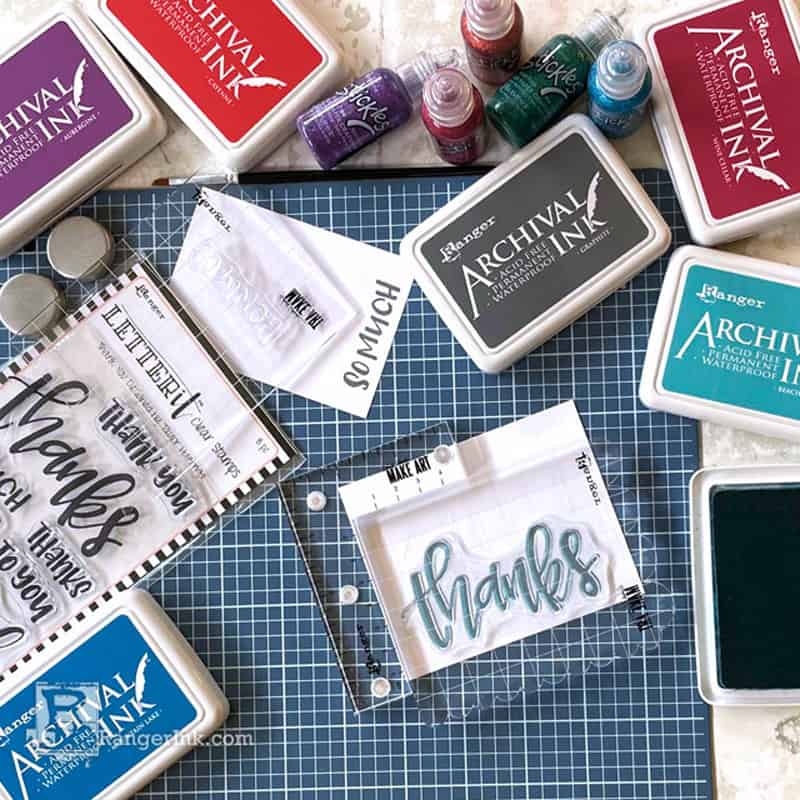
Step 5: Using Letter It’s Thank You Clear Stamp Set, stamp “Thanks” in Graphite Ink on white cardstock and allow it to dry for a few seconds before repositioning the stamp just slightly to the left, and stamping a second time in Beach Cruiser Archival. Cut out neatly around the word using scissors. On a separate scrap of cardstock, stamp “So Much” in Graphite, then trim it into a neat strip measuring approximately 5/8 x 2″.
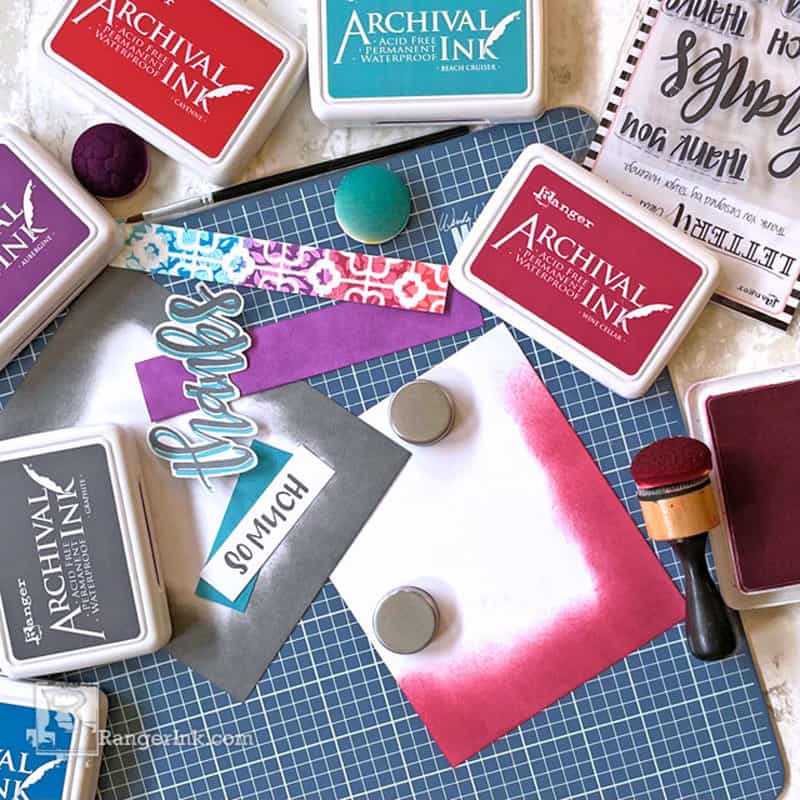
Step 6: Trim a piece of Simon Hurley create Stark White cardstock to 4.75 x 5.75″ and apply Wine Cellar Archival Ink around the edges. Trim another piece of white cardstock to 5 x 6“ and apply Graphite Archival Ink around the edges. Trim the offcut piece of the embossed panel to 5/8″ and matt it on a 7/8″ scrap of white cardstock that’s been inked with Aubergine Archival. Mat the “So Much” sentiment on a scrap of white cardstock approximately 7/8 x 2.25″ inches that’s been inked in Beach Cruiser Archival.
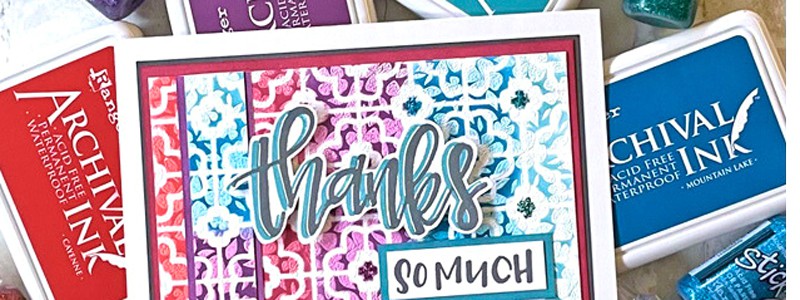
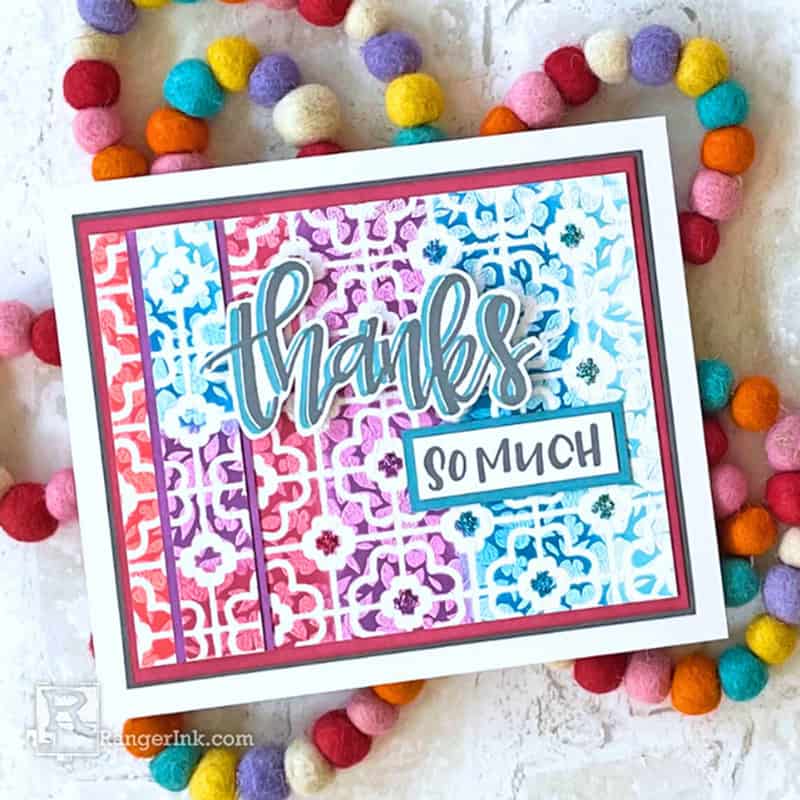
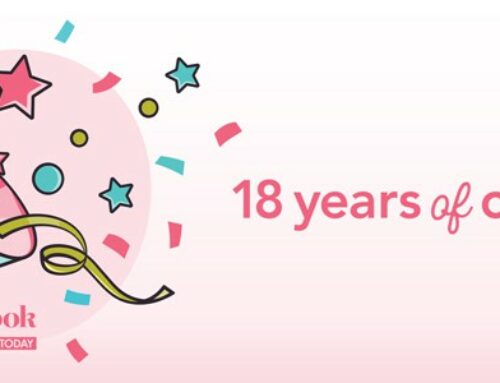
Step 7: Assembly: Add the Aubergine-matted offcut to the left-hand side of the embossed panel, as pictured, using Perfect Card Adhesive. Trim off the excess at the top and bottom. Mat the embossed panel on first the Wine Cellar panel, and then the graphite panel, using Perfect Card Adhesive. Add the “So Much” sentiment flat as pictured, and mount the cut-out ‘thanks’ just above, on small pieces of Letter It White Foam Roll Tape. Affix the finished design panel to a 5.5 x 6.5” white card.
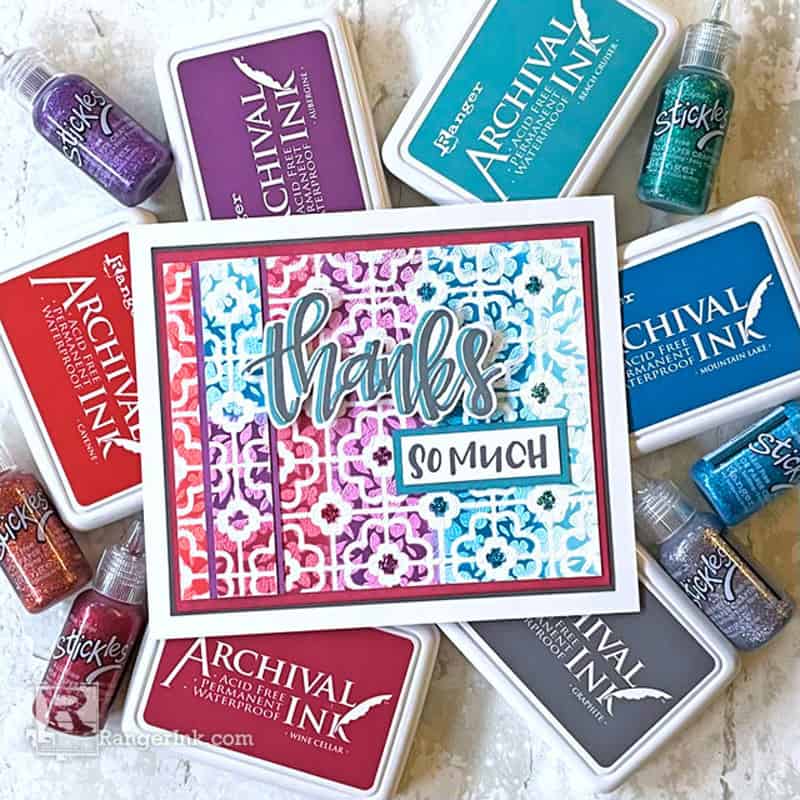
Step 8: Stamp an additional sentiment on the inside, if desired; sign the card and address to a favorite friend who could use some happy mail. Send it ASAP and prepare to make their day!
My name is Lauren Bergold, I live in central New Jersey with my husband of 30+ years. My favorite medium is paper and I especially love making cards and gifts for family and friends. I teach paper crafting classes, as well as collect and compile vintage and found papers. You can find me on my blog, All the Good Blog Names Were Taken and on Instagram where I love to connect with other artists and makers!
Be sure to find the latest products and project tutorials from Ranger at the links below!
Ranger: Shop | Instagram | YouTube | Facebook
![]()

What a beautiful card and wonderful tutorial by Lauren! Don’t you love those new Archival Ink and Stickles hues? If so, you can snag them with a $50 gift card giveaway from our friends at Ranger Ink:
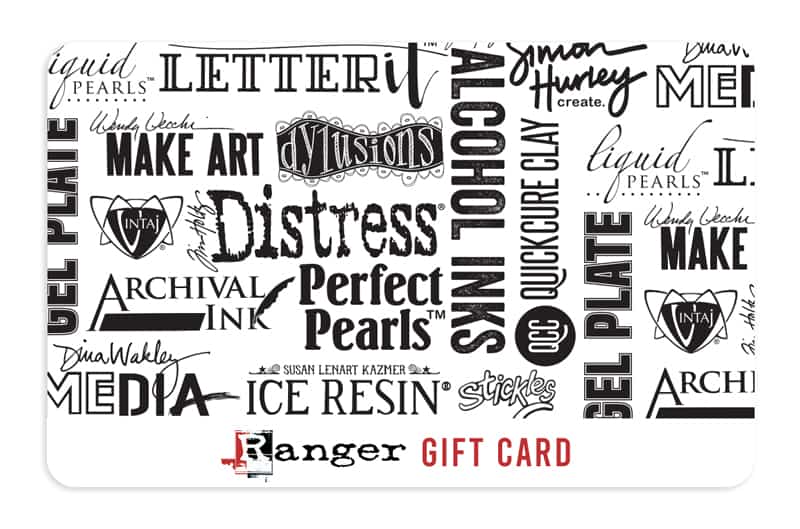
Ready to shop at the Ranger Ink store with this gift card? Leave a comment on this post by midnight Eastern time on Wednesday, April 10th, telling us which colour in the new Archival Ink and Stickles hues is your favourite! A comment will be selected at random and announced here on the SCT blog on Friday, April 12th. Good luck!
We will see you back here tomorrow for more papercrafting inspiration, and don’t miss another New & Noteworthy post this Friday!


Ohhhh! Such pretty colours, but if I had to pick just one, it would be the Aubergine! Have a great day everyone.
Lovely card! I think my favorite new color is Aubergine, with Wine Cellar a close second.
I’m loving them all, but particularly the Wine Cellar! Great tutorial!
Love a good tutorial and I LOVE Beach Cruiser!
Amazing card! Love it! I think my favorite new color is Aubergine.
All the colors are beautiful, but Wine Cellar may be my favorite! I have many, many colors of Stickles, but now I need more! Thanks for the giveaway!
Cayenne or wine cellar? Cayenne it is. Great tutorial, beautiful card!
I gravitate to teals and turquoises so Beach Cruiser is for me!
All of the colors are gorgeous, but I think Mountain Lake is my favorite. Maybe that is because I would have used it on my last project as I was looking for that exact color. HAHA!
All of the colors are right up my alley! Beach Cruise is really pretty!
Awesome techniques on this beautiful card! I love the new Beach Cruise color!
Mountain Lake
Beach Cruiser is my favorite, but I love them all.
I love the Beach Cruiser in both products. They look to be awesome. The colors are gorgeous!!!
All the new colours are beautiful, but my favourite is Beach Cruiser.
It’s really hard to choose a favorite, it’s a tie between Beach cruise and Mountain Lake! Love the new ink and stickle colors!
Really nice new colors! I am loving the beach cruiser color!
Beautiful new colors! Wine Cellar is my favorite!
I actually like the graphite color and co ordinating stickles. Aubergine would be my second color choice.
I love all the colors but my favorite would have to be the beach cruiser.
I love the versatility of the graphite colour! ❤️ 😍 I also love the card technique!
Mountain Lake is my favorite!
It’s a toss up for me between Wine Celler and Mountain Lake! This card is fabulous! I love it! Thank you for sharing!
So excited about this giveaway! I have all the archival ink colours and need to complete my collection! I love the new aubergine. Always need more purples!
All the colors are gorgeous but if I have to pick a favorite it would be aubergine. I’m a fan of Stickles so I have them in almost every color. I wouldn’t mind getting the new colors.
Mountain Lake is my favorite!
Don’t even need to think about it. Favorite color is wine cellar😀. Thank you for the inspiration with this lovely card!!
Love these colors!!! Great giveaway!
so many beautiful colors but it has gotta be beach cruiser!
Love these, adorable!
I think my favourite is the Aubergine, but I also really like Mountain Lake ;) I love the colour resist technique!! Thank you for the inspiration.
Such beautiful colours and if I had to pick just one I think it would have to be Aubergine. It looks so rich – love them all though!!!
Aubergine is my favorite color. It looks like a good match with all the other new colors.
Loving ALL the jewel tones, but the aubergine (purple) is stunning!
Definitely Beach Cruiser! Love that color!
Such scrumptious products and colors!! Loving the Cayenne stickles and Beach Cruiser Archival ink pad!! Gorgeous card sample and tons of inspiration!!
My fave is Wine Cellar followed very closely by Beach Cruiser!
Aubergine is my favorite. Love all of them, though.
These are all fantastic colors! I would have to say my favorite is the Mountain Lake
So pretty! Aubergine and Mountain Lake are my faves!
It is hard to choose a favorite. I think Graphite would be the one I use most but I really like Beach Cruiser for a fun color.
I love using Stickles to add pops of shimmer and shine to my projects. Mountain Lake is definitely my favourite colour ♥
I think fave color is Aubergine!
So hard to choose just one! I think I’m going to have to go with Aubergine, love the bright purple!
Oh my goodness they are beautiful! I can’t decide between Mountain Lake and Aubergine
I like all the colors but I am partial to Mountain Lake.
Aubergine is definitely my favourite in this new collection of Ranger Archival inks and Stickles. Purple is my favourite colour (since I was a kid) and this is a great shade.
If I had to pick one Aubergine!!! Thanks for the chance to win!
Mountain lake
My favorites are a tie between Cayenne and Beach Cruiser. They are all super lovely, though!