
Welcome back everyone! It’s Lindsay Bateman here and I am so happy to be back with you all this month. I so look forward to talking about planners and my memory planner journey with you all. It is always one of my favourite topics to chat about. So I am so glad you are all here joining me again. I appreciate you all so much.
For this month, the month of May…I thought I would switch things up a bit and talk a little “Planner Basics” instead. To me, planner basics are essential. They are the tools that I use to keep me going, keep my memory planner flowing, and help me achieve success in my daily documenting. I find it I keep things “basic” and within my reach, I am way more successful in my planner workflow.
As much as Memory Planning is fun and rewarding, it still requires work, effort and commitment which sometimes can be distracting from the “fun” of it. So my intention today is that hopefully by sharing with you all some of the quick and simple ways I organize and set up my tools and products perhaps it will help alleviate some of the planner stress and/or guilt you may feel when life get’s busy and you don’t have a chance to get to your planner as often as you would like. These are my tried and true 6 Planner Tips for basic planner organization/documentation success!
Planner Basics Tip #1:
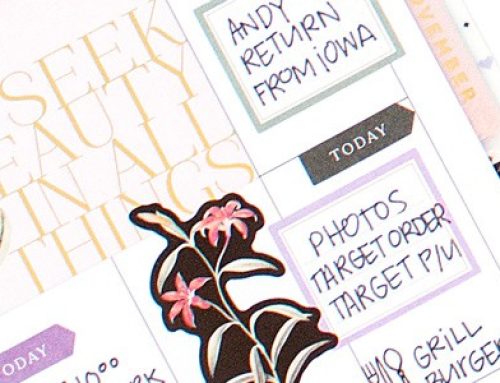
Purchase good pens…and purchase A LOT of them!
Nothing is more frustrating then feeling like you are “wrecking” your Memory Planner with junky pens. I am a FIRM believer in investing is good writing tools. I even have favourite tip sizes and ink colors. I am picky. But it is true. A junky pen can really make a huge difference in both the overall look and feel of your planner. Plus, if you are taking the time to write and it does not visually appeal to you, the writer, then it is easy to become unmotivated and distracted by it all. Writing and journaling should always evoke a nice aesthetic touch to your planner. It is art just like everything else.
At the beginning I would often ask my fellow scrapbookers and friends who loved to journal what writing tools they used and/or recommended. After taking their advice and trying out various brands and types, it was decided that the best success I had with pens was with the Zig Millennium brand.
I love the crisp black ink and the fact that they come in a variety of tip sizes. For me personally, the smaller and finer the tip the better. I gravitate to pens that have a .01 or even .005 tip size. I was able to find these pens on Amazon.
Planner Basics Tip #2
Invest in a good hole punch.
Since my planner is always a place reflecting my life and my daily day to day…I want to be able to add in things, photo memories or memorabilia easily and effortlessly.
The Heidi Swapp Memory Planner punch is such an awesome tool for always making it super easy to pop in extra “stuff” into my planner. This means I do not have to procrastinate or wait or “pile” extra stuff somewhere until I get around to it. Having a hole punch always close by and handy makes it quick and efficient to add in what I need to, when I need to.
Planner Basics Tip #3:
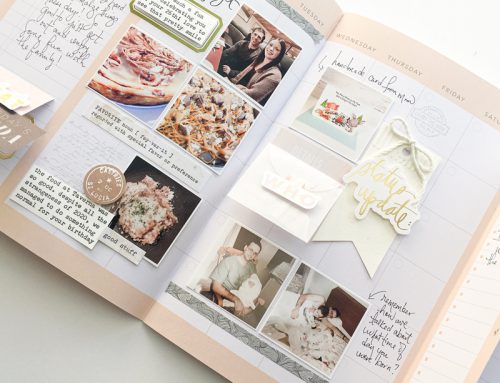
Cute storage containers are ALWAYS a must.
Having supplies (especially your designated planner supplies) organized somewhere will always remain a key to success when using your planner. If you do not have to spend loads of time looking for something, but instead have it close by and at hand, odds are you will not only spend less time looking than doing…but you will also actually USE what you HAVE.
Most of my storage containers are mis matched and purchased during various times when I was actually not looking to purchase storage containers. They were just found along my travels and added to my scrapbook studio collection. I love finding homes for pretty containers and filling them with cute planner supplies. Not only are they functional for storage but they also look great sitting on my work table or book shelf. This little beauty was found at Target when I was down in the States. I just love it and how perfect is it for holding all of my planner clips?
Easy and accessible clips will have you adding and adhering stuff into your planner in no time. I always have this organization tool within reach when working with my planner.
Keeping popular “go to” items, such as tabs, journaling cards and stamps in cute little containers is always a huge help to me as well.
Having all of these things together makes my actual “work” time so much more productive. Who has time to be looking for stuff? Not this girl! ;) Less work…MORE PLAY I say!
Planner Basics Tip #4:
Always have a stash of supplies ready for the road.
A strategy that has hugely helped me in staying current with my Memory Planner has been keeping a carry case of planner supplies ready for when I am “on the go”. If I am out of town, or away from home for a few days all I need to do is simply grab this bag and my planner and I am set for documenting while being away from my studio. All I have simply done is fill a zippered pencil bag with some of my “must have” supplies from my stash. No, it is not everything…but enough to do the job I need to do while being away. If I want to still add in “extra” then I can do that when I return. But the bulk is done, and I am more than happy about that. I always leave my supplies in here, replenishing when I need to so that it is ready for the next time I need to be gone.
Planner Basics Tip #5:
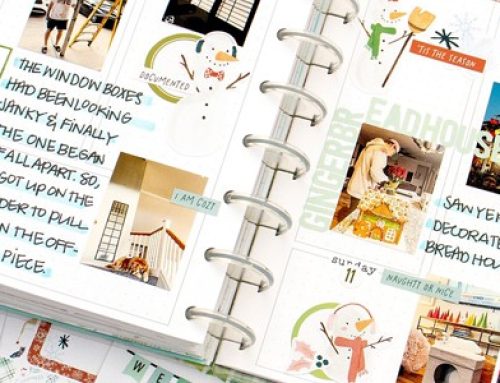
Always have Washi Tape close by! And use it with and ON everything!
Washi will always remain my #1 method when it comes to adhering elements and extras into my planner.
Not only is it an awesome adhesive, but it is a super fun way to add in colors, patterns and just that little extra touch we are always sometimes needing in a spread. Plus, it’s sorta addicting right?!? Washi is such a simple way to achieve great results when working in a Memory Planner. It really takes no time at all when using washi tape to make something look great. It just is that perfect added touch!
I hope that you have enjoyed this little “Planner Basics” installment. It is fun to switch things up a bit and considering we are almost halfway through 2016 sometimes we all need a little help and motivation when it comes to getting the documentation done!
I look forward to meeting with you all again next month where I will be sharing both May and June’s Memory Planner pages with you in a double feature as we celebrate making the 6 month mark of our Memory Planner journey! See you then!
~ Lindsay Bateman
Want to see more of Lindsay's work? Here is where you can find her!
- her blog: Simple Reflections
- on Instagram @lindsaydawnbateman
- on YouTube

Great tips!! I love your black and white cups and organizer!! Crisp and beautiful!! TFS!
Nice information and the photos are great too!
Great tips! TFS
Really enjoying this series with Lindsay! I always like seeing how people use their planners to document & plan the everyday moments that make up our routines. I use mine for so many different reasons but I think I can add in a few of these tips! Awesome as always!
Love the black and pd white organizer. Half the fun of creating is organizing .
Some really great planner tips today, Lindsay! Thanks so much for continuing with this series! I’m enjoying it a lot!
I have wondered how you keep up with the planner, now I know, thanks, loved the tips.
This is great!! I’m new to planning but had no clue where or how to start, organize, etc. I have planner and craft ADHD I think. Now you ha e given me exactly what I need. Thank you!!!
What brand name planner do you use? I’m looking to get serious about planners, but there are so many choices.
Thanks so much for these tips! I need motivation!