

Today we want to welcome Natasha Polite to the SCT blog to share her talent with us! We met Natasha in our Creatives of Colour blog post and have loved seeing what she has been sharing on her social media channels! Let’s take a few minutes to see what she has to share with us today—a card filled with whimsy and fun—along with a process video so that you can see how it came together!
![]()
Hi crafty friends! My name is Natasha of Polite Creations. You can find me on Instagram, YouTube, and my blog. I am excited to be joining you on the Scrapbook & Cards Today blog!
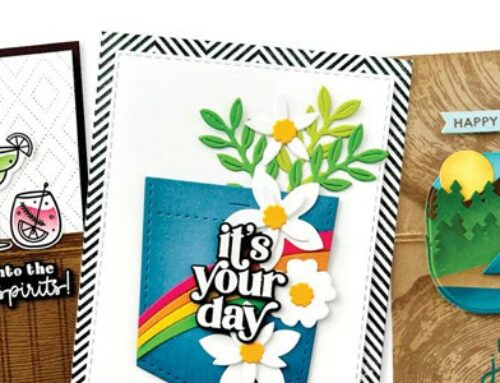
Today’s card is filled with vivid colors and textures that are sure to brighten someone’s day. I have been wanting to use the Birthday Dinosaur and Birthday Balloons die sets from Spellbinders for a while now, and an upcoming summer birthday presented the perfect opportunity!

Supplies | Spellbinders: Birthday Dinosaur Die Set, Birthday Balloons Die Set. Label 59 Nested Dies, Optical Arches Embossing Folder, Curved Everyday Sentiments, Gold Foil, Glimmer Hot foil System, Platinum Die Cut Machine, Spellbinders Chamomile Cardstock; Hammermill: Premium Color Copy Paper 100lb; Ranger: Squeezed Lemonade Distress Oxide Ink, Mustard Seed Distress Oxide Ink, Picked Raspberry Distress Oxide Ink, Saltwater Taffy Distress Oxide Ink; Hero Arts: Precision Glue, Sequins Mix, Azalea Cardstock; Scrapbook.com: 2mm Foam Strips; Scrapbook Adhesives: Small White 3D Foam Squares; Other: White Paint Pens, Versafine Black Ink, blending brushes, jewel picker

I love using larger dies to create a fun background and that is exactly what I did with these cute dinosaurs. I chose to die cut these from color cardstock and then add more color by ink blending to add more depth and character to each one.

At times I struggle to cut even the smallest overhang, but as with the case of today’s card, cutting assembled pieces can help fill space and make your card more interesting. Further interest is added using texture through embossing.

The Spellbinders Label 59 nested dies not only cut at the A2 size but also offered a slightly smaller size that when combined with the largest created a frame. I was initially going to leave the card panel as a shaped card, but to add an additional pop, decided to adhere it to bright Azalea cardstock from Hero Arts.
Join me in this process video as I create this card:
So, there we have my completed card bursting with color and cuteness. The techniques used on this card can be used with an endless list of die sets. For instance, if your die set has a solid backer, consider using that to create your background. Then assemble a fully detailed die cut and use that in the center. If you prefer not to ink blend, you can use contrasting cardstock for the background and/or your focal die cut. My project combined both older and newer products from my stash. I encourage you to NOT be afraid to shop what you already have. You never know what amazing things you can create!

Hi, I am Natasha and I live in Austin, TX. I am married to my college sweetheart and we have 2 beautiful children. I began seriously papercrafting about 6 years ago and have been hooked since. I get excited to learn new techniques and experiment with different mediums and textures. If I am not playing with paper, you can find me with thread, as I sew and embroider, too!
Find more of Natasha’s creations here: Instagram | Facebook | YouTube | Blog
![]()

Last Friday, we mistakenly forgot to post the prize winners of two of our New & Noteworthy giveaways from Concord & 9th and Crafter’s Companion! That post has been updated to share the winners at the end, and don’t miss the chance to win a $50 gift card to the Taylored Expressions store when you’re there, just by commenting!

This card is darling! I love the colors that Natasha used!!
cute