
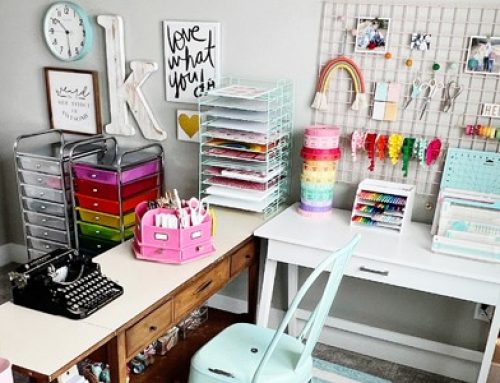
Hello SCT fans! It’s Lisa Dickinson here today and I’m excited to be sharing a new layout, as well as an easy technique you can use to include important memorabilia in your albums! If you have kids in school, you know the amount of paper and projects that come home every week can be overwhelming. And those special items, like awards or report cards, can get lost in the clutter. But because of their size, it’s often hard to include these important milestones on a scrapbook layout. The solution? Turn it into a photo!
Supplies | Patterned paper: Pebbles; Chipboard letters, stickers: American Crafts; Die cuts: Blue Star Design on Etsy; Journaling tag: Project Life; Acrylic: Close to My Heart; Enamel dots: Bella Blvd; Adhesive: 3M; Other: buttons, twine, paper clips
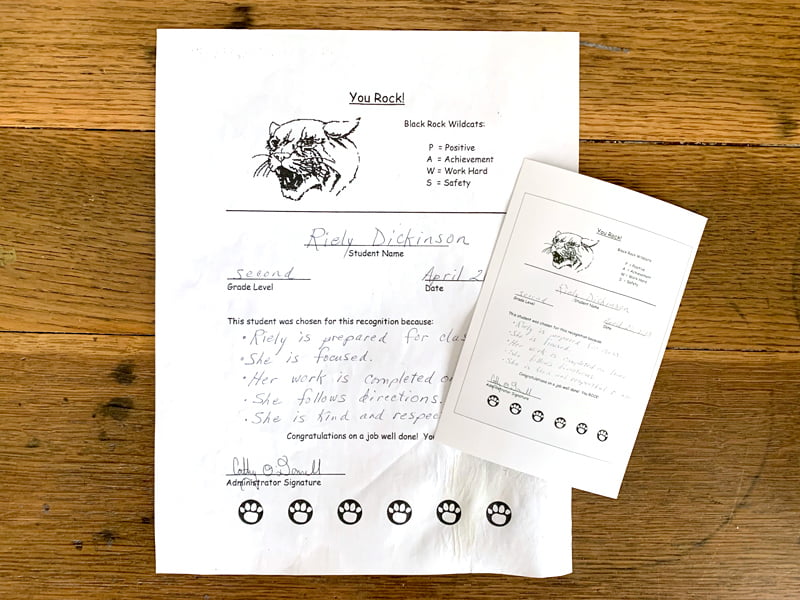
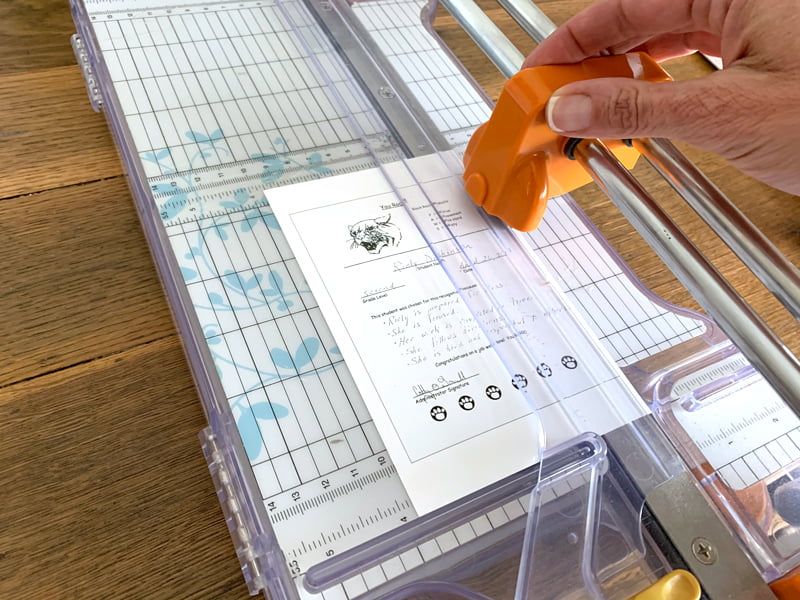
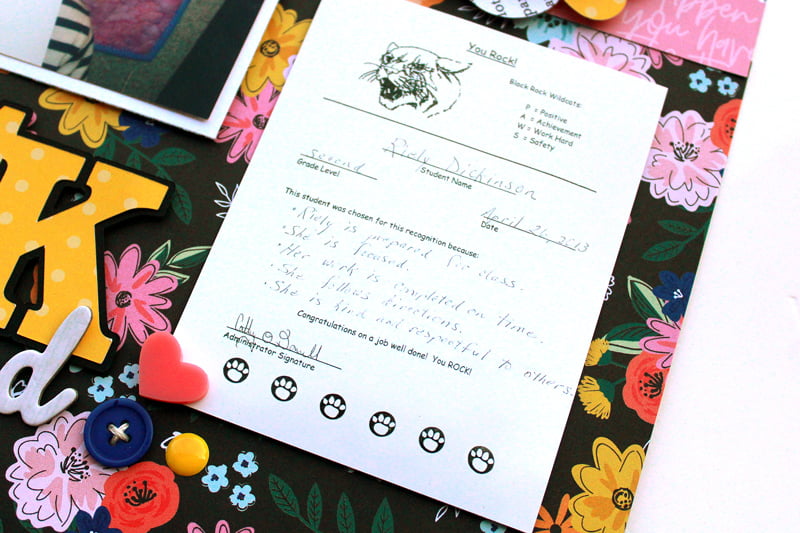
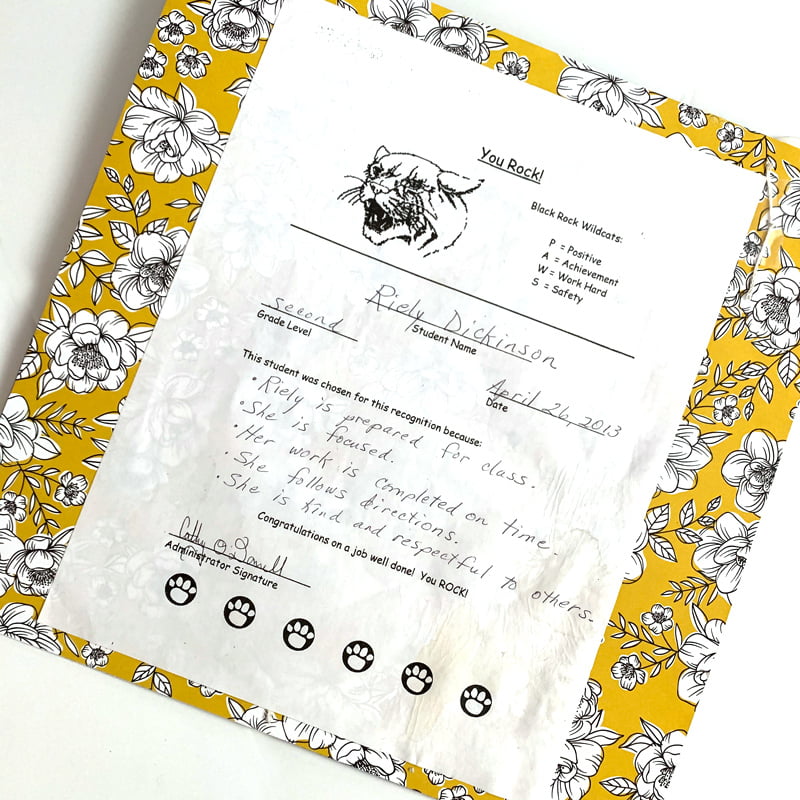
My daughter was recognized at her elementary school with a monthly citizenship award and the certificate was a letter-size that would have taken up most of my layout. So, I simply took a photo of it on my phone, resized it to a smaller canvas, and had it printed as a 4” x 6” print. TIP: Your photos should be 300 dpi resolution at print size for best quality!
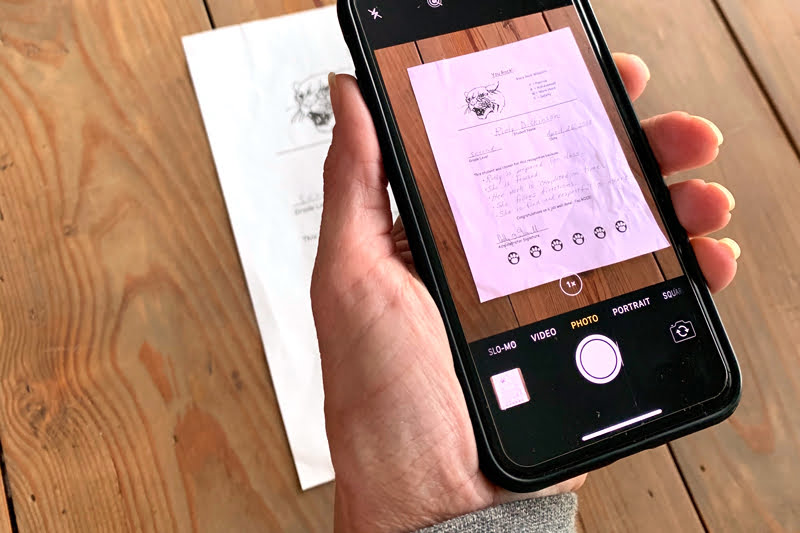
After printing, I have a miniature version of the certificate that’s perfect for including on a 12” x 12” page!
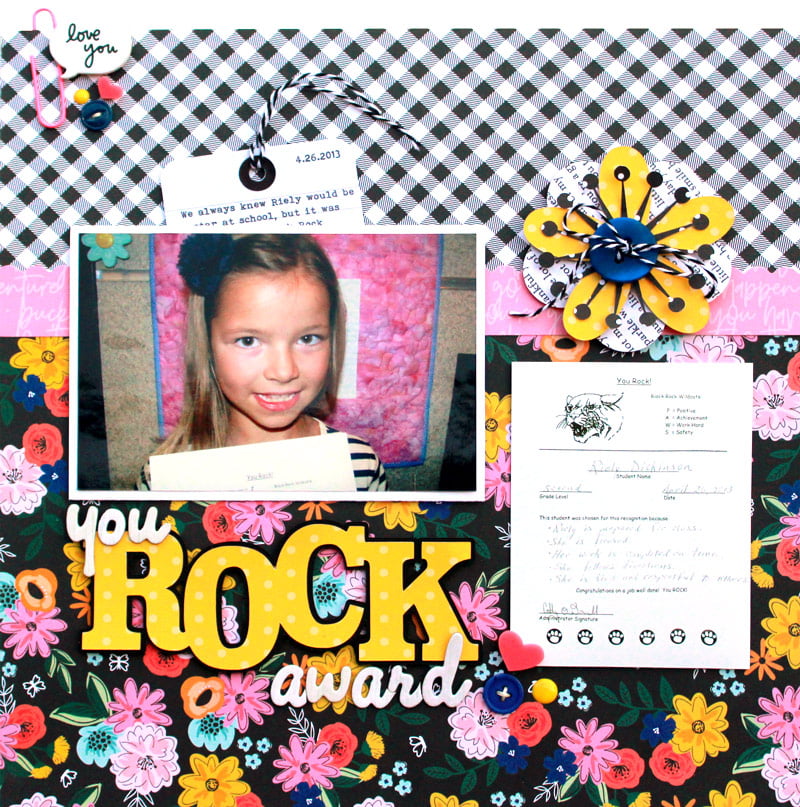
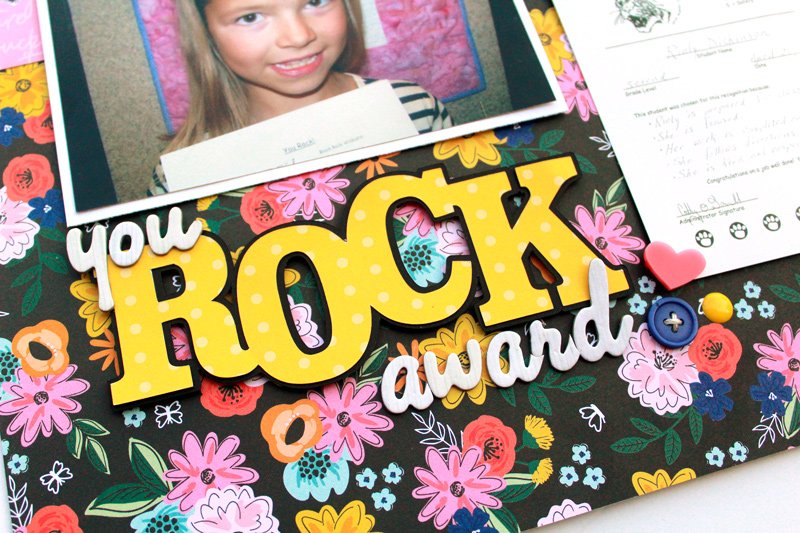
I was able to include the certificate in the design, as well as a photo of my daughter from the day she won the award. Even though it’s significantly reduced, you can still see all the details on the award. Displayed on the page, it’s no longer contributing to the big piles of clutter on our kitchen counters!
A bold title is a great way to set the theme of the page, using a die cut word and chipboard stickers. I love the font Super Clarendon for making titles like these—it’s a bulky serif font that’s perfect for using with electronic die cut machines.
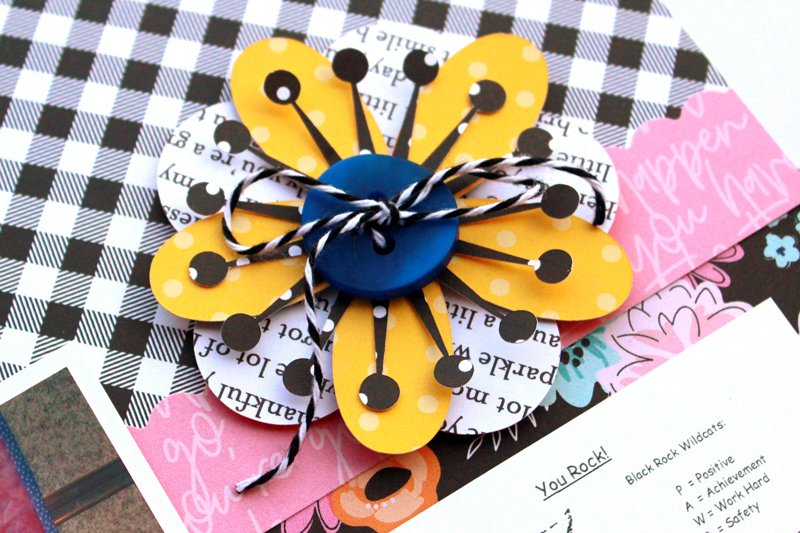
A layered die-cut flower ties in the floral pattern from the bottom half of the page and helps complete the grid of four elements in the center of the page: photo, title, award, and embellishment!
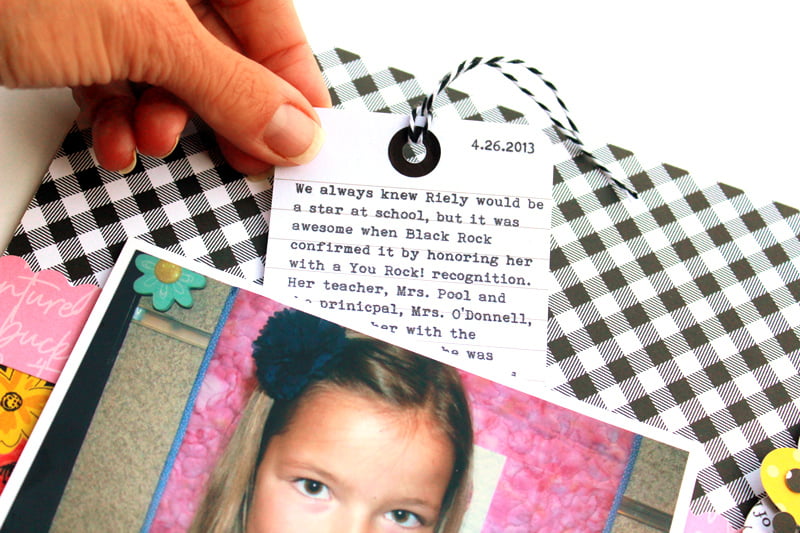
The story of the layout was typed on a journaling tag that slides behind the photo, easily accessible with a pull of the twine. When I adhered the photo to the page, I used a solid line of adhesive on the sides and bottom edge, leaving the top edge open to allow for the tag.
If you’re feeling nostalgic and don’t want to trash the original certificate, you can always include it on the backside of your layout like I did!
I hope this has inspired you to include important memorabilia on your next page—it’s as simple as taking a quick snapshot!

Great idea.
Love the layout and taking a photo of the certficate is a great idea. Another option that I have also used is to reduce the image and print out on cardstock.
What an unique way to save those special moments. Thanks for sharing :)
Super cute and wonderful idea!
CLEVER & SMART IDEA!
Very smart!
Thanks for the great inspiration!
What a great idea!
Wow this is beautiful and colourful, I love it. Thank you for the tip of 300dpi and that great font.
So important to keep these awards for your daughter to look back on. I like the way you used the award in your layout. Cute.
Love this colorful layout! Love the way you reduced the size of the document, so cleaver.
Great idea! Thanks for sharing.
I always learn something when I visit this site.
Love this page. Great way to keep the original, too!
I love this idea. I have taken photos of all my kid’s keepsakes and treasures as I thought it was a better way to store all of them but I love using them on a layout this way and then only keeping the original of the truly special ones.
So smart! I’ve done this with newspaper clippings to preserve the story but never thought doing the same for all those school certificates!
Love this layout and the preservation of a child’s fun certificate, Loving using special keepsakes such as letters, report cards, etc. on layouts. Well done!!!
Love the layout , especially the way you incorporated the certificate.
Wonderful! Love the colours too!
what a great tip.