
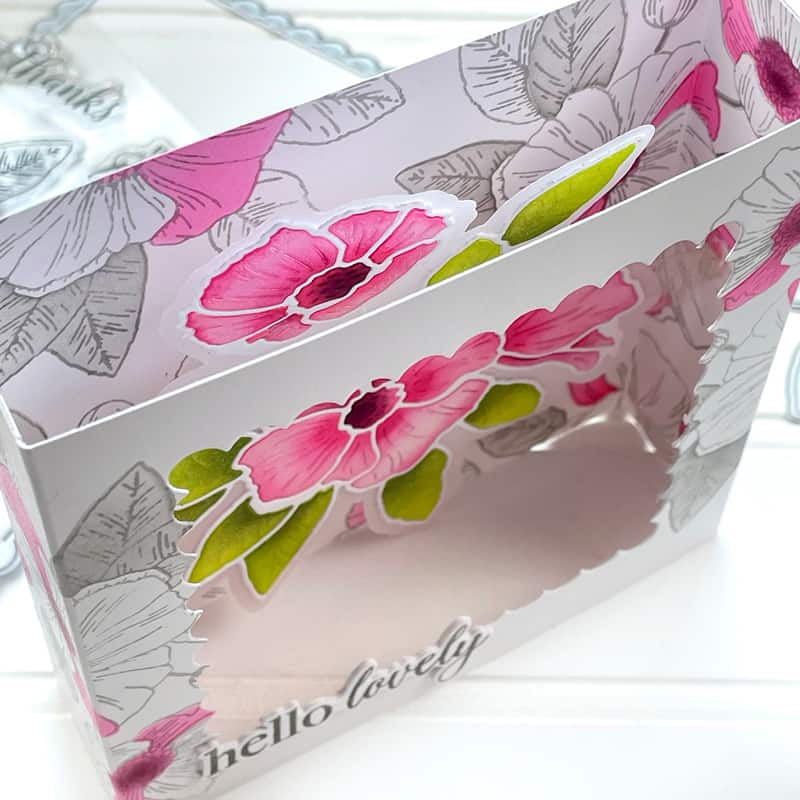
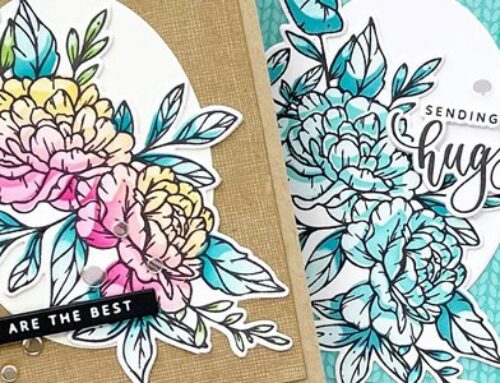
Hello, SCT friends! It’s Sam Olden joining you today. The new Summer Collection from LDRS Creative has several beautiful florals, among so many other fun items, but my favourite product from this collection has to be the Poppy Posy Bundle. I love all the bits and pieces and wanted to pull together a card that uses all of the elements. This shadow box uses the Poppy Impression Die as the focal point and the Poppy Posy stamp and stencils to create the background.

Supplies | LDRS Creative Summer 2023 Collection: Poppy Posy Impression Dies, Poppy Posy 4 x 6 Stamps, Poppy Posy Layering Stencils 4-Pack, Poppy Posy Coordinating Dies; LDRS Creative Hybrid Ink Pad Collection: Alloy Hybrid Ink Pad, Soft Kisses Hybrid Ink Pad, Fandango Hybrid Ink Pad, Tickled Pink Hybrid Ink Pad, Key Lime Pie Hybrid Ink Pad, Four Leaf Hybrid Ink Pad, Raven Hybrid Ink Pad
First, you will need to create a shadow box. You will need two identical 6-1/2 x 4-1/4” heavy-weight cardstock panels. The first piece will create the back panel and the second piece will have a die-cut opening that will create the front panel. Start by scoring both panels 1-1/8” in from each side. (See Image A. Vertical pencil lines are for visual reference for score lines.) Set one panel aside for your back panel.
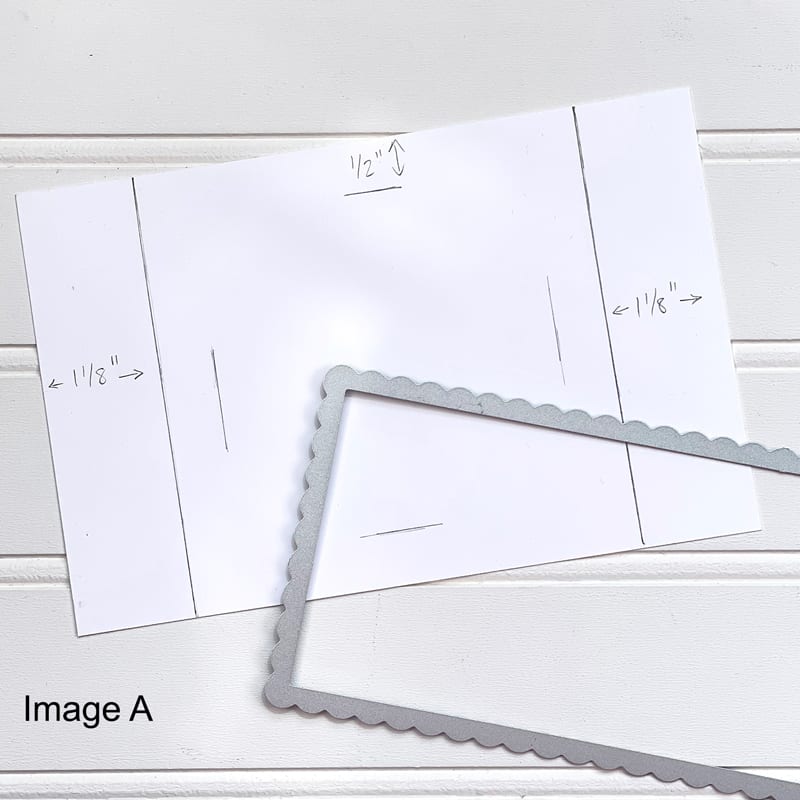
image A
Take the second scored panel and centre, top to bottom, the slim line scalloped die from the Floral Scallop Slimline die set. Partially die cut the scallop die so that the opening gives a border of approximately 1/2” on three sides as noted in Image A. Then, place the die on the opposite side and partially die cut in the opposite direction to complete the opening. (See Image B for reference. Alternatively, use a square die you may have for the opening.)
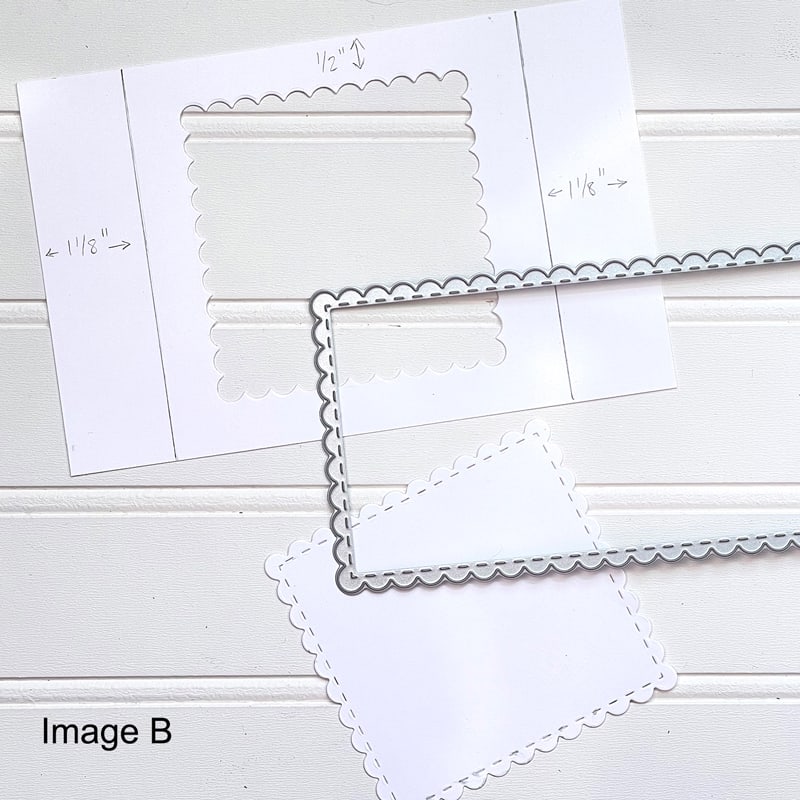
image B
You will also need to cut two strips of acetate that are approximately 1/2” wide by 2” long. The acetate strips will adhere the floating Poppy bouquet to the sides of the shadow box. Score the acetate strips approximately 1/2” or so in from the end to create the flaps that will adhere to the side panel.
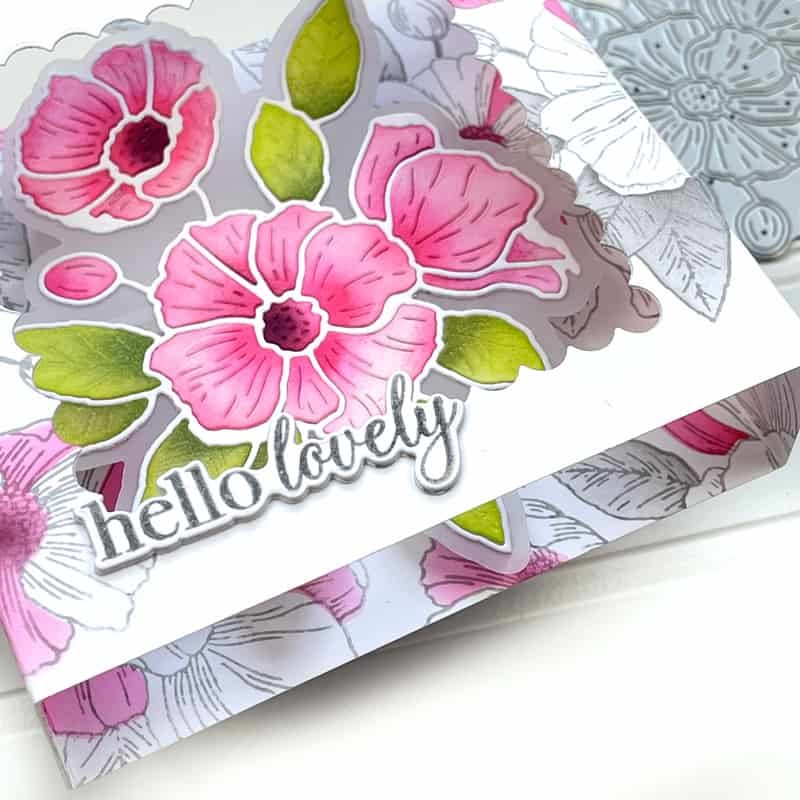
The technical stuff is done—now on to the creative part! Start by die-cutting the Poppy Impression Die from white cardstock and ink blend the pieces with your favourite pinks and greens. I like to use 2-3 inks to get a variation in the blend, but it is easy enough to do with one. Just use a light touch in one area and a heavy in the other.
Die cut the bouquet outline from the Poppy Impression Die with vellum. Adhere the Poppy Impression Die outline and all the pieces to the vellum. With strong adhesive, attach the acetate strips to either side of the Poppy bouquet at the back. The distance of the Poppy Impression Die and acetate should span a 4 1/4″ distance side to side, not including the flaps that will attach to the sides in measurement.
Now to create the soft inked background! On what will be the inside panel of the shadow box, repeatedly stamp, in grey ink, the Poppy Posy stamp to cover the entire space. On the front panel with the opening, stamp a partial of the Poppy Posy stamp twice.
Since I wanted the background to remain subtle and not overpower the ink-blended focal Poppy Impression Die, I chose to use only two out of the four Poppy Posy stencils, and with a light touch, I blended pink and grey inks with stencils 1B and 2A to blend over all the stamped images. These stencils are very forgiving and easily line up with the stamped images using the innovative alignment guides on each stencil.
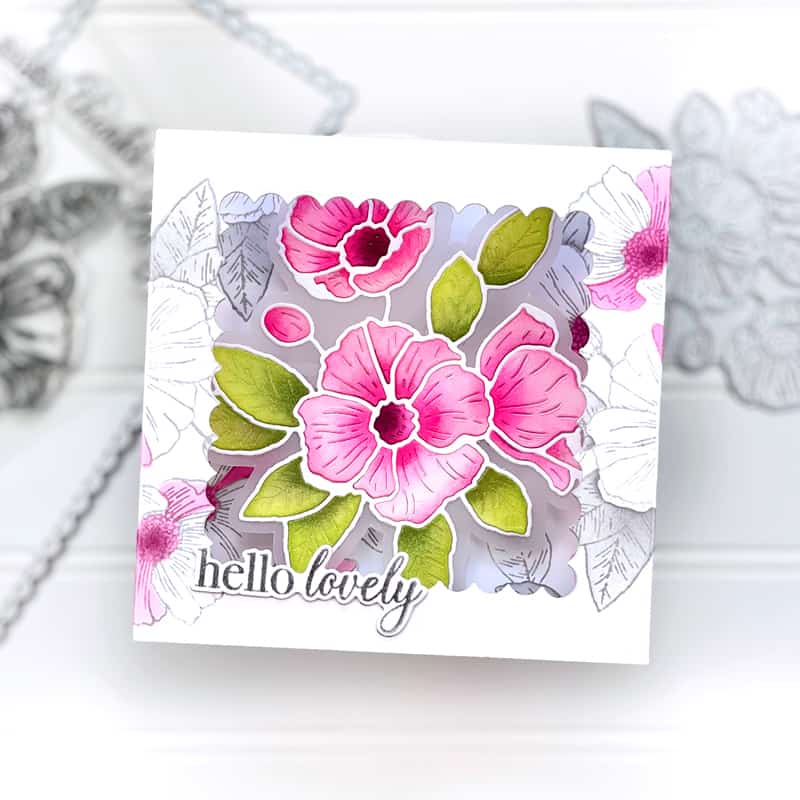
The last element that needs to be created before building the card is the sentiment. I chose “Hello lovely” from the Poppy Posy stamp set before cutting with the coordinating dies.
Before attaching the front and back panels of the shadow box, I find it much easier to adhere the Poppy Impression Die bouquet first. Taking the back panel, line the acetate flap with strong adhesive on the inside of one of the sides, making sure the bouquet die cut is centered top to bottom within the front panel opening. Then simply lay the other acetate flap out with strong adhesive flat and fold the other side of the panel down onto it.
Position and adhere your sentiment to the front panel.
You can sign directly on the back of the shadow box, or use the piece created from die-cutting the front panel opening to write a message and adhere to the back. (See image B for reference.)
I hope you enjoyed this card creation, and you give this impressive technique a try for yourself! Thanks for joining me today!

Hi there, I’m Samantha, and I am very excited to be invited to guest design for Scrapbook & Cards Today magazine. You can find me posting on my corner of the internet at Sams Studio or @samjolden over at Instagram. I have been lucky enough to join design teams such as LDRS Creative which has allowed me to get to know and share creativity with like-minded individuals around the world. I love to try new crafty ideas and techniques. This is why I am happy to hop on the stenciling bandwagon, creating a variety of ink-blended techniques. At the moment my cards lean towards ink blending especially on backgrounds and die-cut pieces with stencils. (You may happen to notice that this Poppy Posy card includes plenty of ink blending!) However, I will always have a love for colouring hand-drawn critter stamps—where my card making journey originally started 7 years ago. I am glad to have been able to share some of my crafty creativity with all of you. Happy paper crafting everyone!
Find more of Sam’s work here: Facebook | Instagram | Pinterest | Sams Studio Blog


Loving this shadow box card! Gorgeous! Thanks for sharing!
Gorgeous and not too complicated. I will definitely be giving this one a try!
Beautiful card Sam, and easy to make too!
Oh my gosh, I absolutely love this card. What a genius idea!!!!! I fell in love with LDRS at the Crop and Create even in March. I’m slowly building my LDRS stash.