
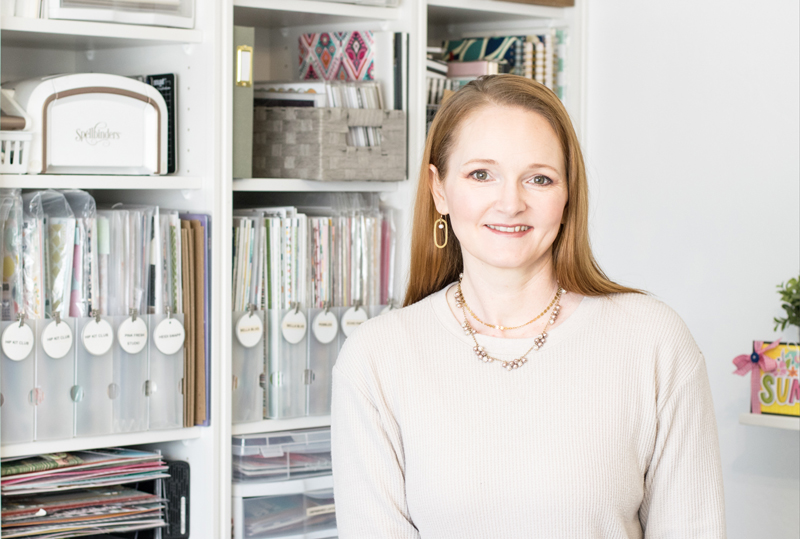
Hello, friends! Wednesday on social media is often tagged as Workspace Wednesday, and we have yet another new blog feature to highlight the amazing workspaces of creatives in the paper crafting world: Creative Spaces We Love! We are kicking off this feature today with one of our own team members, Becki Adams, who has a gorgeous space to share with us! Let’s take a peek into where Becki creates her beautiful projects!
![]()
Hello, Scrapbook and Cards Today friends! It’s Becki here to share my craft room with you! I am so excited to show you my favorite room in my house. This room used to be my daughter’s bedroom, and when she moved downstairs, I made a few changes to the room to make it my dream craft room.
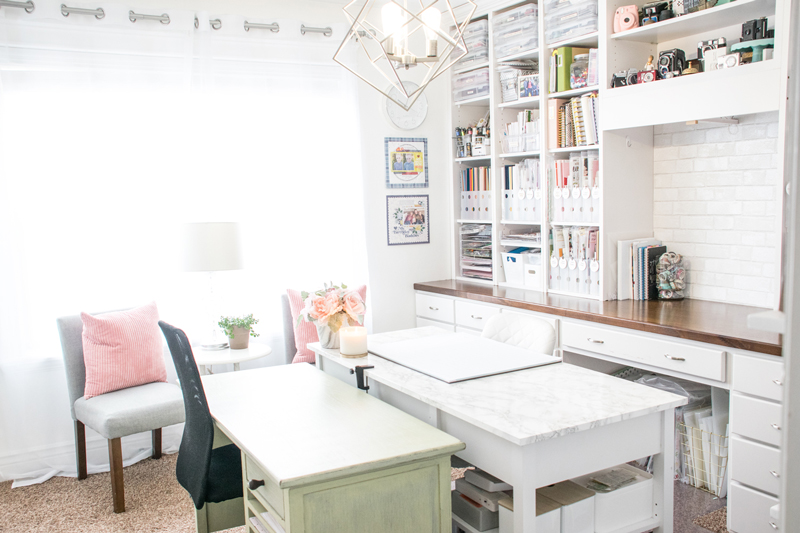
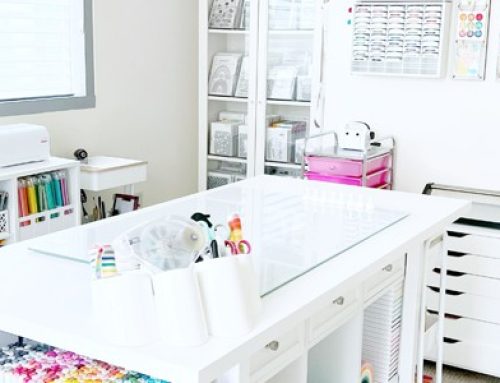
For many years I dreamed, planned, and saved for this craft room. Even though it’s not perfect, I wouldn’t trade it for anything. I have so many sweet memories made in this room. I saved my pennies and got custom cabinetry along the back wall of the entire room. My desk is the white desk in the middle of the room. The other desk belongs to my daughter. Right now, I share my space with her as she is enrolled in an online school. I’m so grateful that we have this time and space to share!
Most of my supplies are stored on the back wall in the shelves and drawers behind my desk. I wanted everything stored in one place that was very easily accessible. I wanted open storage on the built-in shelves because if I don’t see my supplies, I won’t use them!
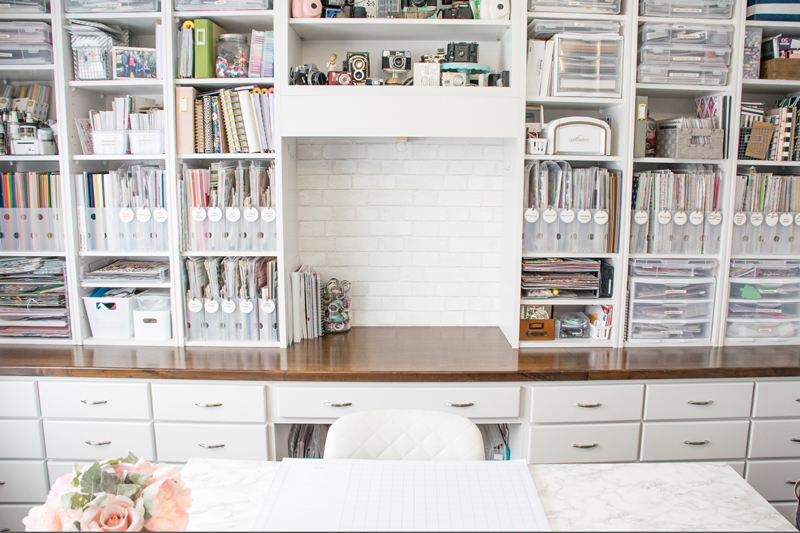
The supplies that I used most often are stored on the shelves and in the drawers closest to my desk—right at my fingertips. The supplies that I don’t use very often are stored in the drawers and shelves near the corners of the room.
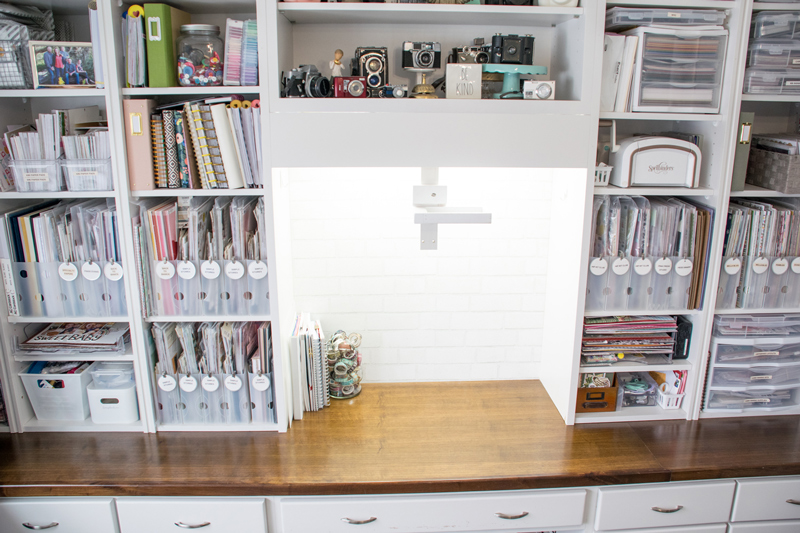
In the center of the built-in cabinet is another desk where I film my process videos. My filming lights are built in and wired into the cabinetry. There is also a bracket that folds down and attaches to my camera or my phone so I can film recorded videos as well as live stream. Isn’t technology the greatest! When I was designing this space, I explained my filming needs to my husband. He designed and built the filming set up. He was even able to make it fold up into the cabinet when I’m not using it. He’s incredibly talented!
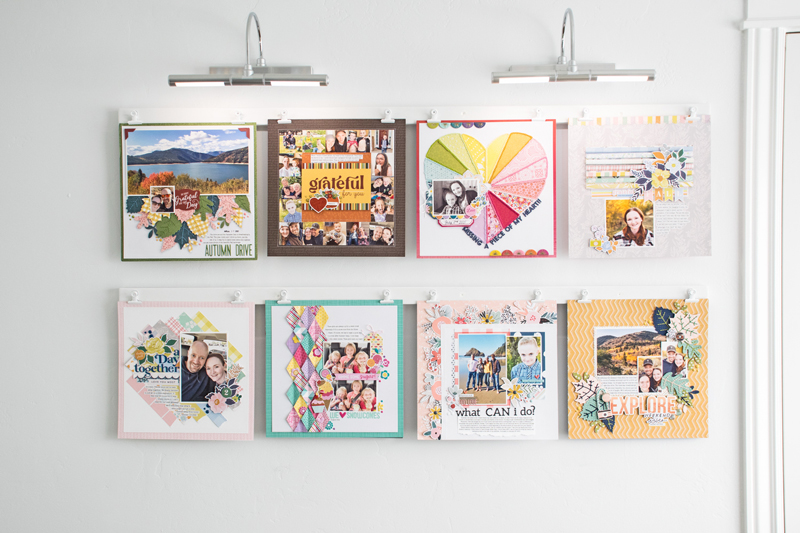
When I’m sitting at my desk, I face this wall that has 8 of my recent favorite layouts. We painted two 1 x 2 boards white, nailed them to the wall and attached white clips to the board with tiny nails. I’ll change these layouts out as new favorites are created. When I’m on video this wall is often the backdrop. To make the layouts stand out, I added two battery operated picture lights. In retrospect, I wish I would have purchased lights that could be wired into the wall. The battery operated lights aren’t as bright as I hoped they’d be.
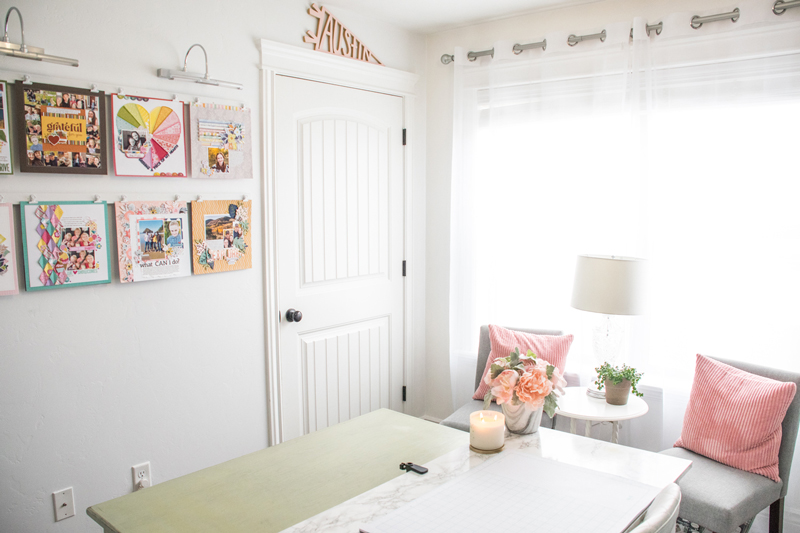
Looking to the right of my desk, there is a large window. I LOVE the natural light in this room! In front of the window is the most important part of the room. I always envisioned my craft room as a place where my family would come hang out with me as I worked. These two chairs hold happy memories of conversations with some of my very favorite people. This cozy space is SO important to me!
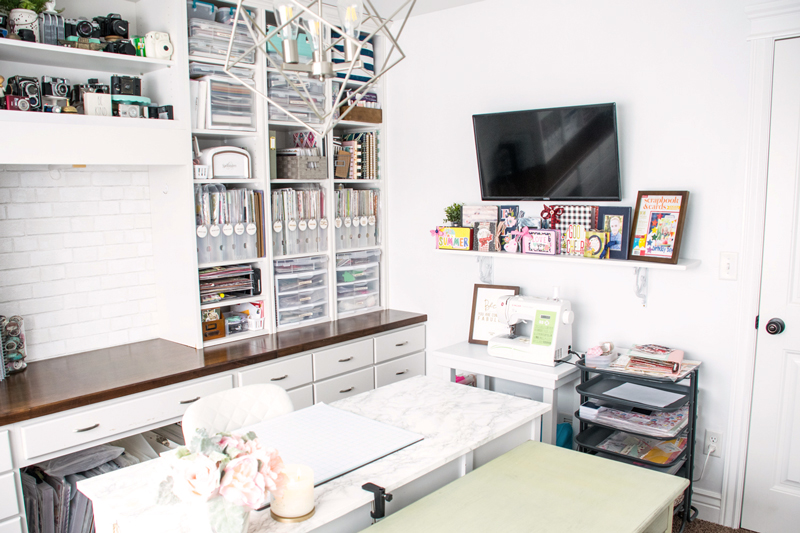
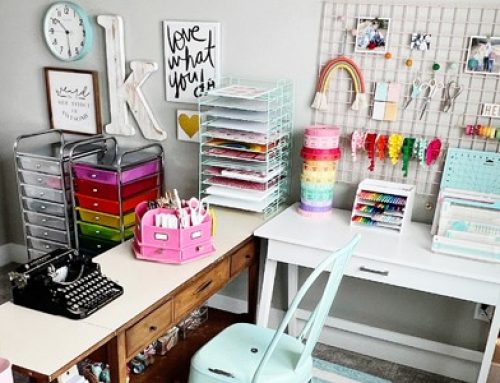
Looking to the left of my desk, there is a television, a sewing machine, a Silhouette Cameo, a project cart, and a shelf that holds a few of my favorite projects. A lot happens here!
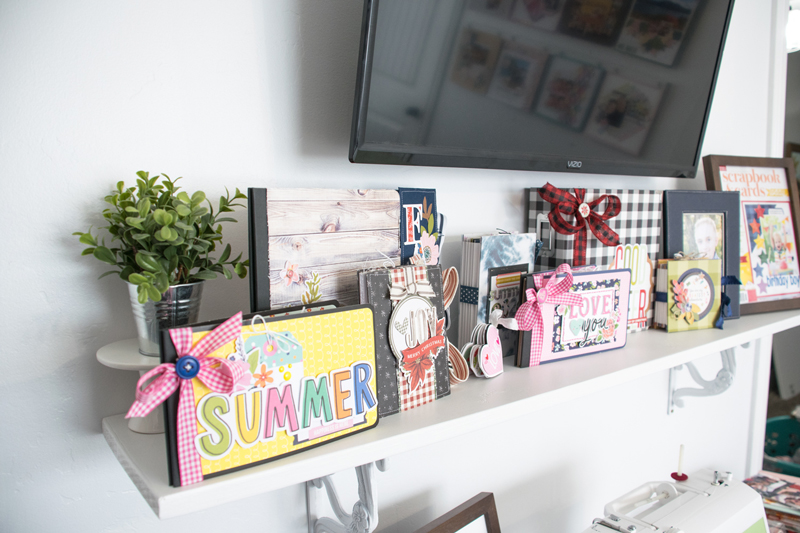
This shelf is a new addition to my space. I made several mini albums in 2020-2021 and I wanted a fun place to display a few of them. A shelf below the TV was a perfect solution. I’ll rotate these albums out with new ones as I create them. I love having them on this shelf. As kids come into my office, they’ll often grab an album and look through it as we visit.
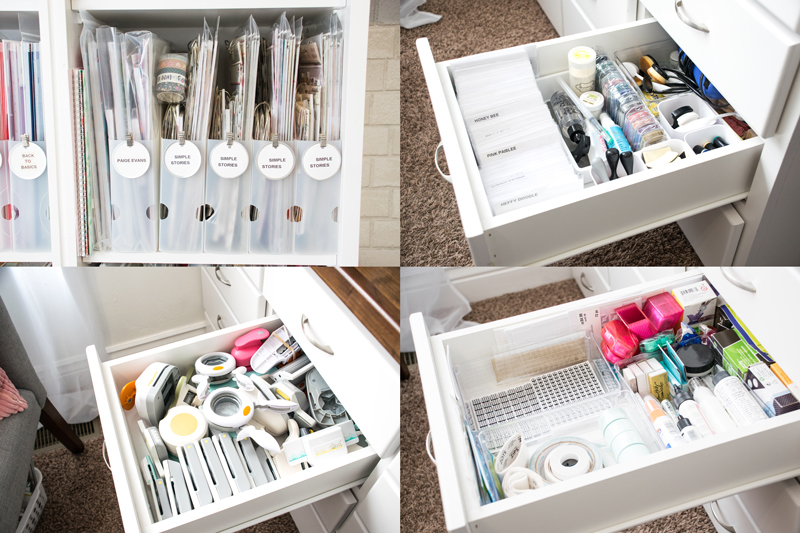
Let’s talk about organization—always a hot topic among crafters! I thought I would give you a little peek into a few of the drawers. There’s nothing fancy about the organization in my office. I keep supplies organized by how I use them. I store all of my adhesives together, my punches together and stamping supplies together, etc. In a few of the plastic paper holders on the shelves, I keep entire collections. For example, when I get a new collection from Simple Stories, I store it all together in one of these plastic containers. This works because when I create a project for Simple Stories, I use one collection. I can pull one of these containers down and set it on my desk while I create. My biggest tip for craft room organization is to find a system that works for you and how you create. If you create with color at the top of your mind, store products by color. If you have the type of product (ie. chipboard, stickers, washi, buttons) at the top of your mind, organize by product type. If you work within a collection, store products by manufacturer.
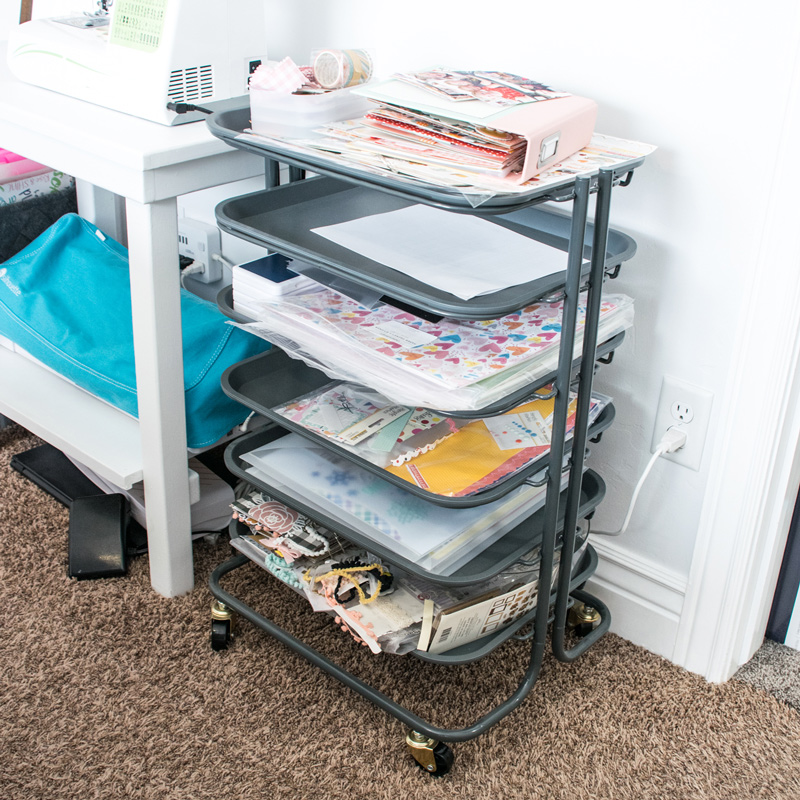
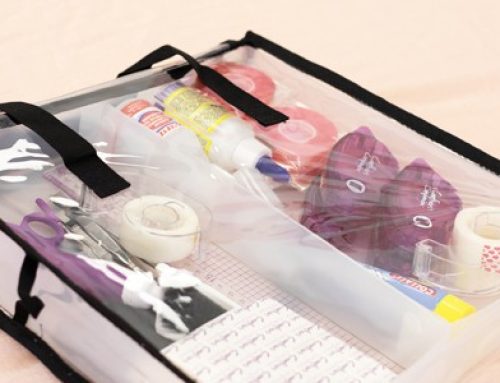
One product that has helped me to stay organized is this project cart from WeR Memory Keepers that helps me organize my supplies by project. For example, one of these trays is for SCT magazine. On that tray I store the supplies that I need to create that project. When I’m ready to create a project for the magazine, I take that tray to my desk and get to work. After the project is done. The supplies that I didn’t use are stored on my shelves or in a drawer. This system works perfectly for me!
Thank you for stopping by the SCT blog and allowing me to share my craft room with you! If you have any questions, please let me know. I’d love to chat with you in the comments. Happy crafting!


Thank you for this wonderful tour. I agree, a true working craft space that is also beautiful!
Thank you, Vicki! Yes! All working craft spaces are beautiful. Priceless memories are created in each one!
Breathtaking, love your creative welcoming space.
Thank you, Glenda!
Love the idea of Workspace Wednesdays, as I learn so much from looking at other people’s craftrooms. Becki’s wall of favourite layouts is something I plan to copy. I have one for my cards, but need to add my layouts. Thanks to Becki for sharing her space!
Thank you, Dawn!! The favorite layout wall is a new addition to my room. I love it!! I can’t wait to see your favorite layout wall! Happy crafting????
Beautiful room.
Thank you, Claire!
Becki, your room is beautiful! So bright and organized! And thanks for the tips!
Thanks, Denise! I do love all the natural light in this room! It makes me want to spend time in there! Hugs!
Thanks for sharing your space Becki. It looks like you’ve figured out what works well for you. I really love ???? your display shelf & place to clip favourite layouts.
Thank you, Dionne! The shelf display and the layout wall are both new additions to this room. I’ve quickly fallen in love with both of them. ????
When I was doing my room dark colors were in, I love the bright feel your room has!
I’ve seen some craft rooms with dark colors that are stunning. I’ve considered painting the walls in my office a dark navy or green. So far, I haven’t done it but I might some day. Thank you so much for your kind words. :)
Thank you for sharing! I love your wall of custom built in cabinets. Can you share the room size? I’m getting ready to convert a 10×12 bedroom to a custom craft space and it’s helpful to envision what will fit in here!
Hi Lori!! Our rooms are almost the exact same size. My room is 11 1/2 x 10 1/2. My built-in cabinets are 11 1/2 x 8. It’s not a very big room, I try to use every square foot wisely. Happy crafting and good luck with your renovations. ????
Love how bright the room is. Great craft space. I also have a cozy chair in my room for my family to hang out while I craft!!
Thank you! I wish my chairs were a little more comfortable. These chairs are very sentimental so they’re here to stay. Happy crafting, Lisa!!
That was so helpful. Thank you for sharing
Thanks, Malinda! Let me know if I can help you with anything else! Happy crafting ????
Beautiful room!
Thank you so much!
What a gorgeous, bright and organized room! I love that every space is well utilized, without looking cluttered. Thanks for sharing!
Thank you, Roxanne!! My craft room isn’t ver big. I try really hard to utilize the space I have. Hugs and happy crafting! ????
Your built-ins are awesome! And your space is so bright. Love it! Thanks for sharing this with us Becki!
You’re so sweet. Thank you!! I appreciate your kind words about my crafting space.
Big hugs!!
Gorgeous space!
Thank you, Lorraine!!
What a dreamy space to create in! And the built in filming station is so cool!
Thanks!! The built in filming area is one of my favorite parts of the room. It makes my job significantly easier! Thank you for stopping by the Scrapbook & Cards Today blog.
A lot of thought and love went into creating this beautiful space.
Thank you so much, Colette!! I appreciate your kind words!
Becki, your room is beautiful! So many good ideas. Thanks so much for sharing.
Beth, thank you!! You’re so sweet!