
Hello there and welcome to another week filled with inspiration and ideas here on the Scrapbook & Cards Today blog! We are so excited to kick off a fresh week with a new monthly feature, designed to teach you design skills, tips, and tricks from some of the best designers in the industry! We are kicking off this blog feature today with guest Aimee Mertell, and we’re excited to share her talent and knowledge with you! Don’t miss her process video at the end of this post, too!
……………………………….
Hello SCT friends! My name is Aimee, and I am so honored to be here today sharing this adorable traveler’s notebook layout of my daughter and I with you all. For some, working in a traveler’s notebook can feel a bit disjointed with two different sides to fill, so today I wanted to share my three best tips for creating cohesion on a TN spread. Let’s go down the list:

Supplies | Elle’s Studio: January 2022 Kit, Love You Paper Stack, Love Notes Die Cuts, Love You Chipboard Stickers; Bazzill Basics: Coconut Swirl cardstock
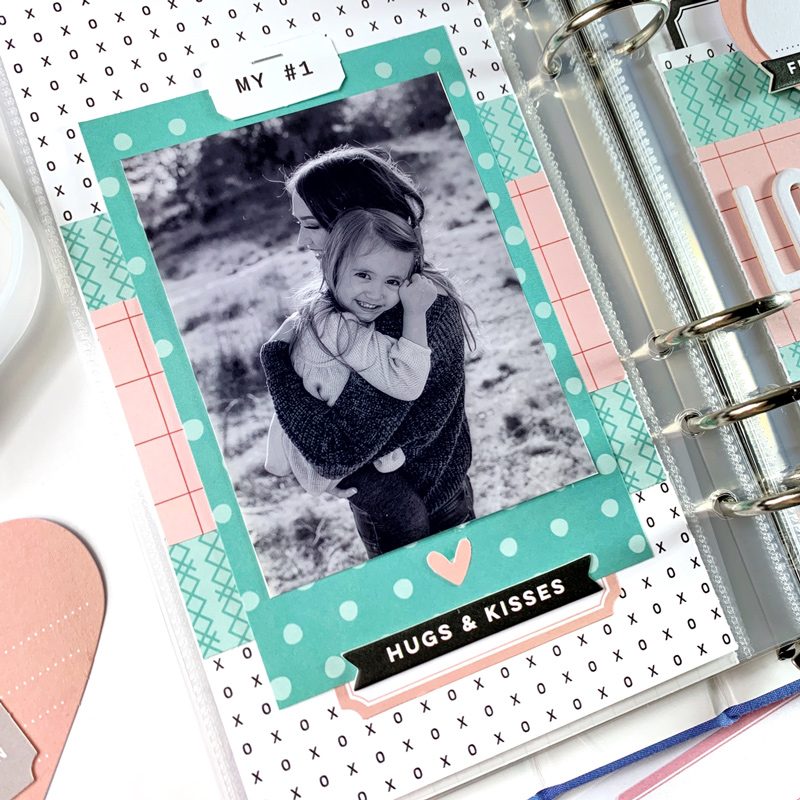
First, I am going to determine my color scheme. I find this is a lot easier when using coordinating products from one designer or kit release — it takes the guesswork out of the process. For the base of my project, I will be using the Love You Paper Stack from Elle’s Studio’s latest release. Because my photo is black and white I can pick any of the papers from the stack that call to me rather than pulling colors from the photo. I chose to stick to two main color families to accent the neutrals on my page— pinks and blues.
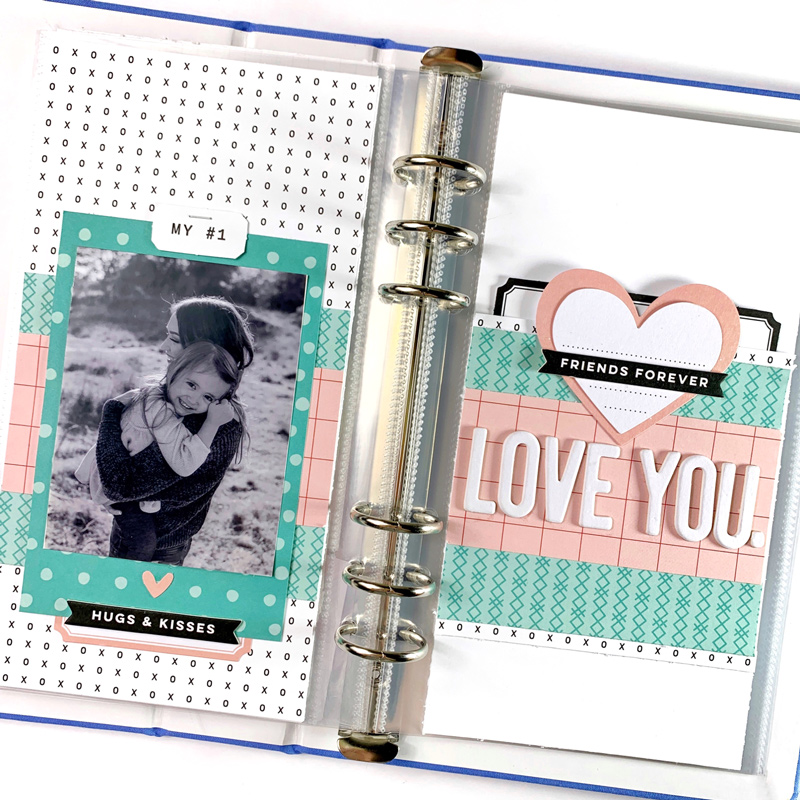
I backed the left side of the layout in a neutral pattern and then laid colorful patterned papers horizontally across the entire spread from left to right. This row of color not only provides an anchor for my title on the right but also for my photo on the left and provides a seamless look throughout. The two sides will look as though they are one!
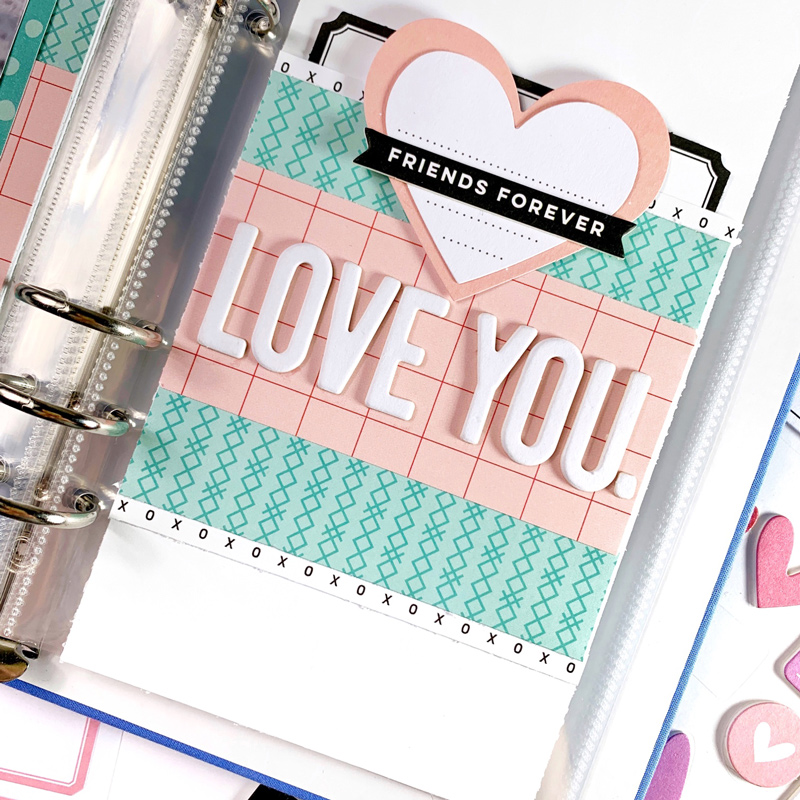
When choosing my embellishments, I picked three main shapes or elements that I would adhere to and made sure to incorporate them equally on both sides of my layout. You’ll find that repeating embellishments and shapes offer continuity to any design! I chose some beautiful hearts and labels from the Love Notes die cut pack to build up embellishment clusters and Elle’s Studio chipboard banners with fun phrases on them to bring some context to my photo as well!
There you have it! By implementing just a few of these tips you’ll have a cohesive TN in no time! Watch me put together this traveler’s notebook spread in this process video:


Absolutely gorgeous! Love love love the colours, great tips and what a great idea of using a black and white photo.
I love TNs – I find the small size to be easier and faster to work with, and they are somehow more intimate than my larger albums. I generally use your techniques of matching colors/papers across both pages as well as similar embellishments. But I never thought to run horizontal strips of paper across the spread – that’s brilliant and looks wonderful! Thank you so much for the inspiration!
Love the simple small size page. Very nice.
Love the layouts;pretty, simple and elegant.
Lovely!
Beautiful layout journals.
This is absolutely beautiful! Where did you find the travelers notebook? I have been looking for one with binder rings and haven’t not been able to find them.