
Hello, crafty friends! It’s Charlene with Dream Craft Create. You can find me on YouTube, Instagram, and my blog at the links below. I’m thrilled to invite you on a creative journey with me. Today, we’re diving into a project that’s brimming with joy and color, featuring the new Bountiful Banner stamps, dies, and stencils from Honey Bee Stamps. Get ready to unleash your inner artist as we explore how adding background texture can level up your cardmaking!
Supplies | Honey Bee Stamps: Bountiful Banner – 6×8 stamp set, Bountiful Banner – Honey Cuts, Bountiful Banner – set of 6 coordinating stencils, Bee Creative Ink Pad – Intense Black, Burlap 3D embossing folder; Altenew: Stampwheel; Concord & 9th: Ink in Clementine, Cranberry, Avocado, Artichoke, Lemongrass, Stardust, Blueberry, Fig; Picket Fence Studios: Paper Pouncers – Bright Rainbow; My Sweet Petunia: Precision Glue Press; Ranger Ink: Stickles – Star Dust
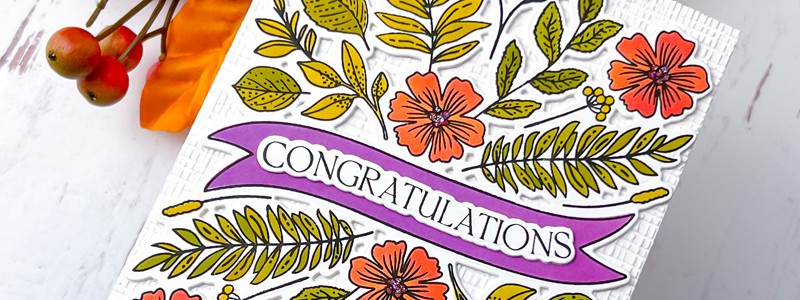
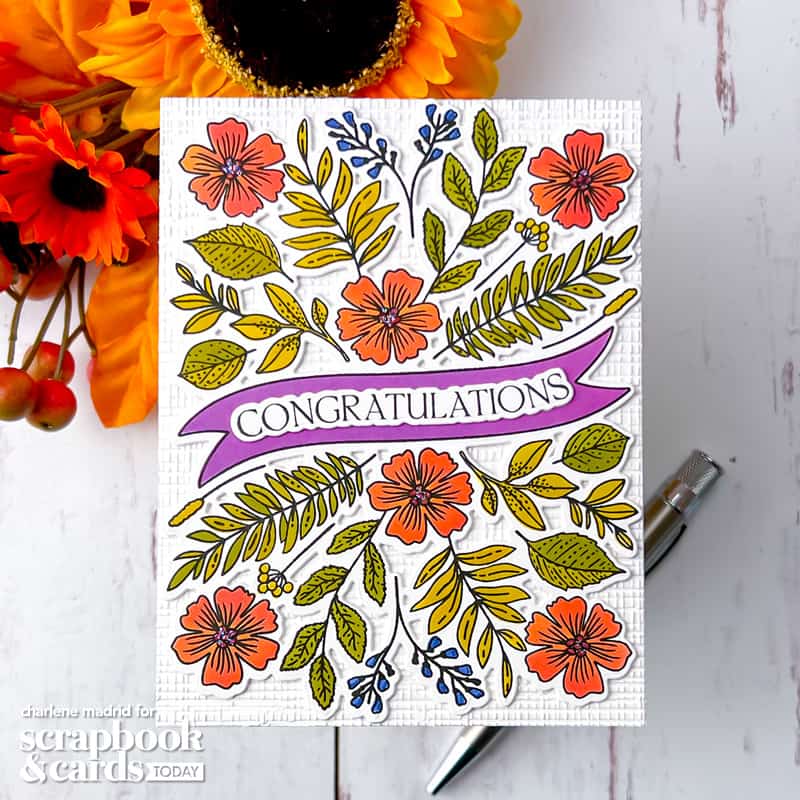
I could not wait to get started with the Bountiful Banner stamp set. The large floral stamp is simply stunning, and I knew it would be the centerpiece of my project. I began by stamping the magnificent large floral stamp using Bee Creative Intense Black Ink. The level of detail in this stamp is truly remarkable, making it a breeze to achieve crisp and clear images.
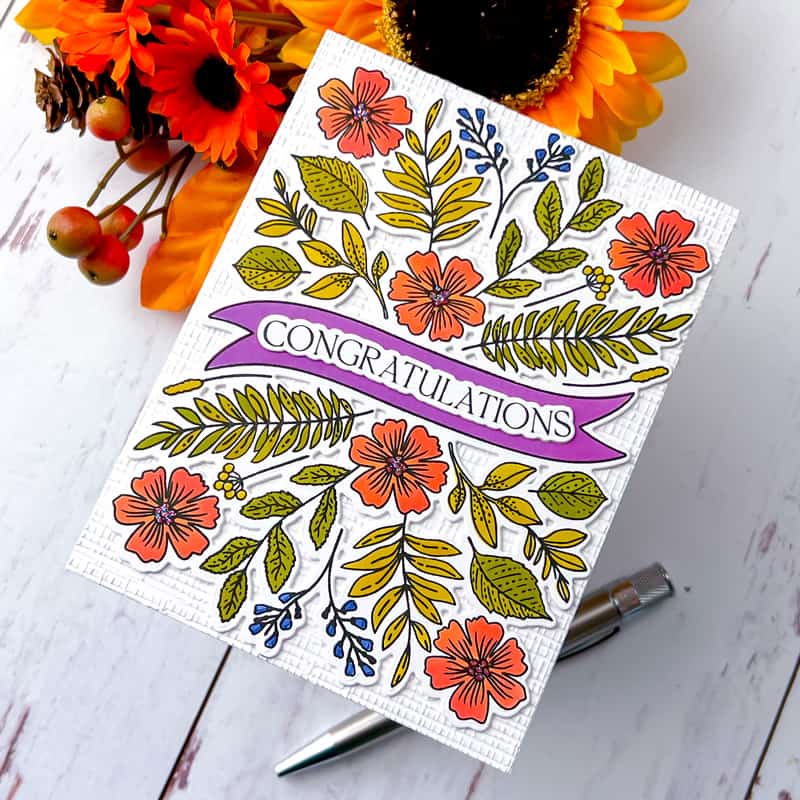
This is where the magic happens! The coordinating stencils make coloring a breeze. I used my trusty Paper Pouncers from Picket Fence Studios to easily pounce my ink through the stencils. The result? A beautifully colored bounty of flowers, leaves, and a charming banner. The stencils allow for precise coloring, giving you the freedom to explore your favorite color combinations.
To make our floral masterpiece pop, I used the coordinating die to cut out the large floral image. I cut two additional pieces and glued them to the back of the floral image to add dimension and flair to the project.
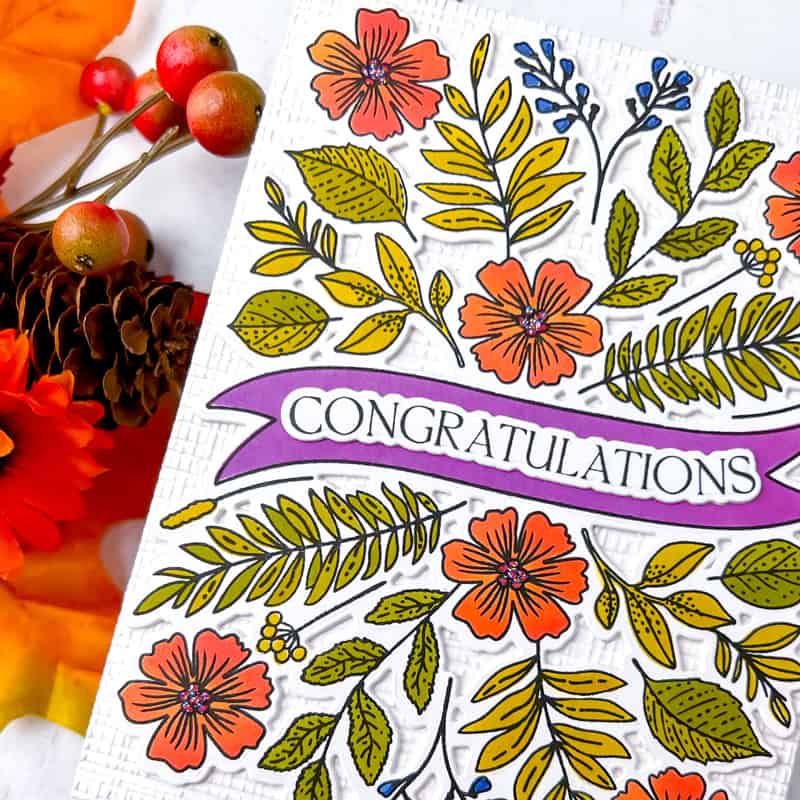
No card is complete without a heartfelt message. I stamped and die-cut the congratulations sentiment, adding two additional die cuts for dimension. The white border of the sentiment pops beautifully against the purple banner. It’s amazing how a sentiment can tie things together.
To create a rustic and inviting backdrop for our floral beauty, I used the Burlap 3D embossing folder. Adding background texture to your cardmaking is like adding a secret ingredient to a recipe—it elevates the entire experience. Texture not only engages the sense of touch but also adds depth and visual interest to your cards. Whether you opt for embossing folders, stencils, or specialty papers, these background textures serve as the canvas upon which your creative vision unfolds. So, don’t underestimate the power of texture; it’s the element that can turn a good card into a remarkable work of art!
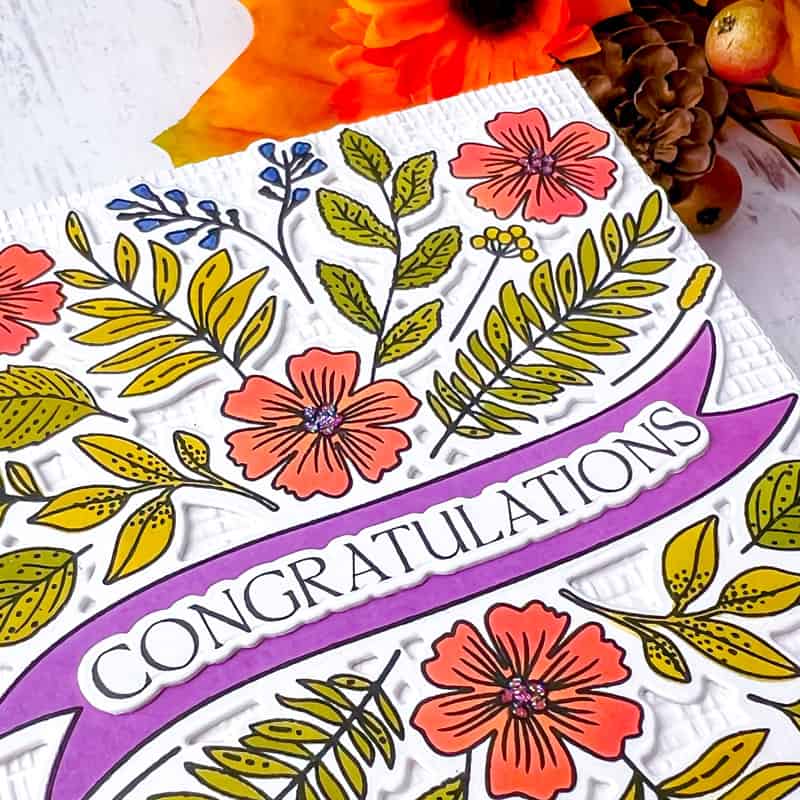
I love adding a touch of sparkle to my projects, and for this one, Star Dust Stickles was the perfect choice. I applied small, glittering dots to the center of the flowers, creating a mesmerizing effect that catches the light beautifully.
Now that you’ve got a glimpse of the project, let’s dive even deeper. In my video tutorial, I’ll walk you through each step, sharing tips and tricks along the way!
Cardmaking is not just a hobby; it’s a celebration of creativity. I hope this project has inspired you to explore the wonderful new release from Honey Bee Stamps. The possibilities are endless, and every project you make is a unique expression of your artistry.
I encourage you to experiment with different color palettes and find ways to add background texture to your projects. Whether you’re a seasoned crafter or just starting, there’s always something new to discover in the world of cardmaking.
So, go ahead, pick up those stamps, dies, and stencils, and let your creativity bloom. I can’t wait to see what you create. Happy crafting, and may your projects be filled with boundless joy and color!

Charlene’s crafting adventure kicked off with a special gift from her husband. Today, she’s a cardmaking content creator, primarily known for her engaging video tutorials. With a track record of collaborating with design teams and earning features in various publications, Charlene’s passion is evident. On her YouTube channel, Dream Craft Create, she shares cardmaking tips and plenty of creative inspiration. For a continuous stream of ideas, don’t forget to follow her on Instagram at @dreamcraftcreate.
Find more of Charlene’s creations at these links: YouTube | Instagram | Blog | Facebook


This is very beautiful. These colours are awesome together.
Love the style and color choice!