
Welcome to the end of another week, friends! We made it, and that calls for a celebration! How about new product news and a giveaway to finish off the week? Today we’re getting a peek at the latest products from our friends at LDRS Creative with a beautiful, and beachy cute card from Carol Weatherspoon. Let’s check it out!
…………………….
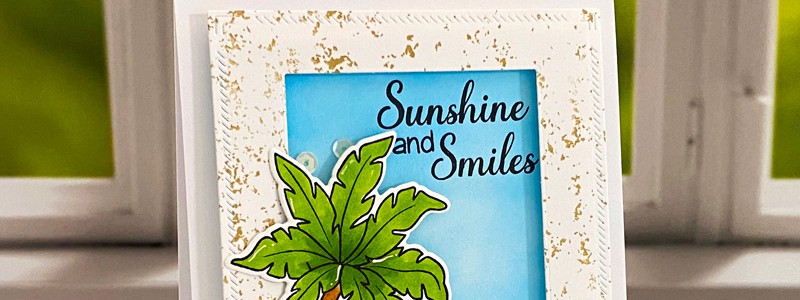
Hello, friends! It’s Carol Weatherspoon with you today and I’m so excited to share a card using fabulous new products from the LDRS Creative Summer Collection! I don’t know about you, but I love anything with a beach theme and palm trees. Maybe it’s because I live in Florida, or it could just be that palm trees make me smile! Whatever the case may be, LDRS Creative has such fun stamps and dies to use until your beachy heart is content.
For this card, I started by stamping the Natural Granite 6 x 6 texture stamp onto an A2-sized card panel. I used Iced Tea hybrid ink to mimic the look of sand on the beach. Next, I cut the panel down using my all-time favorite die, the A2 Diagonal Stitched Layered Card Topper die. I absolutely love the texture that it creates! I thought it would be cute to add my images into a window frame, so to do that, I used a smaller A2 Diagonal Stitched Layered Card Topper die to create my window.

Next, I did a little ink blending with Iced Tea and Bali Blue hybrid inks. I love how it gives that look of sand and the sky to go along with our beach theme. At this point, I needed some super cute images to add to the card, so I pulled out the Hawaiian Vacation stamp and coordinating dies. The images in this set are just adorable!

I stamped the palm tree, turtle and crab onto a piece of Neenah Classic Crest Solar White 110lb cardstock and colored my images with Copic markers. I cut them out using the coordinating dies, then I needed to figure out where to put my sentiment. A good tip is to arrange your images onto your card front without adhering them down. This way you can play with the placement and get a good feel of the layout before you add your sentiment. Once I did that, the best place for my sentiment (also from the Hawaiian Vacation stamp) was the upper right-hand corner. I stamped the sentiment, adhered it onto my card base, then added my window frame with foam adhesive.

To finish this card, I adhered all of my images as well as a few sequins from my stash to add a little bling. I think this card turned out so cute and it will surely brighten anyone’s day!

Thank you so much for joining me today! And, if you haven’t done so already, check out the Summer Collection from LDRS Creative. It’s so good!

Find more of Carol’s work here : Blog | Instagram | Facebook
…………………….
How cute was Carol’s card, and that summer release from LDRS Creative? How would you like to shop their newest products yourself? Well, you’re in luck because they’ve generously offered this giveaway to one lucky commenter:

Enjoy $25 to shop at the LDRS Creative shop! To enter to win, leave a comment on this post by midnight on Wednesday, July 20th telling us your favourite cardmaking technique! Maybe it is die cutting, stamping, or colouring with alcohol-based markers? We can’t wait to hear!
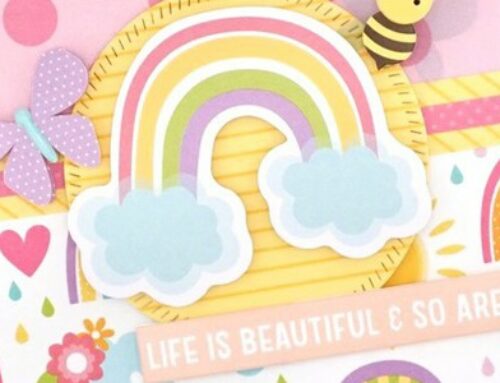
We also have last week’s New & Noteworthy giveaway from Scrapbook.com—a full set of their new patterned cardstock paper pads—to announce. That lucky winner is:
“I LOVE LOVE LOVE pattern papers and these are SO BRIGHT and cheerful! Thanks so much for the chance!” ~ Meghan
Congratulations, Meghan! Please send your full name, address, and telephone number to meghann@scrapbookandcards.com to claim your prize!
What a great week we’ve had on the blog, friends! From free cut files to fresh inspiration, we hope you loved every bit of it! We’ll see you next week for more papercrafting fun!

I’m like using stencils. Less taxing on this brain of mine!
My current favorite card making technique is using layered stencils. Thanks for making wonderful products, LDRS!
Such a pretty card! My favorite technique is making shaker cards.
Love clean and simple cards. Cute card!
I enjoy using layered die cuts that create an background for stamped images and sentiments.
Although I’m still in the process of developing and experimenting with different cardmaking techniques; I love to use inks and watercolors to make an abstract and splattered background. I can then add die cuts and or stamped images. Thanks LDRS Creative for the chance to win!
super sweet card – my favorite technique is layering die cuts
Best palm tree. So cute with the little critters.
I don’t like to get bored, so I try a lot of different techniques!
Darling card!
I like interactive
cards.
Carla from Arizona
I love playing with my inks and blending brushes. Love the little critters on the card.
Such a lovely card, but oh my goodness that little crab has stolen my heart ♥
Carol’s card is so Florida! lol We always have sunshine!!
And I love using dies on my cards.
I love using watercolors for my cards. So many fun ways to combine them with stamps, stencils and more. Thank you LDRS and SCT for another amazing giveaway opportunity.
I love this new collection! My favorite card making technique is stamping and stenciling! I’m a new card maker, so I’m looking forward to learning new techniques!
What a cute card! Love LDRS products. I like ink blending with stencils these days. thank you SCT for a great giveaway.
Cute summery card. I like the framing.
I enjoy making cards with die cuts.
I especially love making shaker cards!
My favourite thing these days is ink blending with brushes. I love it all but that’s my current go to!
the crab is just too cute. I love to combine techniques when possible so lots of favorites
I love a good stamp and die cut set! Love to Colour in with markers, it’s so relaxing!
Making interactive elements is my fav. All the little ones in my life love them.
Love the stitched dies & granite stamp. Goin on my Christmas wish list!
Darling card! I love the palm tree. Currently, my favorite card making technique is ink blending.
I love this card!!! So beachy!! My favorite technique is die cutting!!!
Awesome card! Love the images and the pretty ink blended background!
My favorite cardmaking technique is using my dies!
I love stamping and ink blending for cards ! I also love summer !
My favourite technique is heat embossing. Just never gets old.
What a cute card. I’m not very familiar with LDRS so I’m going to check them out after I finish this comment. My favorite cardmaking techniques would be die cuts & embossing (both kinds.)
Beautiful beach scene! Lately I’ve been doing a lot of shaped, 3D cards using my cutting machine. Thanks for the opportunity to win!
I like ink blending and stacking word dies to add dimension to my cards
My favorite card making technique is using embossing folders!
Cute card! Diecutting is my favorite technique for cards.
I don’t know that I have a favorite technique. I do a variety or techniques & am always open to try something new.
I love stamping, heat embossing and using patterned paper on my cards!
Such a cute card!! My favorite technique is interactive cards!
I love love love fun folds
Super cute card, my favorite cardmaking technique is foiling
It’s hard to pick just one technique, but if I had to pick it would be heat embossing.
I haven’t made many cards but have recently started colouring stamped images – so relaxing! Thanks for the chance to win.
What a darling card! I use die cuts on just about every single card I make. I would have to say that Die Cutting is my favorite technique. Just can’t get enough of it!
Another great giveaway! My favorite technique is heat embossing. I love how there is instant gratification when you melt the embossing powder. Thanks for this opportunity to win and good luck everyone!
I love making interactive cards! LDRS stamps are perfectly sized for them with lots of possibilities for miking and matching the sets.
My favorite cardmaking ‘techinque’ is using the LDRS card kits – it takes the guess work out as everything is coordinated to go to get.
A fantastic card! I like the bright colors. My favorite is using Copic marker.
I love embossing folders and dies!
I like to ink blend, and enjoy using stencils
Such a great card!
I like learning & trying new techniques.
My go though is embossing folders for texture.
Colouring stamped images with alcohol markers is my absolute favourite! It is how I got into cardmaking, I’ve always loved colouring but I didn’t really have the patience to learn to draw and I didn’t like that colouring books just sat on the shelf after being completed. I was so excited to see people colouring in amazing stamped images and adding them to cards and I new I had to try it out! And now my stamp and marker collection shows it!