
Hello, SCT friends! It’s Dilay Nacar here with you today, and I’m sharing two projects inspired by all of the beautiful hot foiled projects featured in the Spring 2022 Issue of Scrapbook & Cards Today Magazine! Hot foiling has made a huge splash in our creative world, and today’s cards use gorgeous new foil plates from Pinkfresh Studio. Along the way, I’ll also share ways to stretch your supplies and use your foil plates for more than just foiling. Let’s get started!
Supplies | Pinkfresh Studio: Blanket Stitched Rectangles, Nested Circles Hot Foil, Charming Floral, Coral Reef Ink Pad, Peach Fuzz Ink Pad, Royal Kiss Ink Pad, Evergreen Ink Pad, Olive Ink Pad, Key Lime Ink Pad, Brushed Sentiments, Abstract Triangles Hot Foil Plate, Stitched Scallop Circles, Sweet Friend, Artistic Blossoms, Fancy Script Words, Gold Embellishments; Spellbinders: Matte Gold Hot Foil, Glimmer Specialty Cardstock, Glimmer Hot Foil System, Platinum 6 Die Cutting Machine; Other: iCraft Removable Pixie Tape, iCraft UltraBond Clear Adhesive
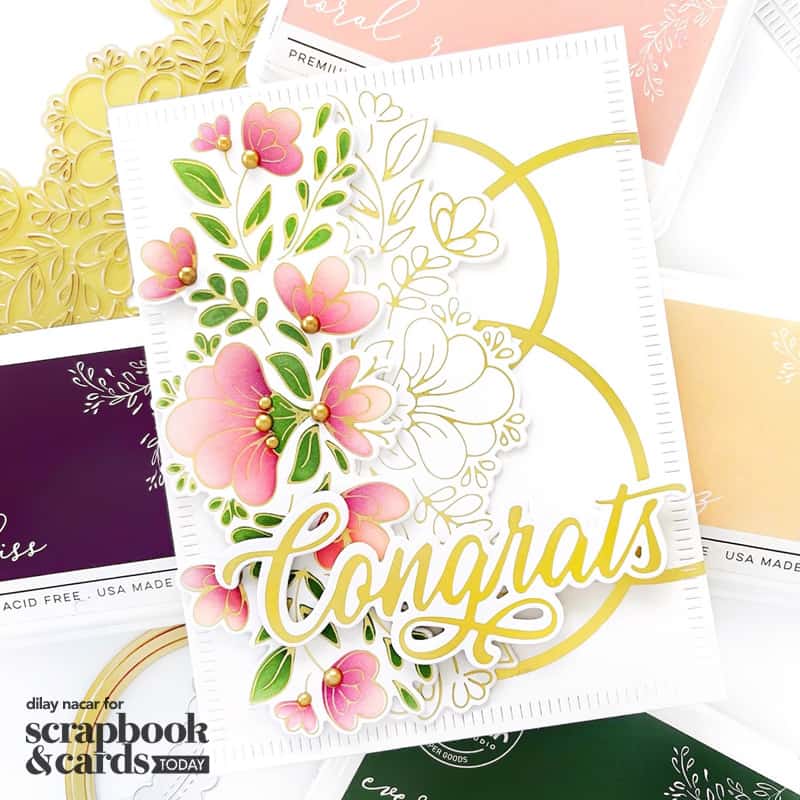
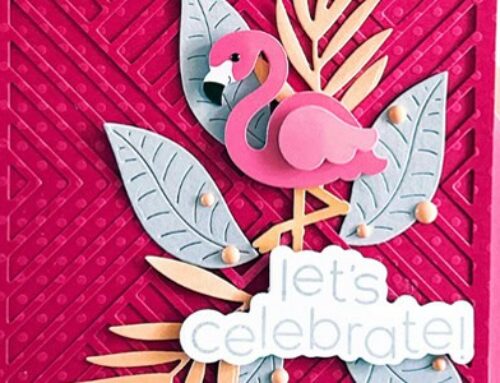
This card is elegant and easy to recreate with minimal supplies and a little foiling! I began by die-cutting a piece of white cardstock with the Pinkfresh Studio Blanket Stitched rectangle die, then used the Pinkfresh Studio Nested Circle hot foil plates and Spellbinders Matte Gold foil to create overlapping circles directly on the panel. You can use this method when you don’t want to die cut the circle or feel like creating a fun background.
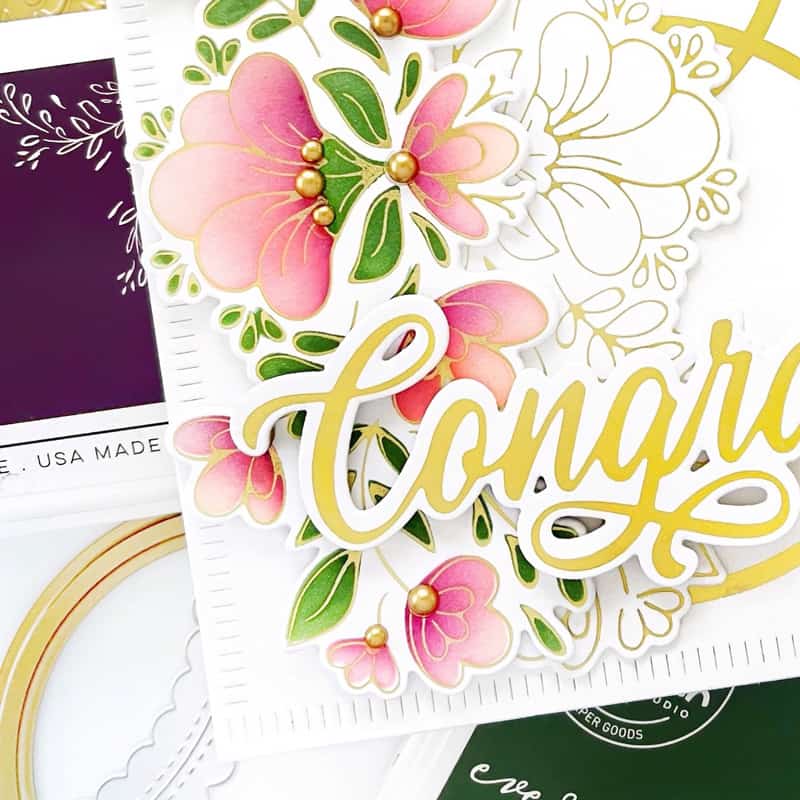
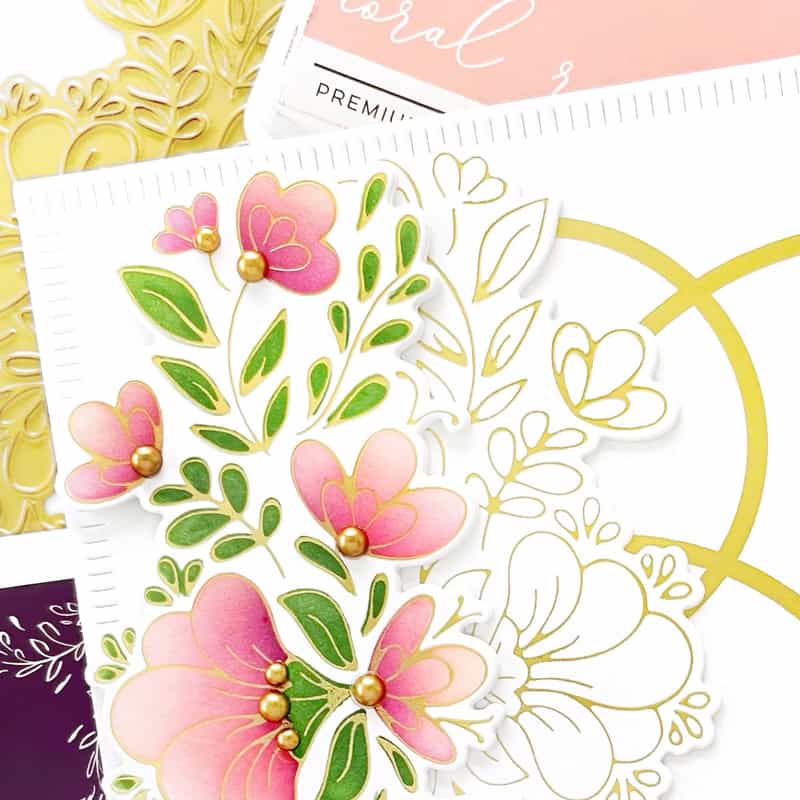
To create the floral elements, I foiled the Pinkfresh Studio Charming Floral hot foil plate twice, using the same matte gold foil, then colored one in using the coordinating stencils in Coral Reef, Peach Fuzz, and Royal Kiss for the blooms and Evergreen, Olive, and Key Lime for the foliage.

Once complete, I cut both the colored and uncolored florals with the coordinating die and adhered them to the panel with thin foam adhesive. To finish, I foiled ‘Congrats’ from the Pinkfresh Studio Brushed Sentiments, die-cut it with the coordinating die, and adhered it to the card.
Foiling tips and tricks:
- When repetitive foiling, use a low-tack tape to center hot foil plates onto cardstock before placing them into the foiling machine!
- Use a smooth cardstock when foiling. The smoother your cardstock, the better your foiling results!
- Depending on your foiling machine, if you’re not getting a perfect impression, you may need additional shims or spacers. If necessary, add a piece of scrap cardstock. Don’t be afraid to experiment to get the perfect results!

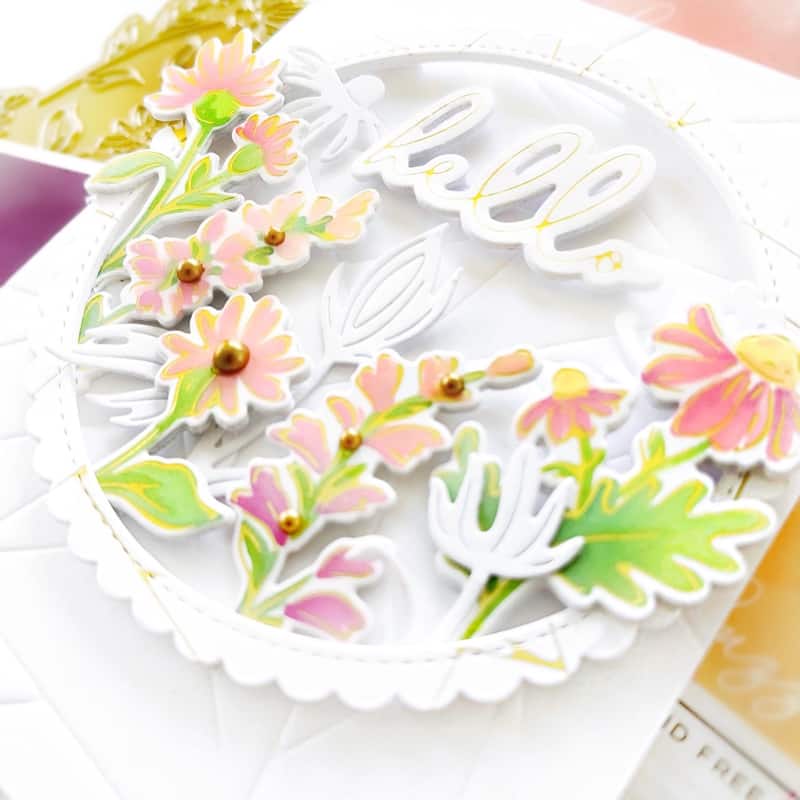
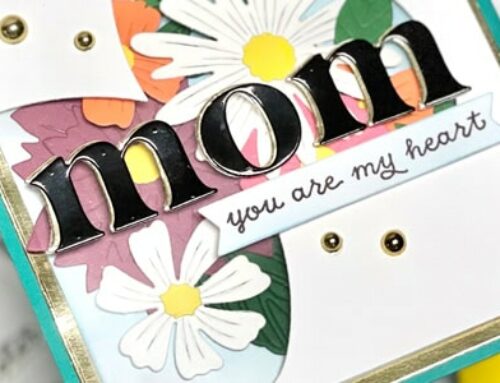
For this card, I switched things up a little bit! To begin, I used the Pinkfresh Studio Abstract Triangles hot foil plate to create a subtly-textured background as the base, simply by using the die with the same sandwich as for dry embossing. Next, I foiled the same hot foil plate, again in matte gold foil, this time to add some interest to the scalloped circle. Once foiled, I cut the panel with the Pinkfresh Studio Stitched Scallop Circles die, cut two more in white cardstock, stacked them behind the foiled circle, and adhered them together. I often do this with die-cut elements and highly recommend it; you’ll find that it makes a big difference in your finished project!

Next, I foiled the Pinkfresh Studio Sweet Friend hot foil plate in matte gold, colored the flowers in with the coordinating stencils (using the same colors as above), then die cut them with the coordinating die. I arranged the flowers behind the circle using double-sided adhesive, then cut off the excess and adhered the circle onto the dry embossed panel with foam adhesive. I wanted to add a bit more detail to the circle, so I die cut the Pinkfresh Studio Artistic Blossoms dies in white then adhered them, tucked in behind the flowers. To finish, I foiled ‘hello’ from the Pinkfresh Studio Fancy Script Words hot foil set, die-cut it with the coordinating die, and adhered it to the card. As a finishing touch for both cards, I added a few gold embellishments for extra sparkle!
More foiling tips & tricks:
- Over-foiling can happen, but don’t worry if it does! You can gently sand away unwanted foil using a sand eraser or a pink eraser!
- If you find that the corners cause over foiling, you can trim the corners on your die for a more rounded edge. This should help!
- Before die-cutting your foiled pieces, add a piece of parchment paper in between the die and foiled cardstock to prevent peeling or blemishes.

I hope you’re excited about foiling as much as I am and are inspired to try new ways to use your foil plates! Thanks so much for joining me today, friends, and don’t forget to check out our Spring 2022 Issue for more hot trends in papercrafting!

Find more of Dilay’s work here: Instagram | YouTube | Blog | Facebook


Gorgeous cards!
Gorgeous cards!
Lovely cards!
Gorgeous cards.
I can’t wait to read about this. I like the flowers and the gold foil