
Hello, SCT scrappers! It’s Lisa Dickinson here today and I’m excited to share a Mother’s Day layout, as well as my process for creating it. Here’s a peek into how this page came together!
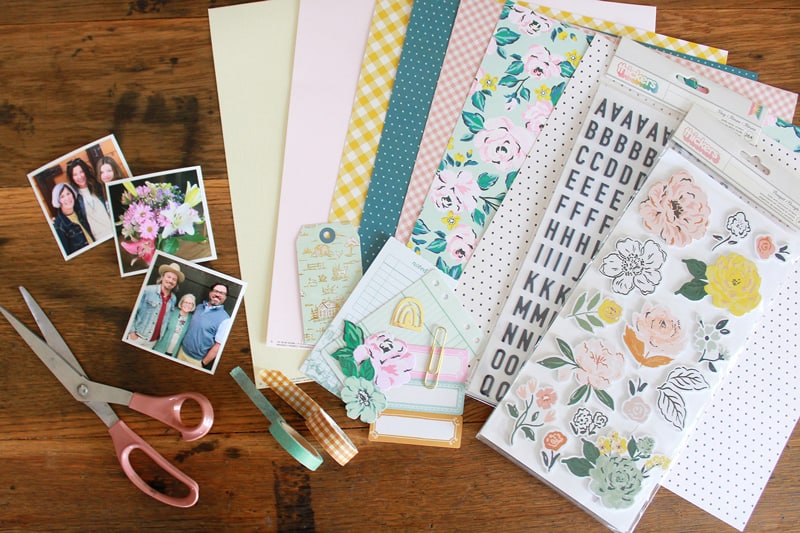
Supplies | Patterned paper, ephemera: Jen Hadfield Reaching Out, Maggie Holmes Garden Party; Letter stickers: Maggie Holmes Market Square: Puffy stickers: American Crafts, Maggie Holmes; Washi tape: Jen Hadfield Reaching Out; Adhesive: Scrapbook Adhesives by 3L E-Z Runner and 3D foam circles
I began by gathering my photos and the products I wanted to use on this page. Since the layout is Mother’s Day theme, I selected a spring color palette with lots of fresh, feminine patterns. While I usually end up adding other pieces to my pages, I like starting with a limited selection of products!
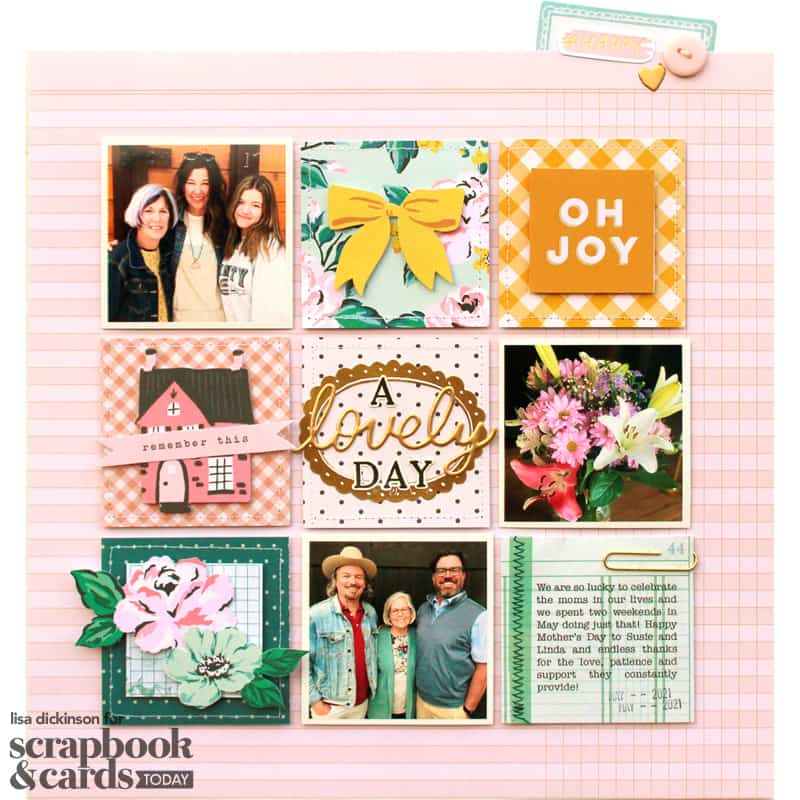
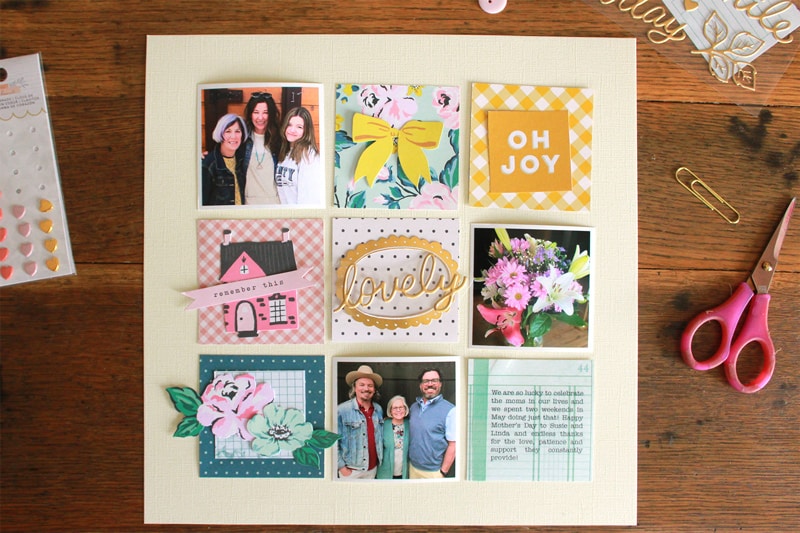
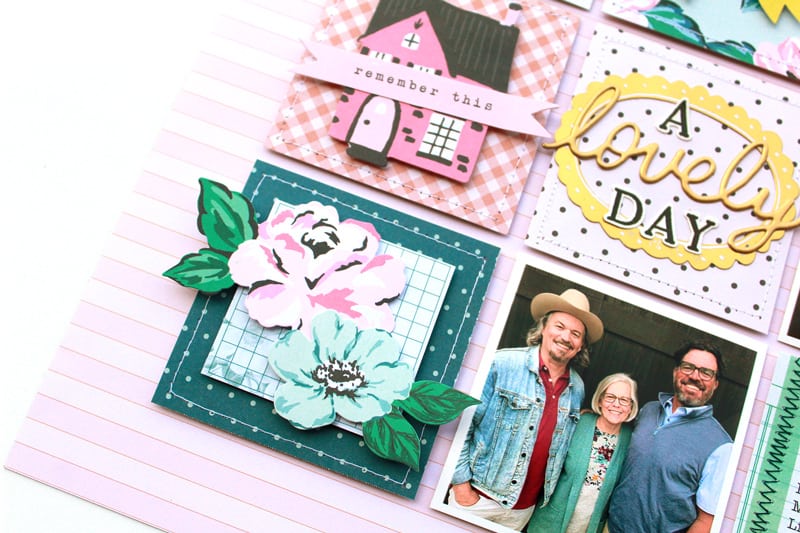
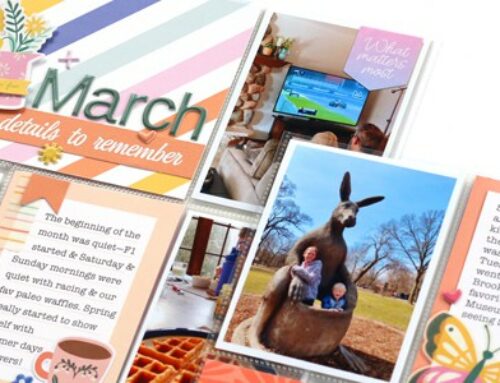
Because many of my photos are taken on my phone and posted on social media, they are often cropped square, and square photos are perfect for a grid-based design! My photos were printed to 3 x 3 inches, a great size for a nine-square grid. It leaves plenty of space around the grid for a border and each square is large enough to accommodate a few die cuts or stickers. To create my grid, I cut several papers the same size as my photos and did a rough arrangement of my page, using a photo on each row with my title in the center square.
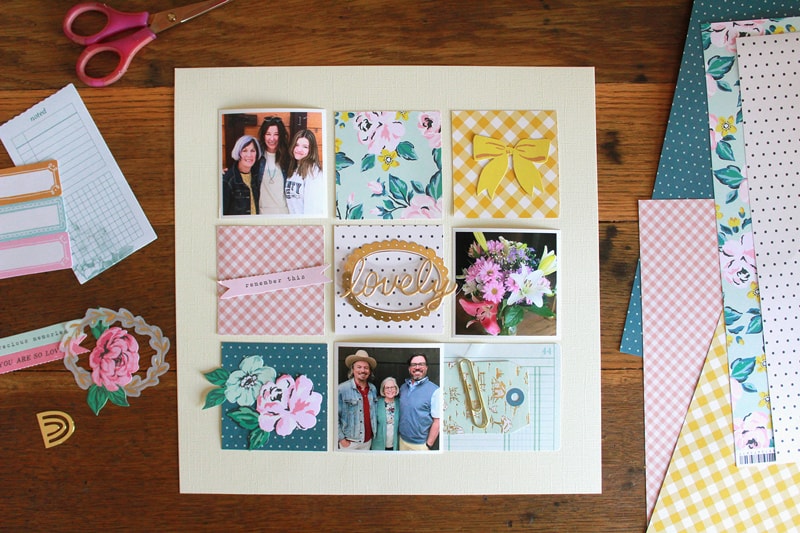
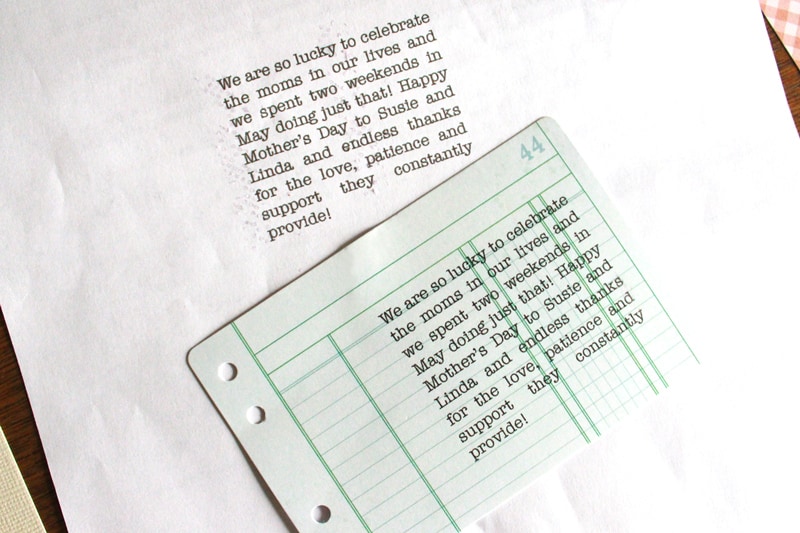
The lined card in the lower right corner is where I planned to position my journaling. I typed it on my computer in a 2.5” square text box and then printed it on a plain piece of white paper. Using temporary adhesive, I positioned the lined card over the printed text and then ran the sheet through the printer a second time to print on the card. After trimming it to a square, I have another block in my grid ready to go!
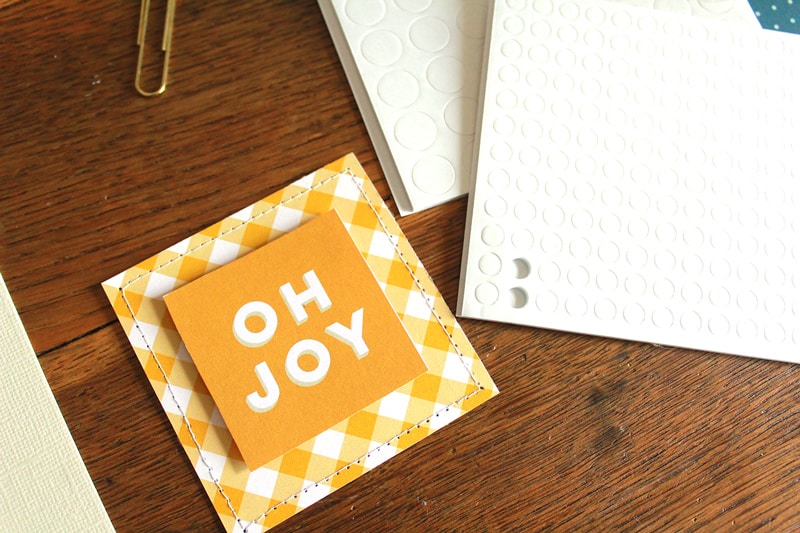
I played around with each of the squares in my grid and decided there were a lot of floral elements making the design too busy. I switched out some of the ephemera for other shapes, like a die-cut house and a simple sentiment square. The new arrangement has one floral element per row which keeps it feminine without being overwhelming!
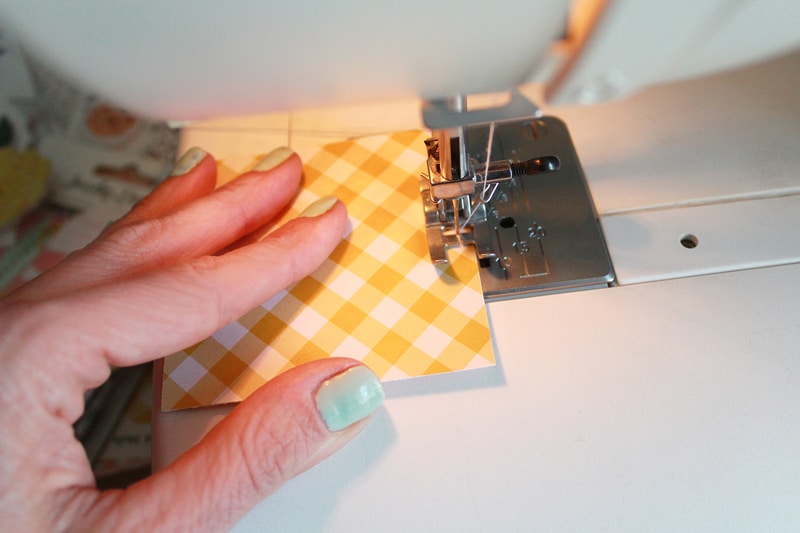
Once my square designs were determined, I began assembling the layers starting by stitching around the edges of each block. I love the handmade touch this adds, and if you don’t sew, you can always draw your stitches!
Each layer of the square was adhered with foam adhesive. The dimension this adds gives the design extra punch and I love the slight shadows it creates on each block!
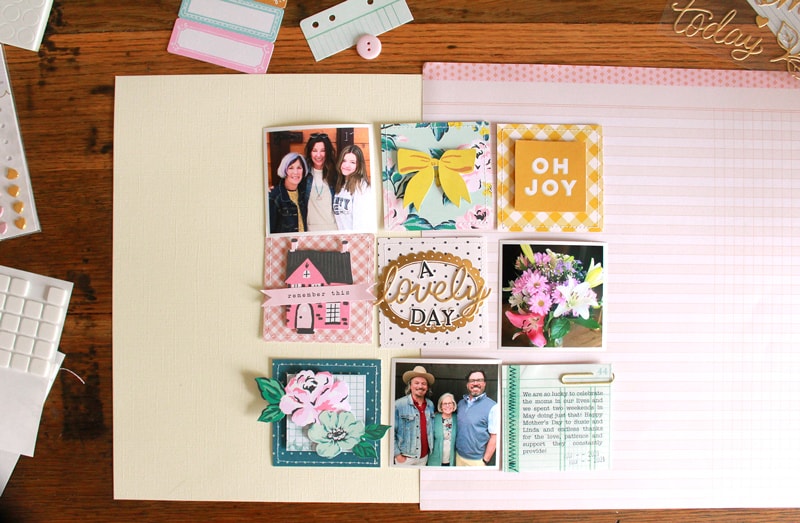
With my grid pieces ready to go, I needed to decide on a background. I had selected a pale yellow cardstock, but it felt a bit too plain. After experimenting with a few subtle patterns, I selected a pink ledger paper instead. It’s more interesting than a solid cardstock, but subdued enough to not compete with the grid.
A few simple touches: a gold paper clip, puffy hearts, a button and a tag to embellish the page finished the design off!
Are you ready to try a nine-square grid for your next page? We’d love to see what you create! Happy scrapping!


This is such a pretty layout. I love the colors and layout!!
Love this layout and great tip for journaling.
Lovely layout!
this is just lovely! thanks for sharing!