
Hello, SCT friends! It’s Latisha Yoast here, and I am so excited about today’s Things We Love Thursday post. Gardening is a hobby of mine, so when I saw the Love Grows Here cardmaking kit from Taylored Expressions, I had to have it! The coolest thing about the kit is the coordinating dies that cut out the images. I love a stenciled die cut!
Supplies | Taylored Expressions: Love Grows Here cardmaking kit, Shelf Control dies, Dots of Diamonds embossing folder, ink (cilantro, oreo, lime zest), cardstock (sugar cube, earl grey, salt water taffy, lime zest); Concord & 9th: cardstock (lemongrass, sweetpea, lilac, buttercup, powder, grapefruit), ink (lemongrass, clover, grapefruit, buttercup, juniper, clementine); Lawn Fawn: Circle Stackables dies, adhesive, ink (mermaid); Scrapbook Adhesives by 3L: foam squares
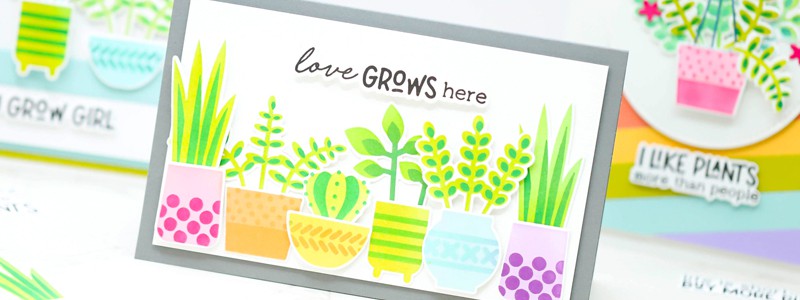
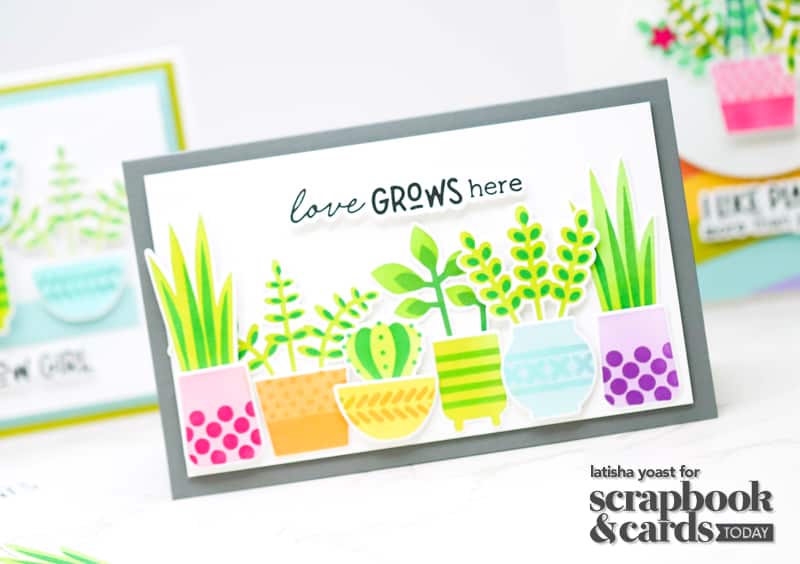
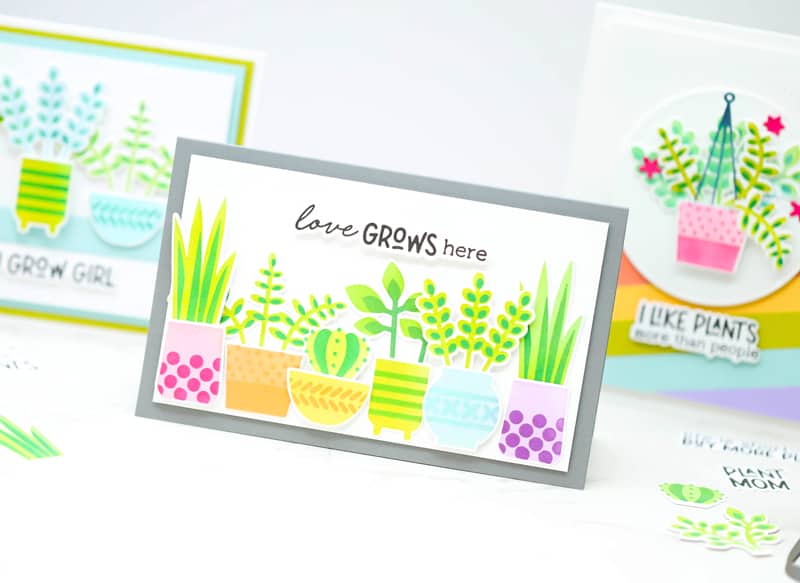
Stenciling is a great time to use your favorite ink colors because you will automatically be inspired. One of my favorite things is creating a rainbow on a card. I stenciled the planters in a rainbow of colors, then I die cut each planter with the coordinating dies. Every other planter is popped up with foam squares so that all of the planters could fit and give the card depth. After I added the greenery I stamped the sentiment with black ink. Lastly, I die cut the sentiment and adhered it to the card with foam adhesive.

One of the die cuts in the kit is a plant hanger. With that die cut, any of the plant and pot combinations can be turned into a hanging basket. They’re so super cute! Using scrap pieces of cardstock cut into 1/2-inch strips, I adhered them to the front panel at an angle. The greenery is from multiple different plants arranged into the pot to create a hanging basket. For added depth, the sentiment and the die cut circle were adhered to the center of the card using foam adhesive.
I did some math to create perfectly layered cardstock panels. I adhered them together using glue and foam adhesive. Before adhering the layers to the card, I embossed the white panel to give some texture and depth to the card. To balance the planters out, I die cut the shelf and adhered it to the lower center bottom of the card. Then, I stamped the sentiment with black ink. Lastly, I die cut and adhered it below the shelf. To finish the card, I adhered the planters to the card front.
If you have this kit, I hope these cards have inspired you to create some fun cards with it! If you don’t, check out the Taylored Expressions shop each month for a new cardmaking kit!


Great cards! I like the sentiment I like plants more than people. I have LOTS of TE products since I live in the same town.