
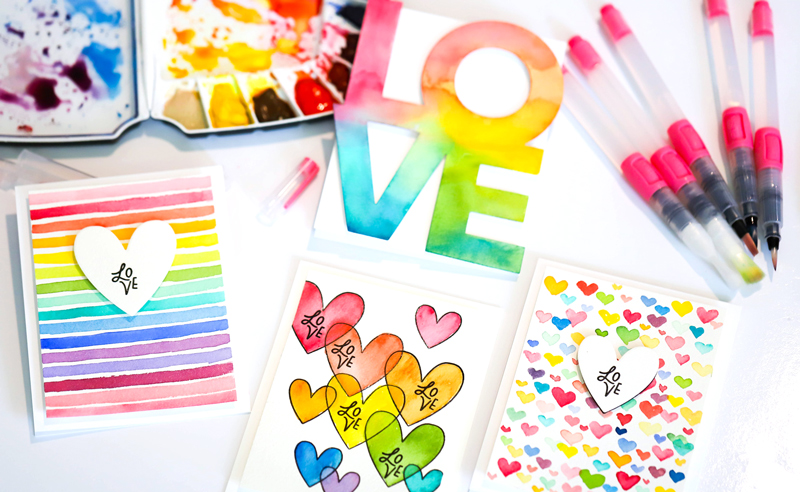
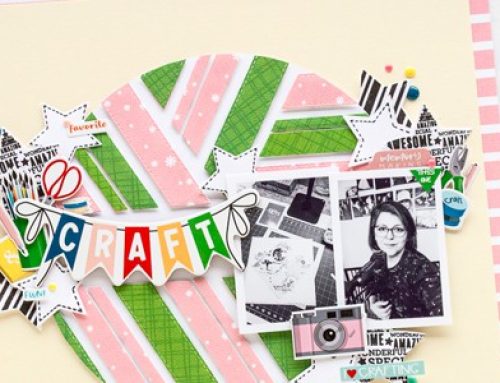
Hello friends! It’s Latisha Yoast here today to share a few cards using the new water brushes now available as part of the SCT Signature Collection. They come in a pack of 6, with 3 rounded tips and 3 flat tips. The brushes are the easiest water brushes you will ever fill. Just remove the cap and pour the water in. There is zero leaking, and did I mention they are pink? So, so cute!

Watercoloring is a favorite technique of mine to use when creating cards or even just to relax in my craft room. You will find a plethora of high-end watercolor brushes as well as a watercolor brush graveyard in my creative space. For years I have been on the hunt for a set of water brushes that are easy to fill. Because let’s face it, most watercolor brushes are almost impossible to fill with water. So imagine my surprise at the ease of filling these babies. You unscrew the lid, fill it with water, and that’s it! What a happy moment that was! Now that the brushes were filled, it was time to watercolor and create a quartet of colorful cards!
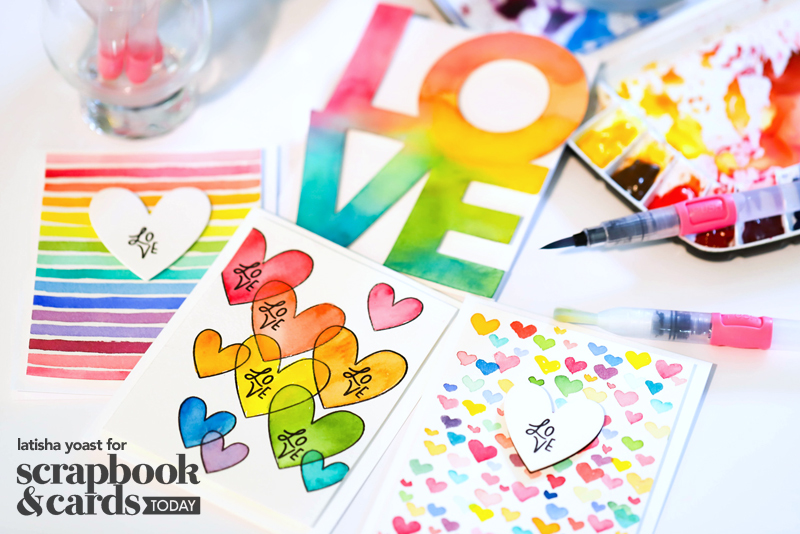
To prepare, watercolor paper was trimmed to fit onto a card base measuring 5 x 3.75 inches. There are 3 sizes of flat brushes, and for this card, I used the smallest flat tip brush. The background was created simply by dipping the brush into water-flooded watercolor, tapping off excess paint onto a paper towel, and then gliding the brush across the panel. I repeated this step until the panel was fully covered. This was so easy to create and is completely customizable. I topped the background with a heart die cut, stamped with a sentiment before adhering to the panel.
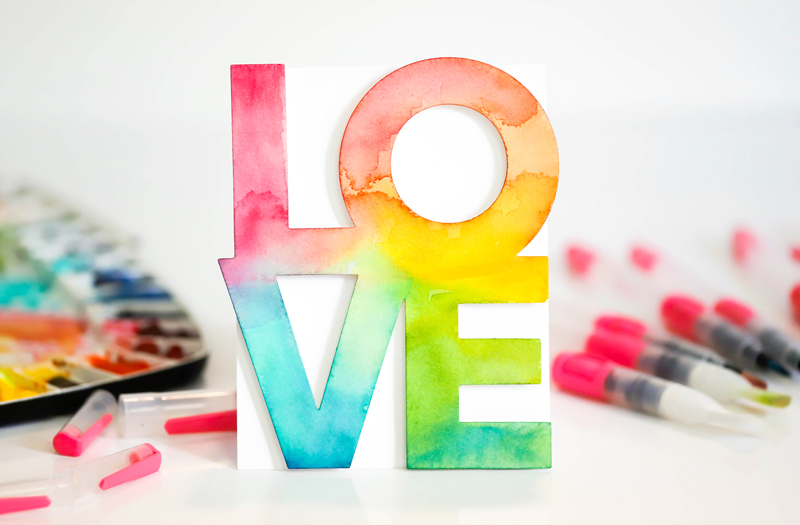
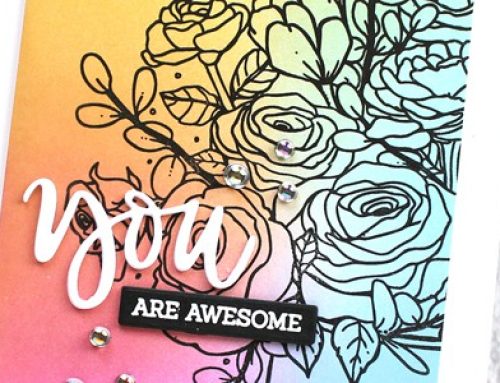
When watercoloring specifically on a card, always use watercolor paper. Traditional cardstock simply cannot absorb much water without pilling and causing damage to the paper. With that being said, this “love” die was cut from watercolor paper. Before adding the watercolor, using the largest flat brush, I applied water first to the die cut, using a technique called wet on wet. Applying watercolor onto a wet surface helps the color flow and spread into the adjoining colors. Once the die cut was fully covered, it was left to dry. The die cut did warp slightly, but that was easily fixed by placing foam adhesive to the back before adhering to the card front.
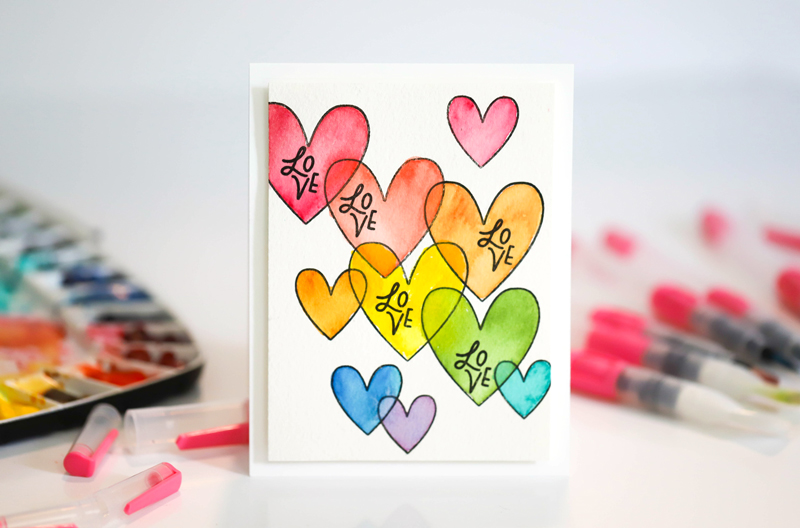
Using the smallest round tip brush and my favorite rainbow colors, I hand painted hearts onto the panel. Once the panel was completely covered in watercolor hearts, a heart die cut was cut with watercolor paper, stamped with “love” and adhered with foam adhesive. This is a great brush for fine detail!
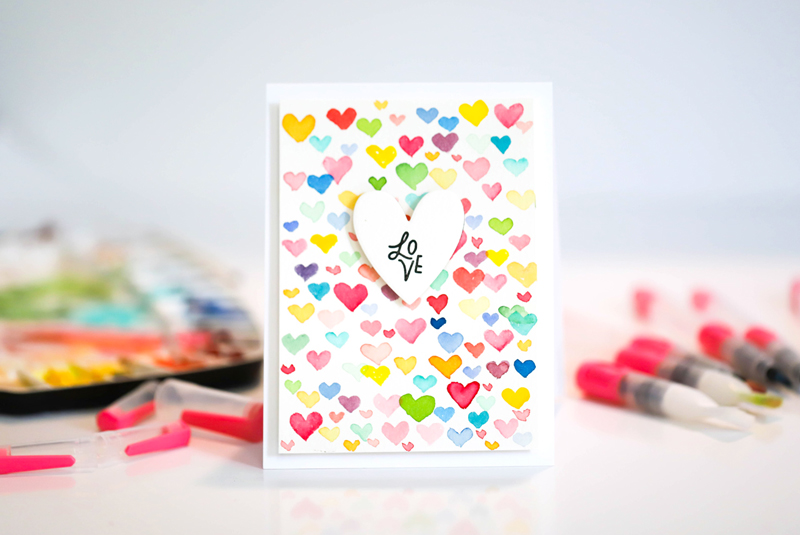
For this card, hearts were stamped all over the panel, using three different-sized heart stamps. When watercoloring stamped images, be sure to use permanent ink that will not bleed. Using the largest round tip brush, each heart was colored in with a different hue. Once dry, “love” was stamped in the largest-sized hearts. The panel was then adhered to the card base with foam adhesive.
All in all, these are fantastic water brushes! I give them a 10 out of 10, plus 5 bonus points for cuteness! These cards were so fun and easy to create. I only shared four cards with you today, but I think I made 15 watercolored card panels in one sitting! Thank you for joining me today, and head on over to the SCT Signature Collection website to check out the signature collection of goodies for purchase!

Find more of Latisha’s work here : Instagram | Facebook
![]()
Find our new water brush package available now, along with the other craft staples in our new SCT Signature Collection today by clicking HERE to visit the SCT shop!

Gorgeous cards
I was on the fence about these brushes, but these gorgeous cards sold me!
I’m just learning watercoloring and have thought how wonderful a broader tipped water brush would be. Poof..here it is. Thank you
A 2022 creative goal for me is to get more comfortable with watercolour, and your cards are so inspiring ~ thank you!
These are SO pretty!
These are the most cheery, bright, and fun Valentine’s ever!! I love that you used a rainbow of colors and I adore the designs! Thanks so much for sharing and inspiring!!! I’m definitely pinning these for later!
Your cards are absolutely darling!!
Beautiful cards