
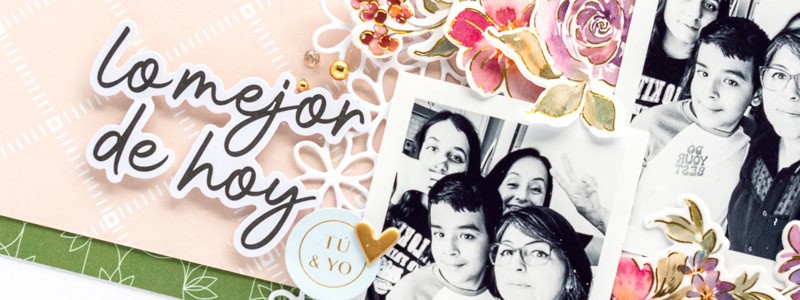
Hello friends! It’s Nathalie here with a new project and process video featuring a few new products from Pinkfresh Studio. I love their newest paper collections are now also available in Spanish (my native language!) in combination with one of their latest washi tape suites were just perfect for today’s project.

Supplies: Pinkfresh Studio Making The Best Of It collection: Patterned paper, chipboard stickers, cardstock stickers, ephemera; Pinkfresh Studio: Floral Lace die, Artsy Floral washi tape, Artsy Floral die, Gold metallic pearls, Champagne glitter drops, ink; Scrapbook.com: Blending brush; Scrapbook Adhesives by 3L: Adhesive; Spellbinders: Platinum 6 die cutting machine; Cardstock – Michaels, Hammermill
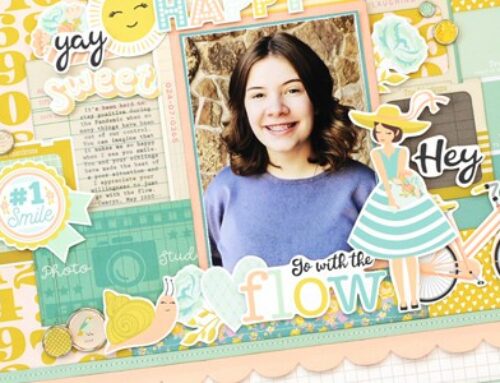
I started my page with a bit of patterned paper from the new Making The Best of It collection. These patterns will ground the pictures and all the elements to the page.

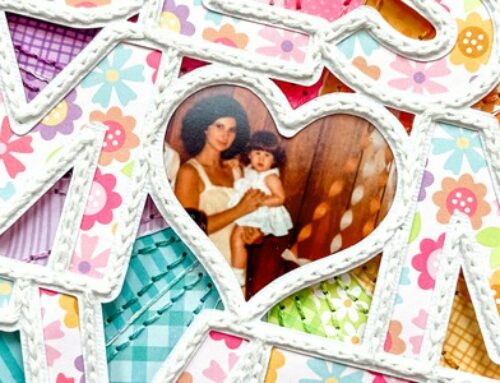
I chose the Floral Lace die (designed by Paige Evans for Pinkfresh Studio) to create a delicate and soft layer behind the photos. The design of the die contrasts with the straight edges of the paper strips which bring interest and texture to the page. In addition, I used a bit of ink on the background paper, this creates a soft shadow on the layout that ensures that all the details of the floral lace show nicely on the page.

If you have never checked Pinkfresh Studio wide washi tapes, then you have been missing out on an easy and quick way to create embellishments for your projects. I am using the new Artsy Florals washi tape for my project today. I used all the washi die cuts to create swags of flowers that surround the photos. I am clustering them in a way that they create an ‘S’ around the photos.

I scattered a few embellishments—stickers, chipboard flairs, metallic pearls, and glitter drops—around each of the clusters. These help to enhance the shape of the floral swags and bring extra sentiments to the page. Did I mention they are in Spanish?

To complete my page, I added a small cluster at the bottom of the page with the same elements that repeat throughout the page. This helps to limit the page while also creating a space for my journaling lines. You can check how this page comes together in today’s process video! Watch below or click ‘watch on YouTube’ to open in a new browser window, leave a comment and like the video!
I hope you enjoyed the video, and that it inspires you to check the new Pinkfresh Studio products and mix card making products in your scrapbook layouts. Be sure to share your projects with us!
Find more of Nathalie’s creations here: Instagram | Blog | YouTube

Lovely layout!