
Hello scrappy friends! My name is Anna Komenda and I am so happy to be a guest designer here on the Scrapbook & Cards Today blog!
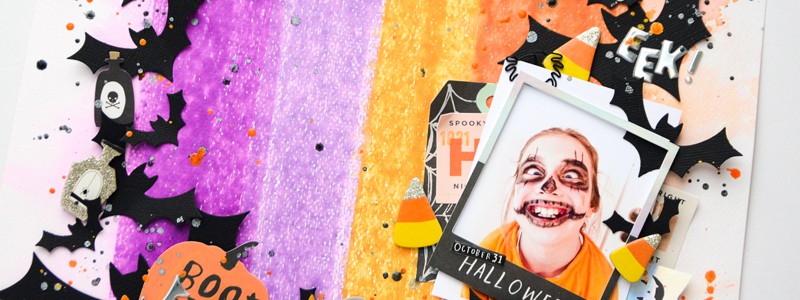
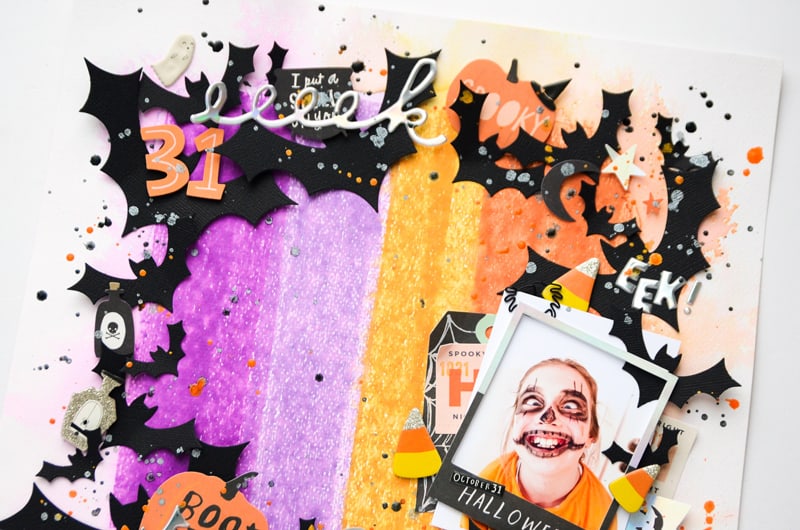
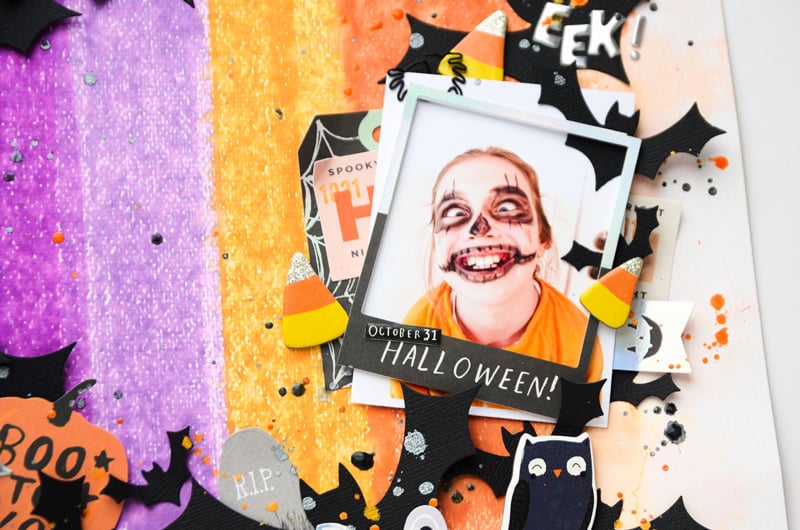
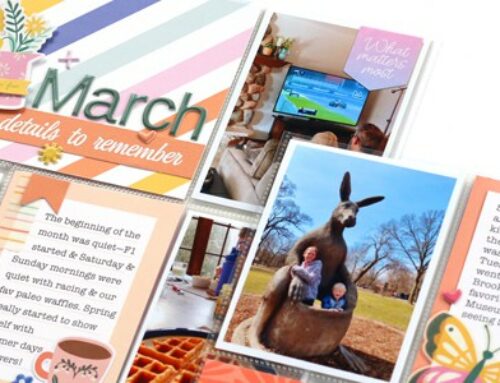
Today I want to share a very simple and easy mixed-media technique for your layout background. I made a Halloween page, but you can easily change the theme by adjusting the colors you are using! All you need is 12 x 12-inch watercolor paper or white cardstock and a few ink pads in your chosen colors.

Supplies | 12 x 12-inch watercolor paper; Altenew “Shades of purple” mini ink cubes set; Pinkfresh Studio “Indian summer” mini ink cubes set; Crate Paper “Hey Pumpkin” collection; Heidi Swapp Color Shine Mists in Tinsel and Mustard; Scrapbook.com “Halloween bats” dies; American Crafts black cardstock
All you need to do is to rub the paper with the ink pad! Depending on your pressure you will get a stronger color impression or a lighter one. You can rub once or twice if the result is too pale. Rub in vertical or horizontal lines, or make waves or a rainbow shape. For more graphic design, you can just press the squares in ink on top of the paper creating a grid. You can stop here or go a step further and sprinkle everything with water. It will lift part of the color and make it float a bit outside the applied strip. Just be gentle with the amount of water. You can always add more but too much of it will create a giant puddle in muddy color.
If adding water is something you would be interested in, remember that some colors mix well and some create just a dirty brownish shade together. The safest option, if you do not have a lot of experience with mixing colors, is to keep the in rainbow order (blue next to green, yellow next to orange, etc) or an ombre order from lightest to darkest in the same color. You can always reach for the color wheel to make the choice easier.
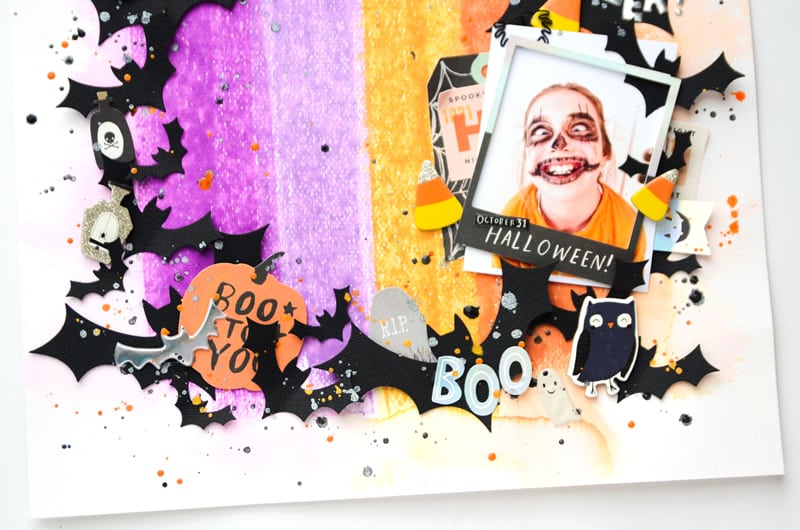
Purple and orange are the complimentary colors on the color wheel so I knew they will mix well together. Plus this color combo is so well known and tried so many times in many Halloween projects that the success was guaranteed here. I used mini ink cubes from Altenew and Pinkfresh Studio but you can use any other dye ink pads. It can be Distress Inks too. They all mix well with water and can create this dreamy effect after spraying on top of them.
After my background was dry, I embellished it with bits and pieces from a bit older but still one of my favourite “Hey pumpkin” collection from Crate Paper and some black bats, die cut with Scrapbook.com “Halloween bats” dies. Easy – peasy! And, not counting the drying time of the background, very fast page.
How do you like my idea for an easy mixed media background? Will you give it a try? You can easily adjust the theme of the page by picking different color palettes. Use red and green to make a Christmas layout, pastel pink, yellow and blue for Easter, or shades of blue for a pool party page! The sky is the limit here. This technique is great for beginners, too, as you don’t need any special skills and hours of training. Watch me create this page in my process video, and see how easily it can be done!
That is all for today! Thank you so much for joining me and I hope I inspired you to pull out your ink pads and create something special!
I live in Poland, Europe, with my little family of two daughters, hubby, and a beagle boy. I have been scrapbooking for almost 14 years. What started as a hobby turned into a lifestyle for me. I love sharing my knowledge with fellow scrapbookers on my YouTube channel. I also teach live and online classes. I would define my style as a bit messy, with a mixed media touch and a lot of colors. Rainbow is my jam for sure!
Find more of Anna’s work here: Instagram | Facebook | YouTube

Loved the process video and your layout. Thanks for sharing.
Thank you so much Glenda
This is beautiful. I will try it and probably for Halloween also. Love the kiddy photo it’s hilarious.
Thank you so much. Don’t forget to tag me on your IG (@anna.komenda) so I can enjoy your project.
It was fun to watch your video putting the page together. I like that you made the frame square instead of round. Fun page.
Thank you so much <3
Beautiful and scary!