
Hello, friends! Valentine’s Day is the day when we show those we love the most how much we care, and how better to do that with something handmade! Sometimes we need to create a quick and easy card, but Valentine’s Day should be the day when we go all out to create a truly special valentine, and that’s what Meghann Andrew is sharing with us today. Let’s take a look!
![]()
Hello, friends! It’s Meghann Andrew with you today. When it comes to creating 95% of the time, I typically go the quick and easy route, but for Valentine’s Day, I love going the extra mile with Valentines to show my family how much I care. I love watching them open an envelope to announce, “Wow, that is so pretty!” or, “Did you make this?” I think that this card would warrant those reactions:
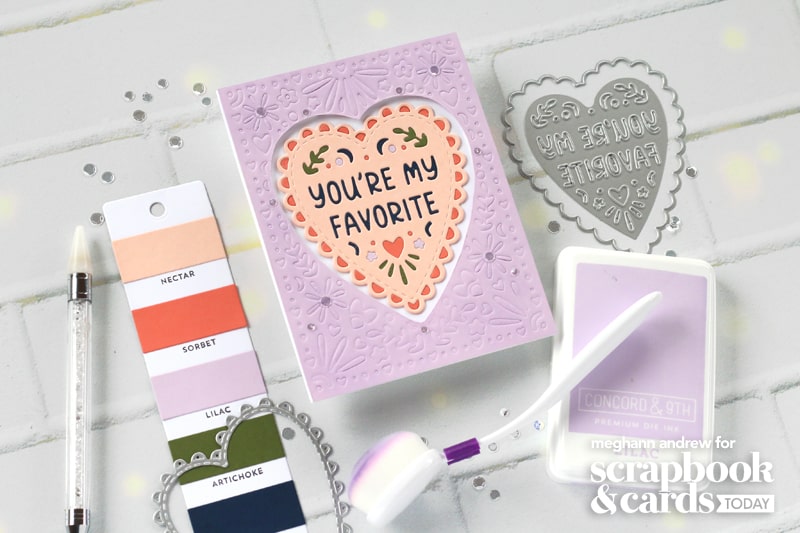
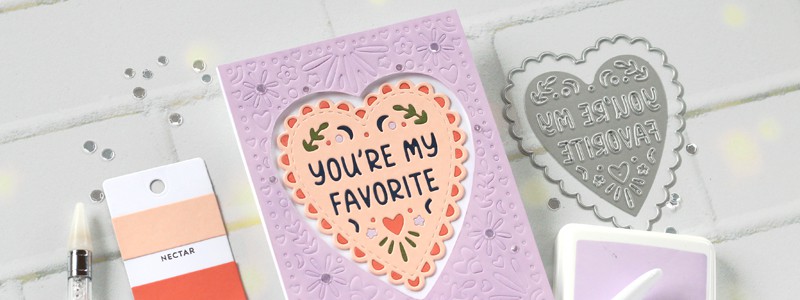
Supplies | Concord & 9th: Enchanted Heart dies, cardstock (Nectar, Sorbet, Lilac, Artichoke, Midnight), ink (Lilac); Spellbinders: Platinum 6 Machine with Universal Plate System; Gina K. Designs: Blending brushes, fine-tip bottles; Scrapbook.com: Top-folding A2 card base, Artis craft glue, Magic Mat; Scrapbook Adhesives by 3L (Crafty foam tape-2mm); Other: Exacto knife, pick tool, sequins
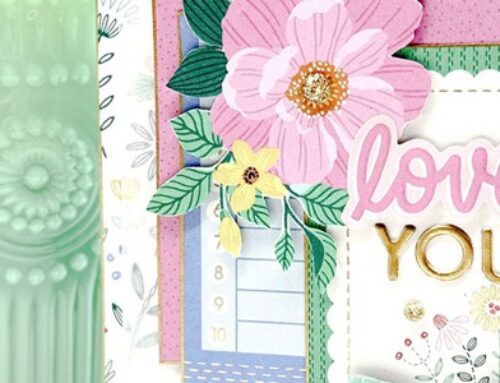
This card doesn’t require many supplies—mainly cardstock, but it does require a bit more time than the typical card to create using two great techniques: die cut inlay and embossing with dies.
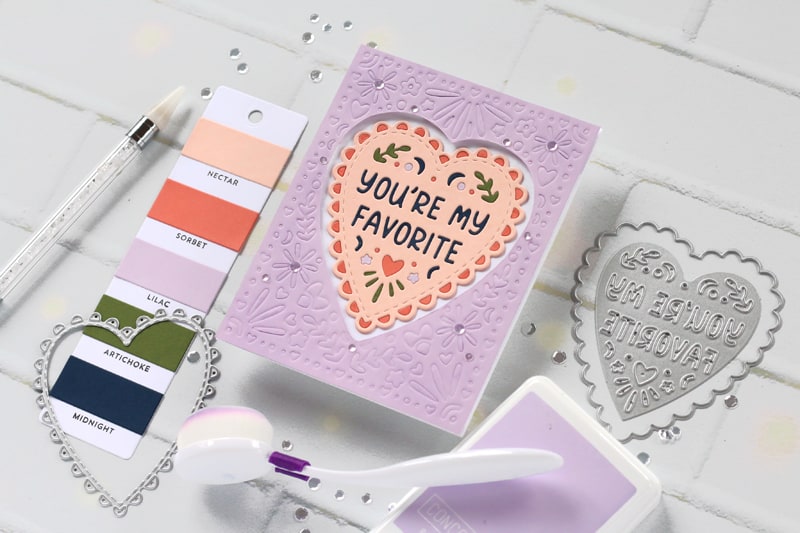
I started by creating my front panel from Lilac cardstock from Concord & 9th. Instead of using the cover plate die to cut out the lovely florals and hearts from the panel, I used the embossing mat in my Spellbinders Platinum 6 to emboss the design instead of cut. This is a great technique to extend the use of your metal dies and get a completely different look on your projects using them. Once that was cut, I ink-blended Lilac ink onto the card panel using a blending brush, which helped to accentuate the raised elements.
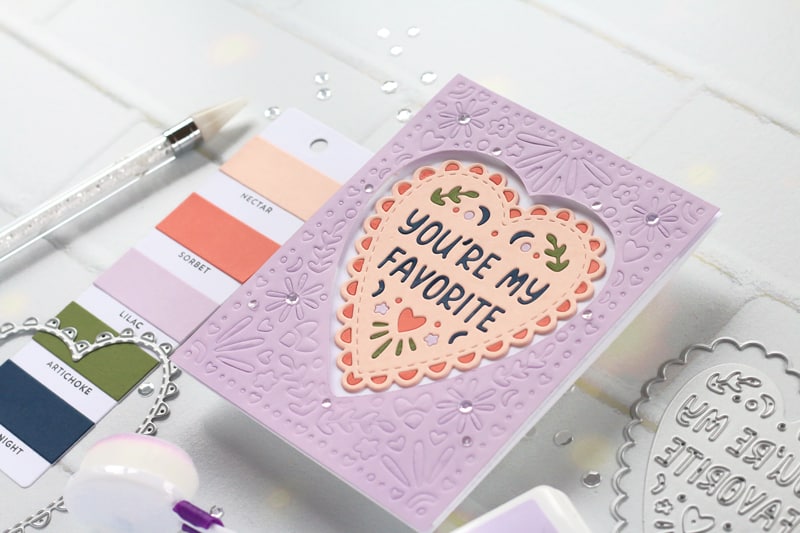
Once the panel was ink blended, I used an Exacto knife to cut out the embossed large heart in the center and adhered it to my A2 folded card front using dimensional foam adhesive from Scrapbook Adhesives by 3L to give it lift and create a frame for my central heart.
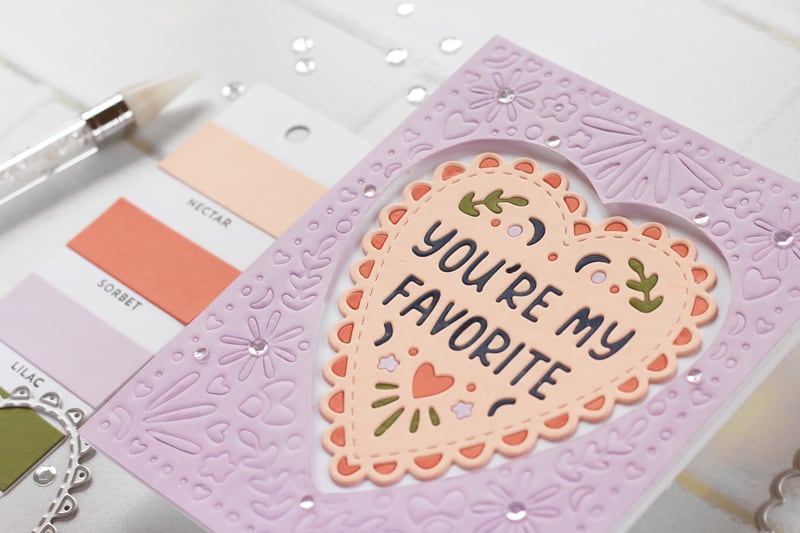
The central heart is the focal point, and the reason why this card is so special! I cut two layers of Nectar cardstock and adhered them together before adhering to the inside of the Lilac heart opening to start the heart shape. Then, I cut the same heart from Midnight, Sorbet, Artichoke and Lilac cardstock to inlay the delicate pieces of the heart. Was it worth it? I certainly think so when you look at the finished card!
Want to see the process of this card coming together? Watch this process video to see both of these techniques in action!
I hope you’ll give these techniques a try, and use them to show someone special how much you care with a handmade card!

Find more of Meghann’s creations here: Instagram | Website | YouTube


Beautiful sweet card Meaghann
Beautiful card ❤
Sweet card Meghann ! Happy V Day !
The heart is so pretty, nice work as always!
Thank you for sharing a new way to stretch our dies by using them to emboss rather than cut! I adore your colorway from Concord and 9th, it is inspiring me to try to duplicate this combination! I know your Valentines will definitely appreciate these sweet cards, knowing you created them with love!
Beautiful card! I really love the purple foreground with the heart window!