
Hello, friends! It’s SCT sketch artist Allison here today to share a few layouts using one of the sketches from the summer issue. One of the greatest advantages of scrapbook sketches is their adaptability to suit your style or ideas. While the sketch provides a foundation, you have the freedom to infuse your unique touches or embellishments. Whether you prefer a minimalist approach, love adding mixed-media elements, or enjoy experimenting with different ideas, the sketch provides a versatile framework to showcase your creativity and make it truly your own!
I have three layouts to share with you today that all used the sketch below as the starting point. Even though each layout started with this same sketch, you’ll see how they each look uniquely different.
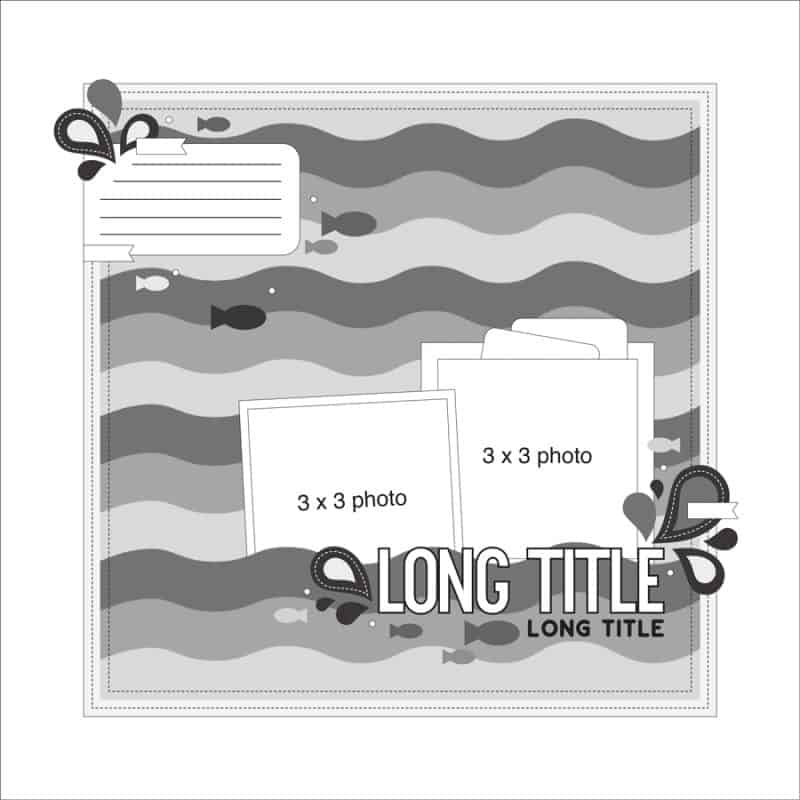
Click HERE to see all of the sketches from the Summer issue!
Supplies | Cardstock: American Crafts; Patterned paper: Simple Stories, Echo Park, Crate Paper, Bella Blvd., and Pink Paisley; Chipboard clouds: Studio Calico; Sunburst cut file: Sophie Gallo, Silhouette Design Store #384831; Water splash cut file: Amy Robison, Silhouette Design Store #83594; Chipboard hearts and crab: Simple Stories; Foam title: Simple Stories; Word/phrase stickers: Simple Stories; Circle punch: Fiskars; Embroidery floss: DMC; Computer font: Century Gothic; Nuvo Jewel Drops: Tonic Studios
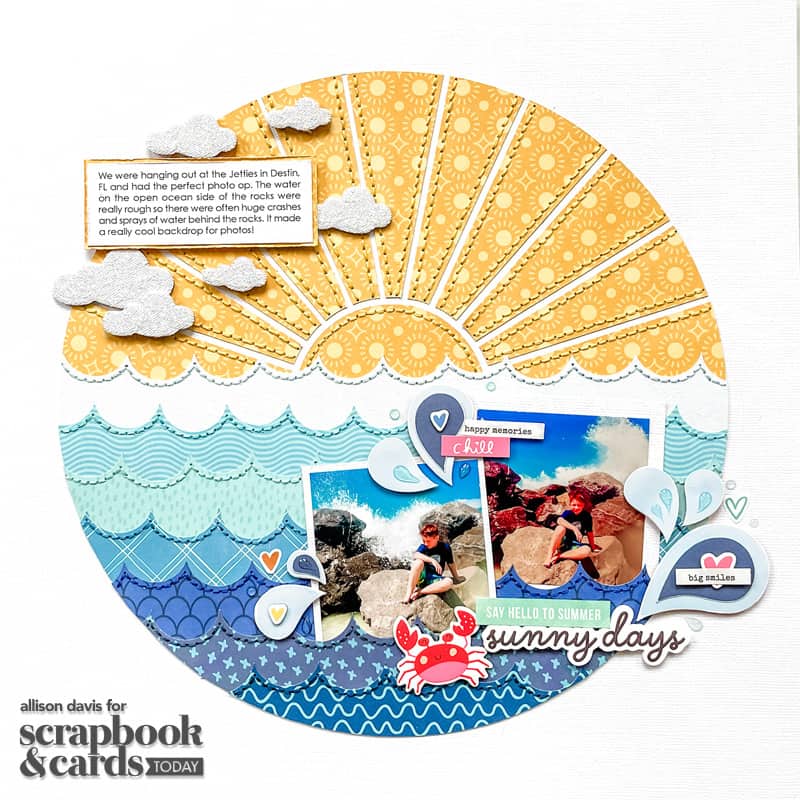
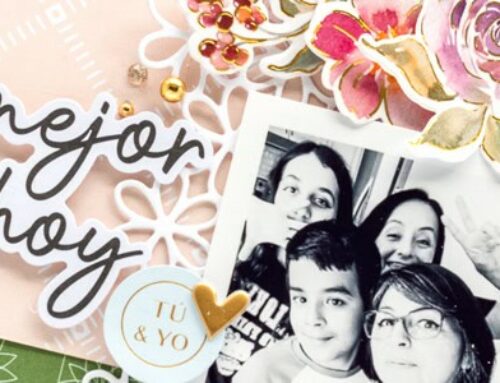
With my first layout, I made some big adjustments while still following the general design concept of the sketch. The main change I made was the shape of the waves background and the amount of waves. I thought it would be fun to work in a sunburst to go with my “sunny days” theme. That evolved into changing the shape of the background from a square to a circle and only using the wave strips to the halfway point of the background.
Anytime I see a larger background on a sketch I always imagine what it could be like as a different shape. With this sketch and layout, it went from a square to a circle. Could it also be a heart? Yes! Could it also work as a hexagon? Sure! Can it be stretched to a rectangle for a two-page layout? Absolutely! There are so many fun possibilities with different-shaped backgrounds!
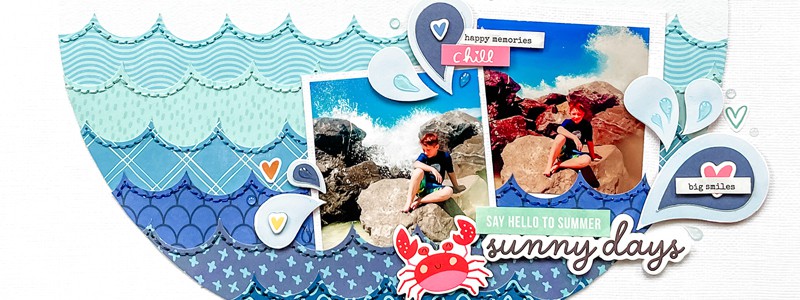
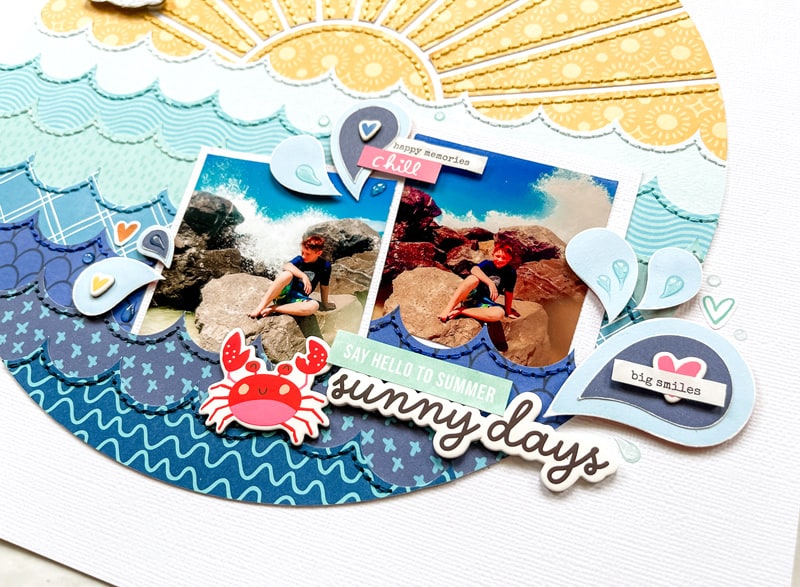
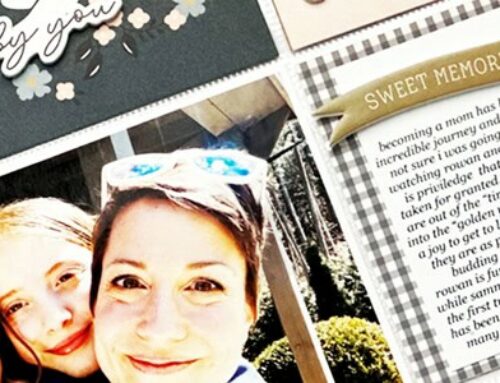
The rest of the layout design follows the sketch quite closely. I still used splashes around my photos. Then around the journaling, I swapped out the fish and splashes on the sketch for clouds.
Supplies | Cardstock: American Crafts; Patterned papers: Bella Blvd. and Simple Stories; Stickers and die cuts: Simple Stories; Fringe scissors: Martha Stewart; Corner rounder punch: Fiskars: Circle punches: Fiskars; Embroidery floss: DMC; Computer font: Century Gothic
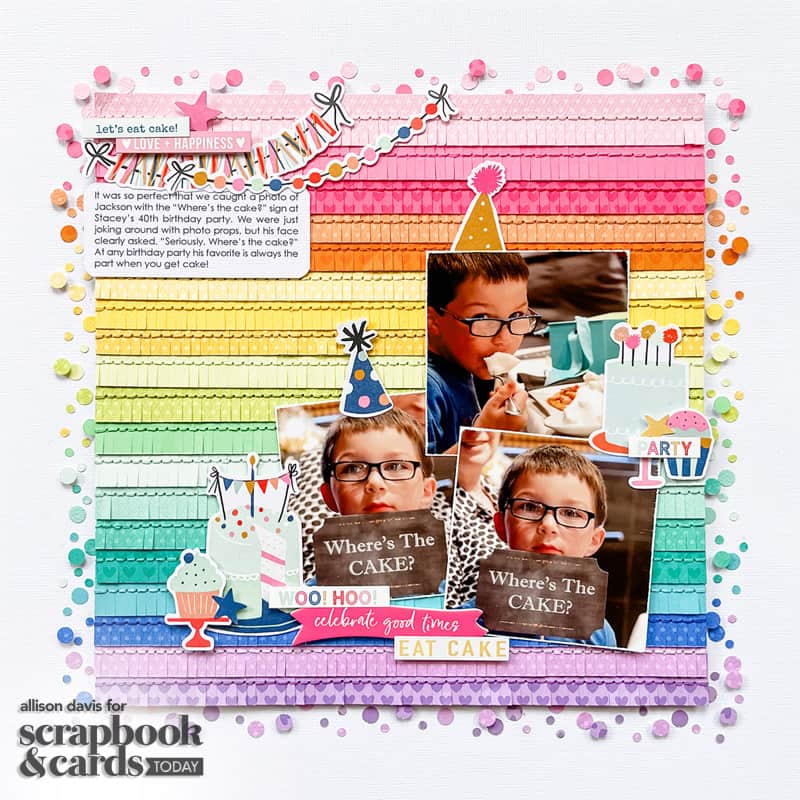
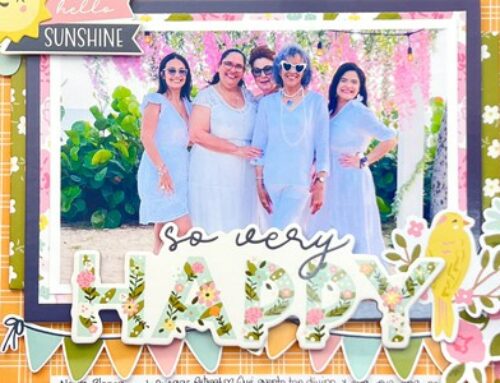
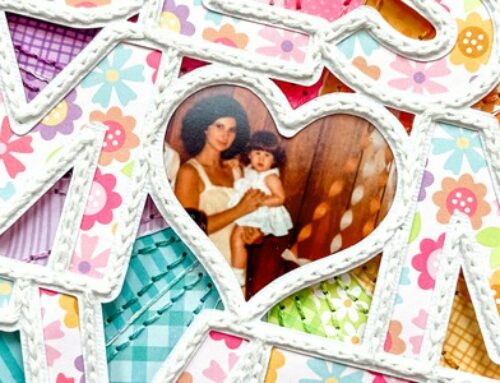
With my second layout, I made a few adjustments to fit my theme and the addition of an extra photo. This time I traded those wave strips for fringe strips to go with my party theme. When looking at a sketch with strips, especially decorative edge strips like the waves, I think of other decorative edge ideas like using scallops, chevrons, and torn or fringe strips like the ones I used. If you want to take it even further, those strips can be changed into vertical strips or squares, or clusters of shapes like hearts, stars, hexagons, etc. The only limit is your imagination!
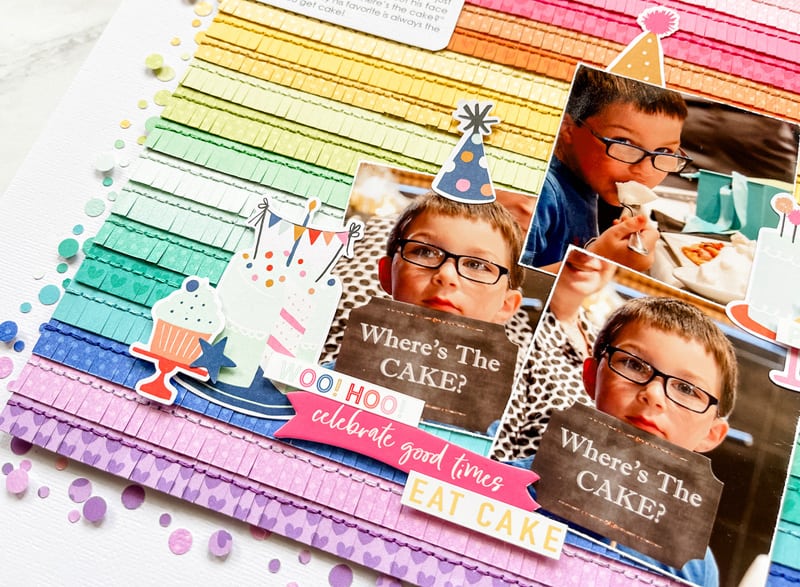
The rest of the layout shadows the placement of the sketch details and embellishments, they’ve just been customized to my party theme. I also added an extra photo which was super easy since there’s lots of open space in that area for more.

Supplies | Patterned paper: American Crafts – Vicki Boutin, Echo Park, My Mind’s Eye Bella Blvd., and Simple Stories; Die cut pieces: 49 and Market; Chipboard “amazing”: 49 and Market; Alphabet stickers: Elle’s Studio; Star cut file: Sweet Afton, Silhouette Design Store #309189; Embroidery floss: DMC; Computer font: Century Gothic
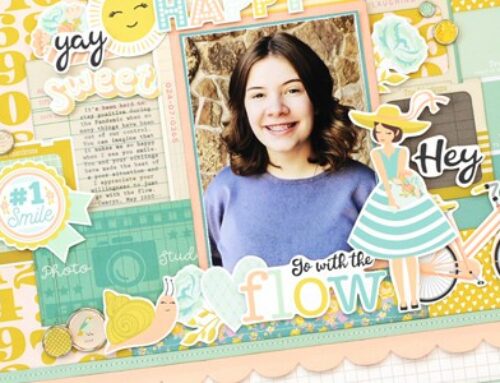
With my third layout, I took the square design and extended it to the outer edges of the layout. That center design became the whole layout. The design inspiration started with the patterned paper I wanted to use for my background. I loved the zig-zag design and thought it would be an excellent swap for those wave strips. This is a great way to simplify a sketch design, by using a single patterned paper in place of all those strips.
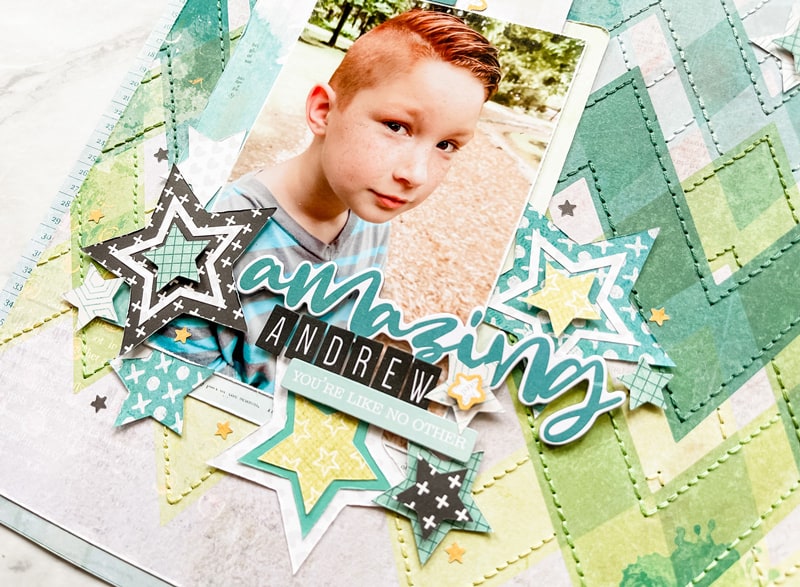
You might also notice that I flipped the sketch so that the photo is now on the left and the journaling is on the right. I did this so that the subject in my photo isn’t facing off the layout. I always try to position my photos with my subject facing toward the center. To me, you naturally want to follow the direction the person is facing and you don’t want the viewer’s attention going off your layout.
Speaking of the photo, I traded the two smaller photos for a single larger photo. This is always a great method for adapting a sketch to fit your photo needs. Plus, with the larger background design, there was a lot more room for a larger photo.
With these three layouts, you can see the versatility of a sketch. Sketches are not a rule that has to be followed. They are simply a starting point that you can use to build on your own creative ideas and style. If you want to see even more ways to adapt this sketch, be sure to grab the Creating with Sketches: Bonus Sketch Options PDF. My challenge to you is to use this sketch (or any of the sketches in the summer issue) and see what unique ideas you can come up with. If you do use this sketch I would love to see what you create as well so if you are on Instagram be sure to tag me, @allisondavis4sg and @sctmagazine! Thanks for stopping by the SCT blog today!
Hi, I’m Allison and I’ve been scrapbooking for about 17 years. I got my start when my family decided to open a scrapbook store in Springfield, MO called Scrapbook Generation. A few years after we opened the store I started creating sketches and producing monthly sketch bundles and books while also teaching and sharing how to adjust and customize sketches through my website, online classes, and YouTube channel. I have been married to my husband, Mike, for almost 19 years and we have two sons, Drew and Jackson. Drew is continuing the “generation” element of SG as the third generation working at our store. It truly is a family business!
Find more of Allison’s work here: Website | Sketches | Facebook | Instagram
![]()

Watch as Nathalie DeSousa works her layout magic with our July Sampler TODAY, and creates one beautiful scrapbook page!
Click HERE to RSVP to Nathalie’s Sampler Live or watch on replay!
Join Meghann on Wednesday as she makes merry in this month’s Let’s Create Together Facebook Live with a sweet holiday project that will excite cardmakers and scrapbookers alike! Join our private Facebook group today and RSVP to Meghann’s live so that you have the date on your calendar!

Love all the layouts, especially the Sunny Days one!
These layouts are fabulous! I really love Sunny Days and want to attempt that one!
Thanks for so many fun, challenging sketches
Allison’s sketches are always awesome! Love how different each of her pages looks.
Gorgeous layouts and tons of inspiration!! Thank you so much for sharing with us!! The sketch is so versatile as well!
I love your first layout! Very inspirational
Awesome layouts! I love the Sunny Days layout!
so many different patterns and look awesome together! thanks
Love the stitching and all layers of colour. Beautiful layouts
These layouts are AMAZING!!! Thanks for sharing your talent with us!
count me in