
If you’ve ever thought about creating pocket pages but didn’t know where to begin, OR, thought that you didn’t have the right supplies on hand, our special guest today, Krystal Idunate, is going to bust that myth for you! Krystal’s pocket pages are rich with stories AND beautiful products, and we think that you’ll be inspired by her ability to use traditional scrapbook products in pockets to create gorgeous pocket pages! We hope that it will inspire you to give pockets a try in your album this year!
…………………….
Hey there friends & fellow storytellers! It’s Krystal Idunate here and I am so excited to be here with you today. I am a (mostly) pocket page scrapbooker with a love for photos, words, and white space. I have come to love pocket page scrapbooking because I find that it allows me to tell my stories quickly while giving me lots of room for photos and words. While I typically create my layouts using products specifically designed for pocket page scrapbooking, I also love the opportunity to stretch my creativity and use a traditional scrapbook collection as well.
Today, I want to share five different tips for how you can think outside of the box and use your traditional scrapbooking collections to document life in a pocket page layout. I’ll be documenting a week in my 2021 Project Life album, but these ideas translate to any pocket page style project you are working on.
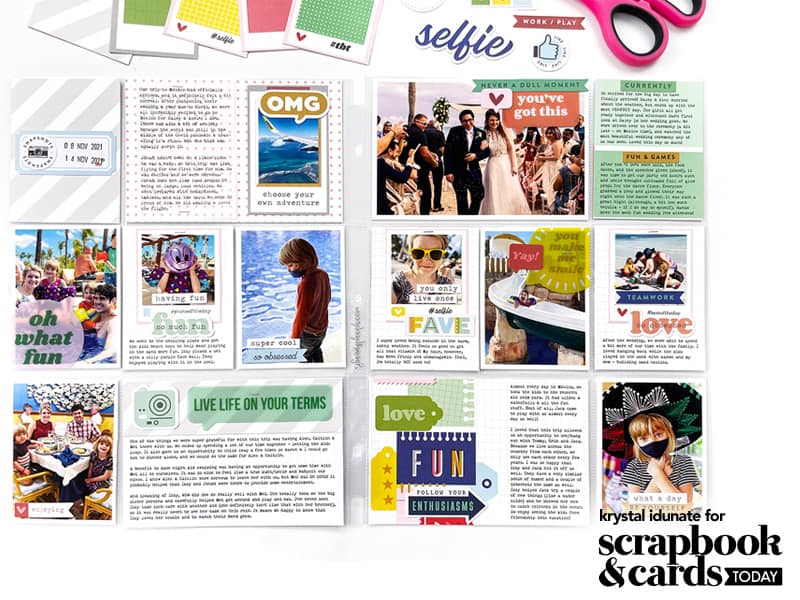
Supplies | Pinkfresh Studio Super Cool Collection (patterned paper, acetate speech bubbles, die cuts, cardstock stickers); Tools: Tim Holtz Tiny Attacher; Fiskars 12” Paper Trimmer; Kokuyo Roller Adhesive; Tonic 8” Paper Trimmer; Foam Stamp Mat; Other: vellum; Similar Paper Collections: Pinkfresh Studio Life Right Now Collection, Obed Marshall Espeical Collection
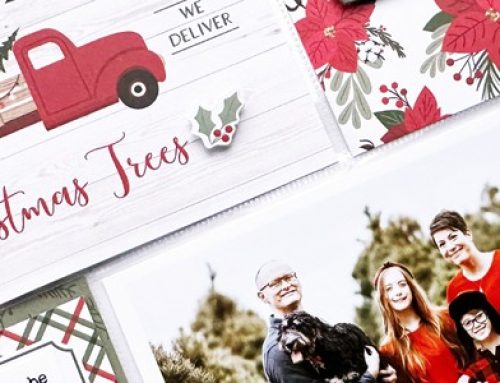
Tip #1: Use Simple Patterns & Light Colored Paper for Cards with Journaling
Consider using some of the simpler patterns OR lighter colored papers to create cards for holding your stories. By keeping the backgrounds of the cards simpler, it prevents your journaling from becoming too busy or overwhelming to the eye.
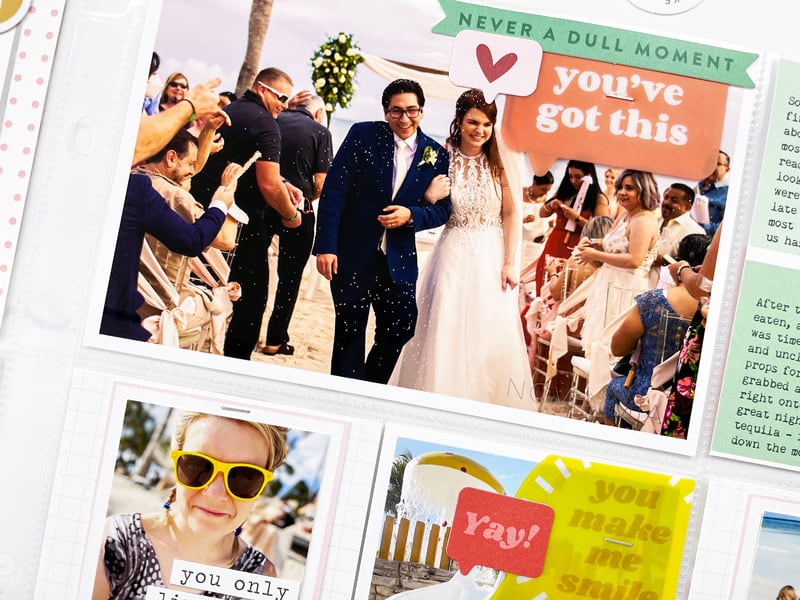
In my layout using the Pinkfresh Studio Super Cool collection, I chose to use a paper with a light grid pattern for the majority of my journaling cards. The paper was originally sized at 12 x 12 inches and included a busier layered tag pattern on the left side of the page. I trimmed off a portion with the layered tag pattern so I could feature that in a 6 x 4 inch journaling card (seen above), and then cut the rest of the paper into 6 x 4 and 3 x 4 inch cards with the plain grid pattern. I love that the grid pattern creates a high level of consistency throughout my spread.

Tip #2: Print Journaling on Vellum to Layer on Busier/Bolder Pattern
If you choose to include busier patterns in your layout, try printing your journaling onto vellum and adhering that on top of the patterned card. Vellum helps to mute down bold colors and busy patterns without covering them up completely. It also helps the text printed on top to be more visible, making these types of cards not only beautiful but also functional!
In my layout, I wanted to include a 6 x 4 inch card using the pink polka dot pattern. I knew that my journaling would blend into the card and overwhelm the eye if I printed directly on it. Instead, I printed my journaling on vellum and attached that to the patterned card with my Tim Holtz Tiny Attacher. Now, you can still see the polka dot pattern AND my journaling is more visible as well.
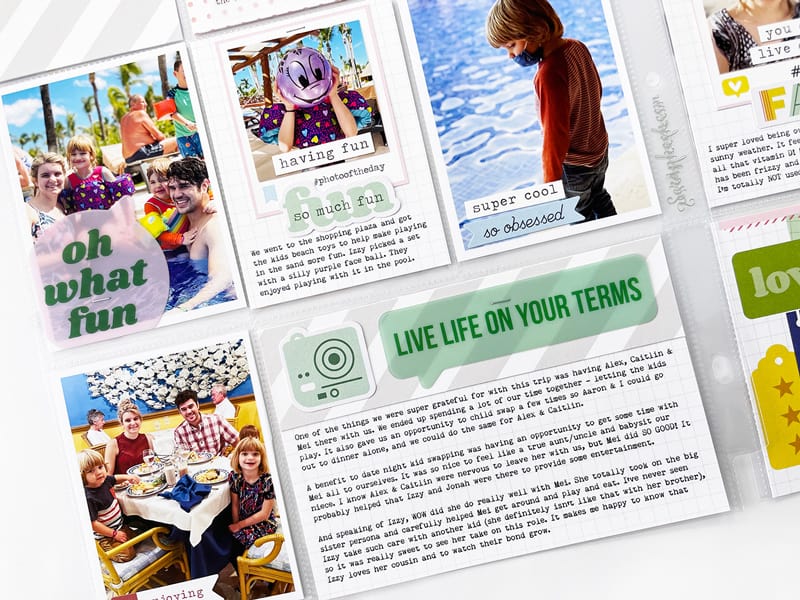
Tip #3: Use a Strip of Patterned Paper & Embellishments for Journaling Card Titles
If you want to use more of your patterned paper in your layout, but don’t want to sacrifice the space for journaling, try cutting a strip of paper to use for the title space of your journaling card. Then, if you like, you can add a title to the pattern paper strip using die cuts, embellishments, alpha stickers, or more. The beauty of this technique is the ability to feature patterned paper while still leaving room for journaling underneath.
In my layout, I wanted to include the gray and white striped paper from the Pinkfresh Studio Super Cool collection. I used it as a 3 x 4 title and date card for my layout, and I wanted to have the pattern repeated for cohesion. I cut down the paper to a 6” x 1.5” strip. Then, I added the patterned paper across the top of a 6 x 4 inch grid pattern journaling card. I finished the card off by adding a plastic speech bubble and a camera die cut to create a title for the card.
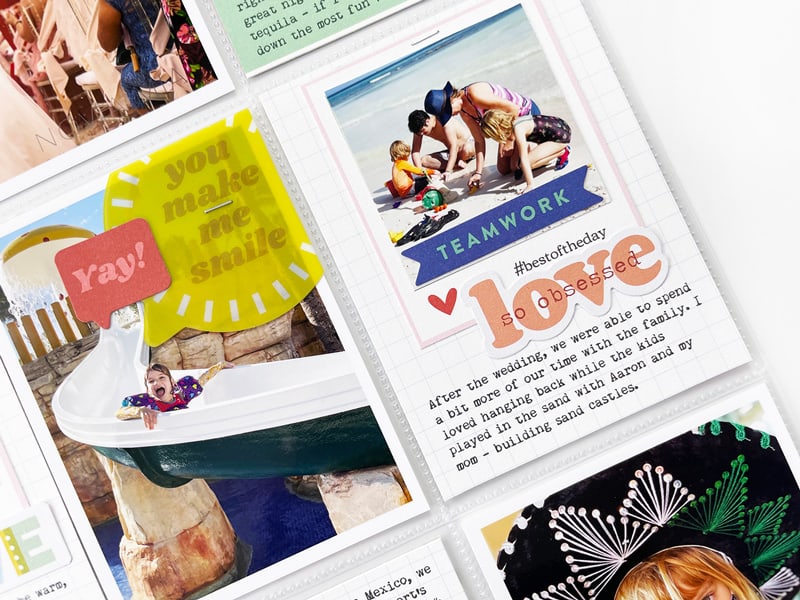
Tip #4: Use Larger Elements Cut from Patterned Paper for Embellishments or Layering Pieces
Look for opportunities to cut out larger elements from patterned papers. You can then use these elements to create homes for your photos or your words. Ideas for patterns to look for: polaroid frames, bulletins, picture frames, large shapes, etc. Trim the elements out and use them to include more words or photos in your layout. Think of them as layering pieces for your smaller card-sized canvases.
In my layout, I trimmed out three polaroid frames from one Pinkfresh Studio Super Cool patterned paper and used them as layering elements to create custom 3 x 4 inch cards. I added smaller square photos into the polaroid frames, stapled each polaroid to the top of a 3 x 4 inch grid pattern card, layered embellishments at the bottom to create a title, and put my journaling underneath that. I did the same thing to create a 6 x 4 inch card using a paper that had a repeated bulletin pattern. I love the dimension and detail these cards create in my layout.
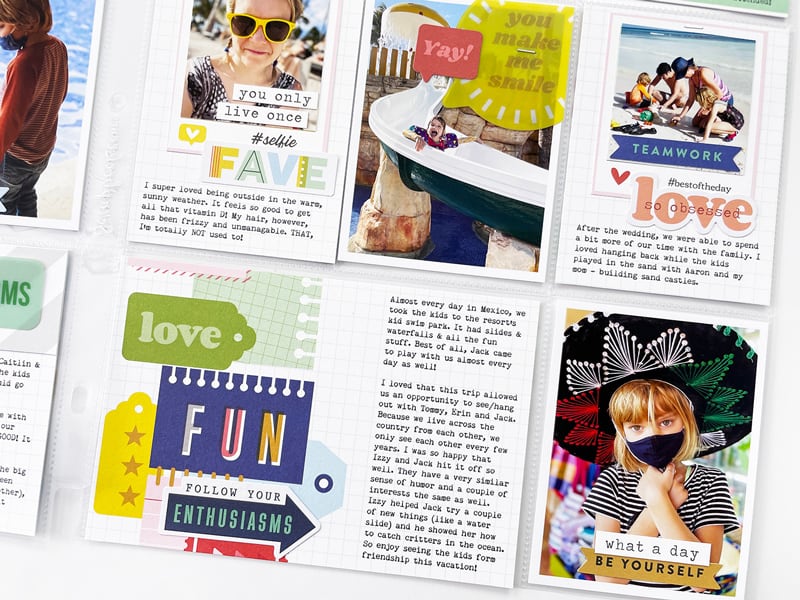
Tip #5: Create Repeated Embellishment Clusters
Look for ways to create repeated embellishment clusters using the same types of pieces. Then, add these embellishment clusters to cards and photos throughout your layout. Keeping your embellishing consistent throughout your spread helps to make decision-making easier and also creates a cohesive look to your layout.
In my layout, I set aside a collection of plastic speech bubbles, word phrase die cuts, and smaller cardstock sticker speech bubbles. I then created embellishment clusters using a combination of these elements to give my whole layout a unified feel.
Want to see more? Watch my layout come together in the process video below to get even more ideas for how to use a traditional scrapbook collection in a pocket page layout.
Thank you so much for stopping by today. I hope you feel inspired to dig into your traditional scrapbook stash and use those products in unexpected ways. Until next time, happy crafting!

Hello friends! My name is Krystal Idunate and I am so thrilled to be on this memory keeping journey with you. I have a passion for storytelling through scrapbooking and a deep desire to create a community of storytellers who can connect and share the stories of our lives.
Find more of Krystal’s work at these links : Patreon | YouTube | Instagram


Great tips, I especially love the tip about printing the journaling on vellum paper. Beautiful layout
So pretty Krystal! Love all these tips! Your pages always make me happy!
Great tips Krystal! Thank you for sharing a video too! I hope we see more of you on the SCT blog.
These are wonderful!
So happy to see you in another scrappy platform! Thank you for continuing to share your creative tips and tricks with us.
Thanks for sharing! Hope to see more from Krystal on SCT.
This is such great content! Thank you for having Krystal on your blog. She is such an inspiration and I always go to her videos for some creativity! Please have more Krystal! <3
Love how vibrant and energetic this spread is!