
Hello, SCT friends! It’s Meghann Andrew with you today! Lately, when I create cards, I’m usually creating all-occasion designs—ones that can be sent as just a quick “hello,” for a birthday, or even as a thank you. The June SCT Sampler included the perfect “friend” exclusive metal die, and since I typically send cards to my friends, it created the perfect all-occasion sentiment starter for two beautiful cards which I stenciled using the Spellbinders Layered Vintage Floral Stencils.

Supplies | June 2022 SCT Sampler: Honey Bee Stamps Gingham Gallore paper pad, Spellbinders Layered Vintage Floral Stencils from the Flea Market Finds collection by Cathe Holden, “friend” metal wafer die; Cardstock: Scrapbook.com Warms A2 paper pad, Neenah Solar White A2 scored card; Stamp: Scrapbook.com Happy Little Sentiments; Ink: The Stamp Market (Peach, Peony, Citrine, Sunshine, Leafy, Breeze); Metal die: Banners by Elle’s Studio; Clear droplets: The Stamp Market; Adhesive: Gina K. Designs for Therm O Web adhesive dot runner, Scrapbook Adhesives by 3L foam adhesive, Scrapbook.com Smart craft glue; Tools: Gina K. Designs ink blending brushes

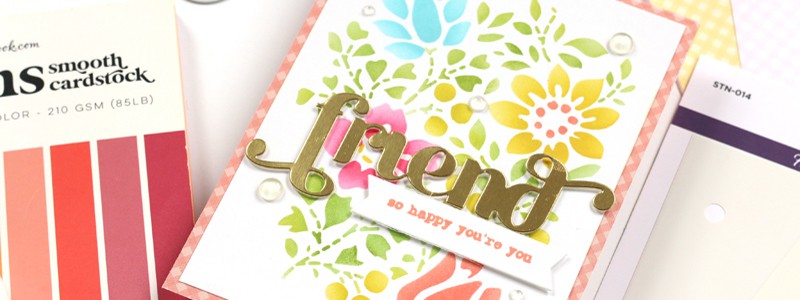
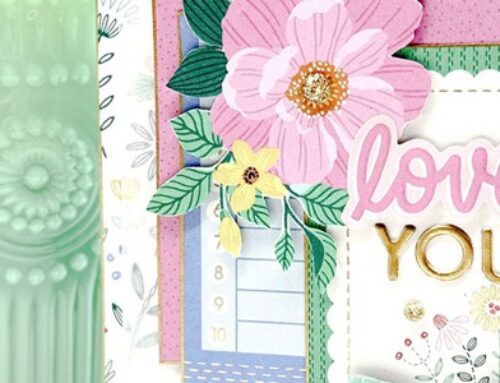
For my first card, I used the stencil as-is, lining it up along the edges of my card front, which put the floral design front and center on the card. Using Gina K. Designs ink blending brushes and The Stamp Market inks, I followed the order of the stencils to add the floral design to my card front. I used stencil #1 to add the leaves in Leafy and Citrine. I then followed with stencil #2 to add the flowers in Breeze, Sunshine, Peony and Peach. I followed with stencil #3 to add the flower centers and the round berries, which I colored in with Citrine. I loved using these colors together! I layered my finished card front onto an A2-sized piece of the Honey Bee Stamps Gingham Gallore peach-colored paper. To begin my sentiment, I die cut the “friend” word out of metallic gold paper, then stamped “so happy you’re you” from the Scrapbook.com Happy Little Sentiments stamp, cutting it out with the Banners metal die from Elle’s Studio. I popped it up with dimensional foam adhesive on the card front, before doing the same with the “friend” word above. To finish off the card, I added a few clear droplets from The Stamp Market. This sentiment can be used for any occasion—from a thank you, to just a quick hello!
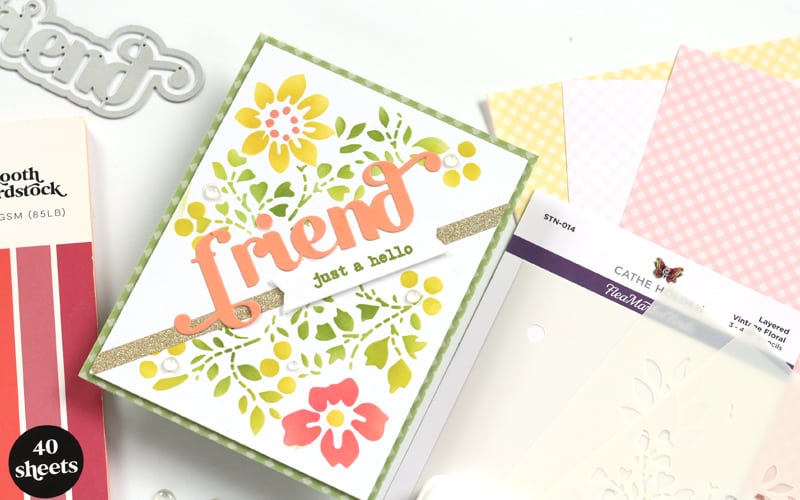
For card two, I wanted to mix up the use of the stencil! Instead of lining up the stencil with the white cardstock card front, I turned it at an angle, so that the leaf design would line up on the diagonal, and allow me enough space to add a flower in each of the top left and bottom right corners. I used the same colors as my first card, but opted to take Breeze, and Peony out of this design. I had a lovely white diagonal line in the center of my card, but I made the mistake of adhering my card front with dimensional adhesive first before stamping my “just a hello” sentiment. Of course, it didn’t stamp well, and whenever something goes wrong, it’s an opportunity for embellishment! I added a strip of gold glitter washi tape right over the stamped sentiment, then adhered my “friend” word above, cut from a peach cardstock found in the Scrapbook.com Warms A2 paper pad. I stamped “just a hello” again using Leafy, cutting it out using the Banners metal die from Elle’s Studio, and I popped it up with dimensional adhesive before adhering it over the washi tape. Just like the first card, I layered my finished card front onto an A2-sized piece of the Honey Bee Stamps Gingham Gallore paper, then added clear droplets from The Stamp Market for that finishing touch. The “just a hello” sentiment opens this card up to any possibility!

Starting with the word “friend” on a card sentiment is always a good idea in my book for creating an all-occasion card, and I hope my two very different designs using the same stencil has shown you that you don’t always have to follow the intended use of the stencil! Play around with your designs and have fun!
Check out the SCT Instagram feed, as well as my own today to see these cards come together in a Reel, and be sure to share what you create with the June Sampler with us by using the #sctsampler hashtag on social media! Thanks so much for stopping by today!

Find more of Meghann’s work here: Instagram | Facebook | YouTube


Beautiful cards Meaghann